
After you create a workflow, use the canvas to build the process that creates your content. An AI workflow connects several tasks so the output from one node can become the input for another. For example, a Text Generation Node can write a prompt, and an Image Generation Node can use that prompt to create an image.
1. How AI Workflows Work
Each node performs one part of the workflow:
- Inputs: The information a node needs, such as text, an image, or a product URL.
- Processing: The task performed by the node, such as generating, combining, or editing content.
- Outputs: The result the node sends to another node or returns for you to use.
- Connections: The paths that carry outputs from earlier nodes into the inputs of later nodes.
Most workflows move from left to right. Start with a source or instruction, connect it to a generation or editing node, and continue connecting nodes until you reach the final result.
2. Add a Node
1. Click the [+] button in the top toolbar, or right-click an empty area of the canvas, to open the add node menu.
2. Choose the node that performs the task you need. For example, add a Text Generation Node to create text or an Image Generation Node to create an image.
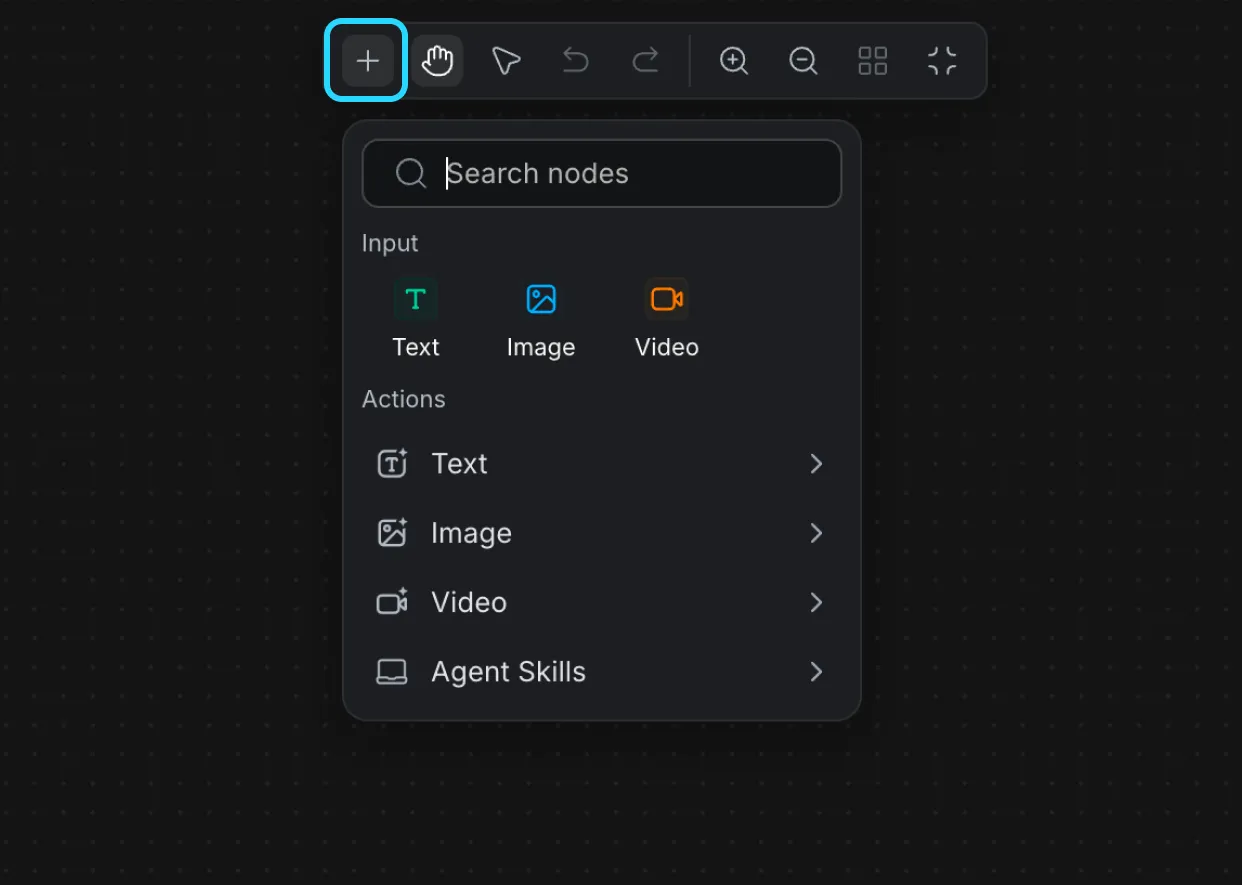
3. Repeat these steps to add the remaining nodes for your workflow.
3. Prepare the Node Inputs
Before connecting the workflow, check what each node needs. An input can come from either:
- A value you enter or upload directly in the node.
- The output of another connected node.
Configure any settings that should remain fixed, such as the model, aspect ratio, duration, or generation options. Leave an input available for a connection when you want an earlier node to supply its value automatically.
4. Connect Nodes
Connections define the order of the workflow and the information passed between nodes. The upstream node creates an output, and the downstream node receives it as an input. You can create a connected node directly from an output or connect two nodes already on the canvas.
4.1 Add a Connected Node
Use this method when the next node has not been added to the canvas:
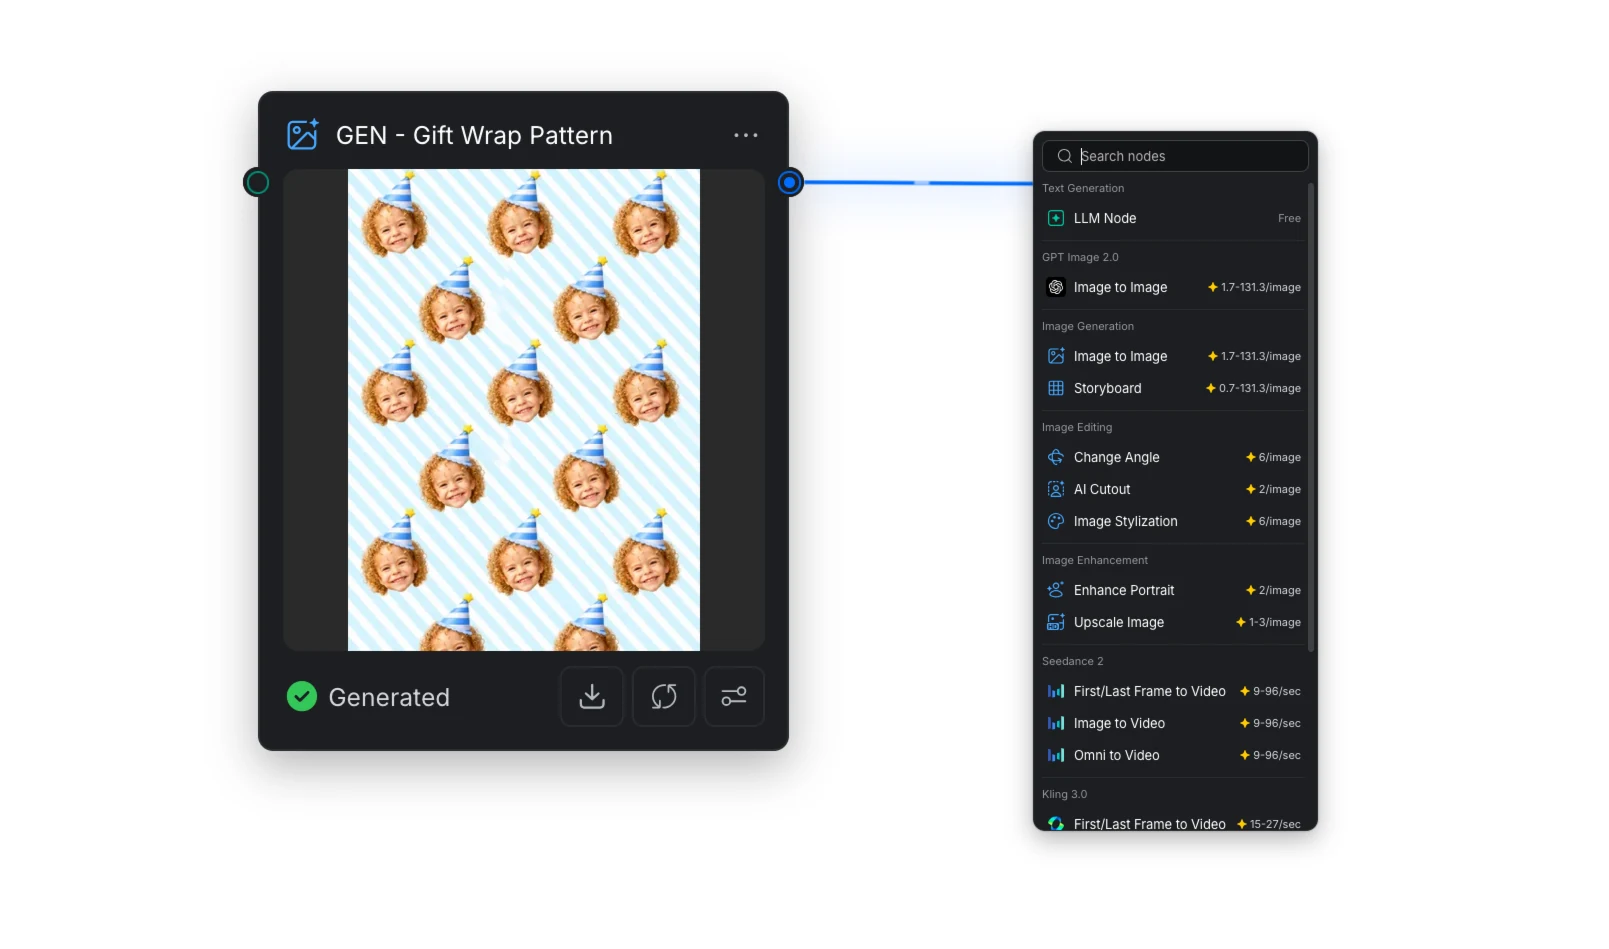
1. Drag a connection line from the output port of an existing node to an empty area of the canvas.
2. Release the connection line to open the add node menu. The available items change based on the output type, so the menu shows nodes that can use that output.
3. Select an item from the menu. CawCut adds that type of node to the canvas and connects the output to a compatible input automatically.
4.2 Connect Existing Nodes
Use this method when both nodes are already on the canvas:
1. Find the output port on the node that will provide the result.
2. Drag a connection line from the output port toward a compatible input port on the next node.
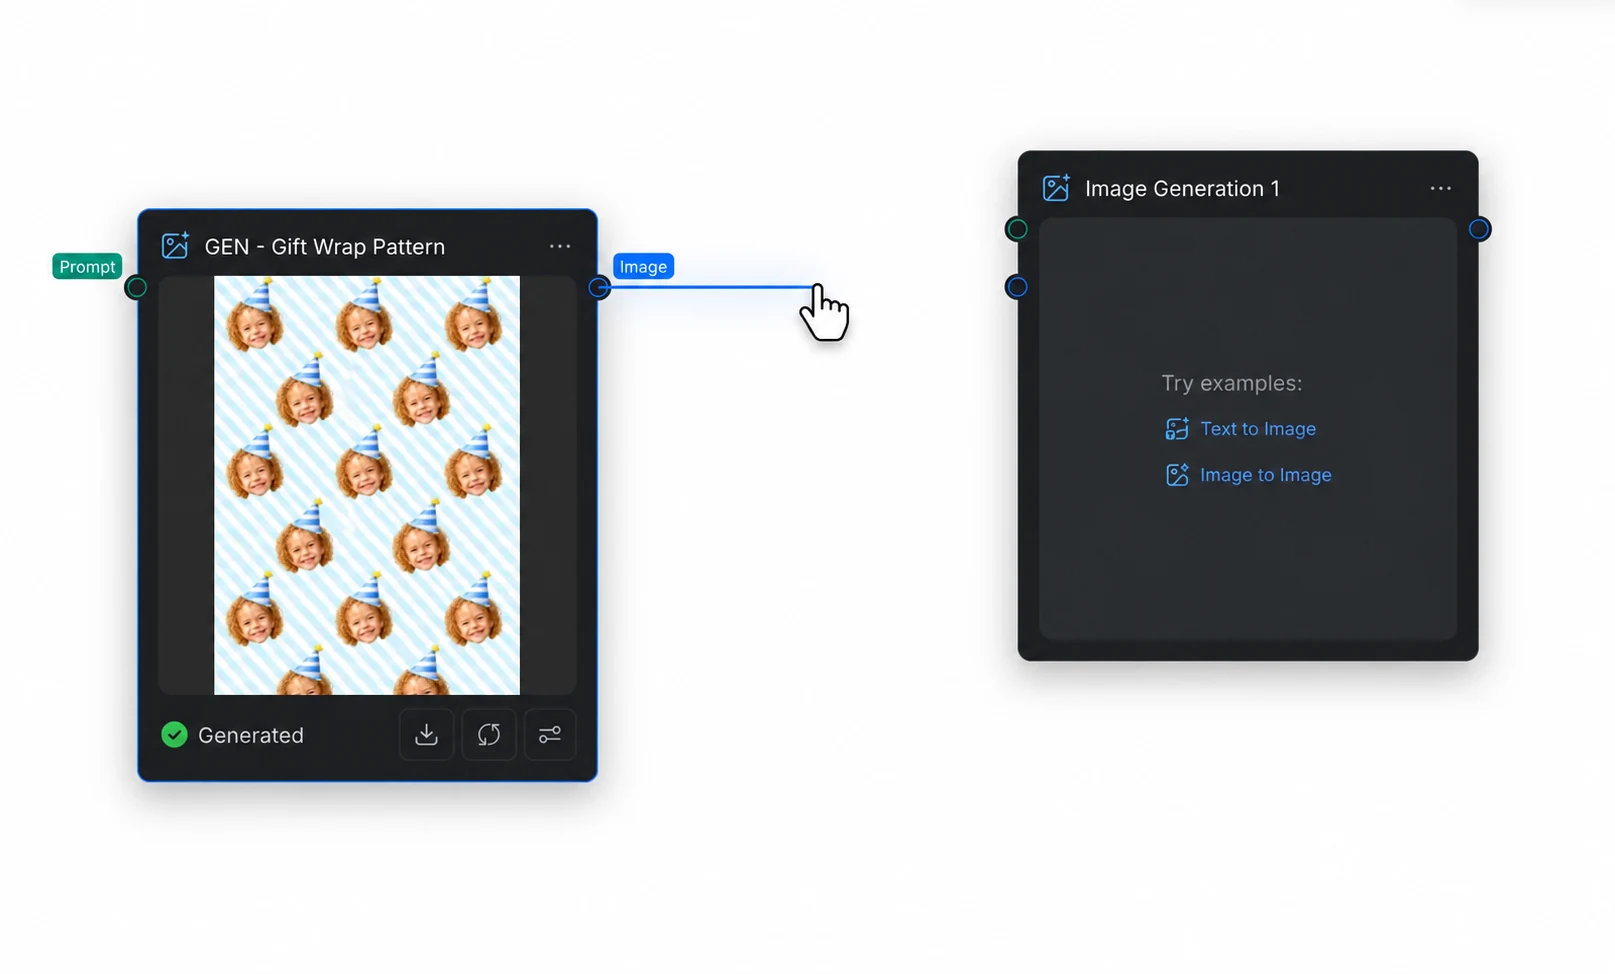
3. Release the connection line over the input port. A line between the two ports confirms that the connection has been created.
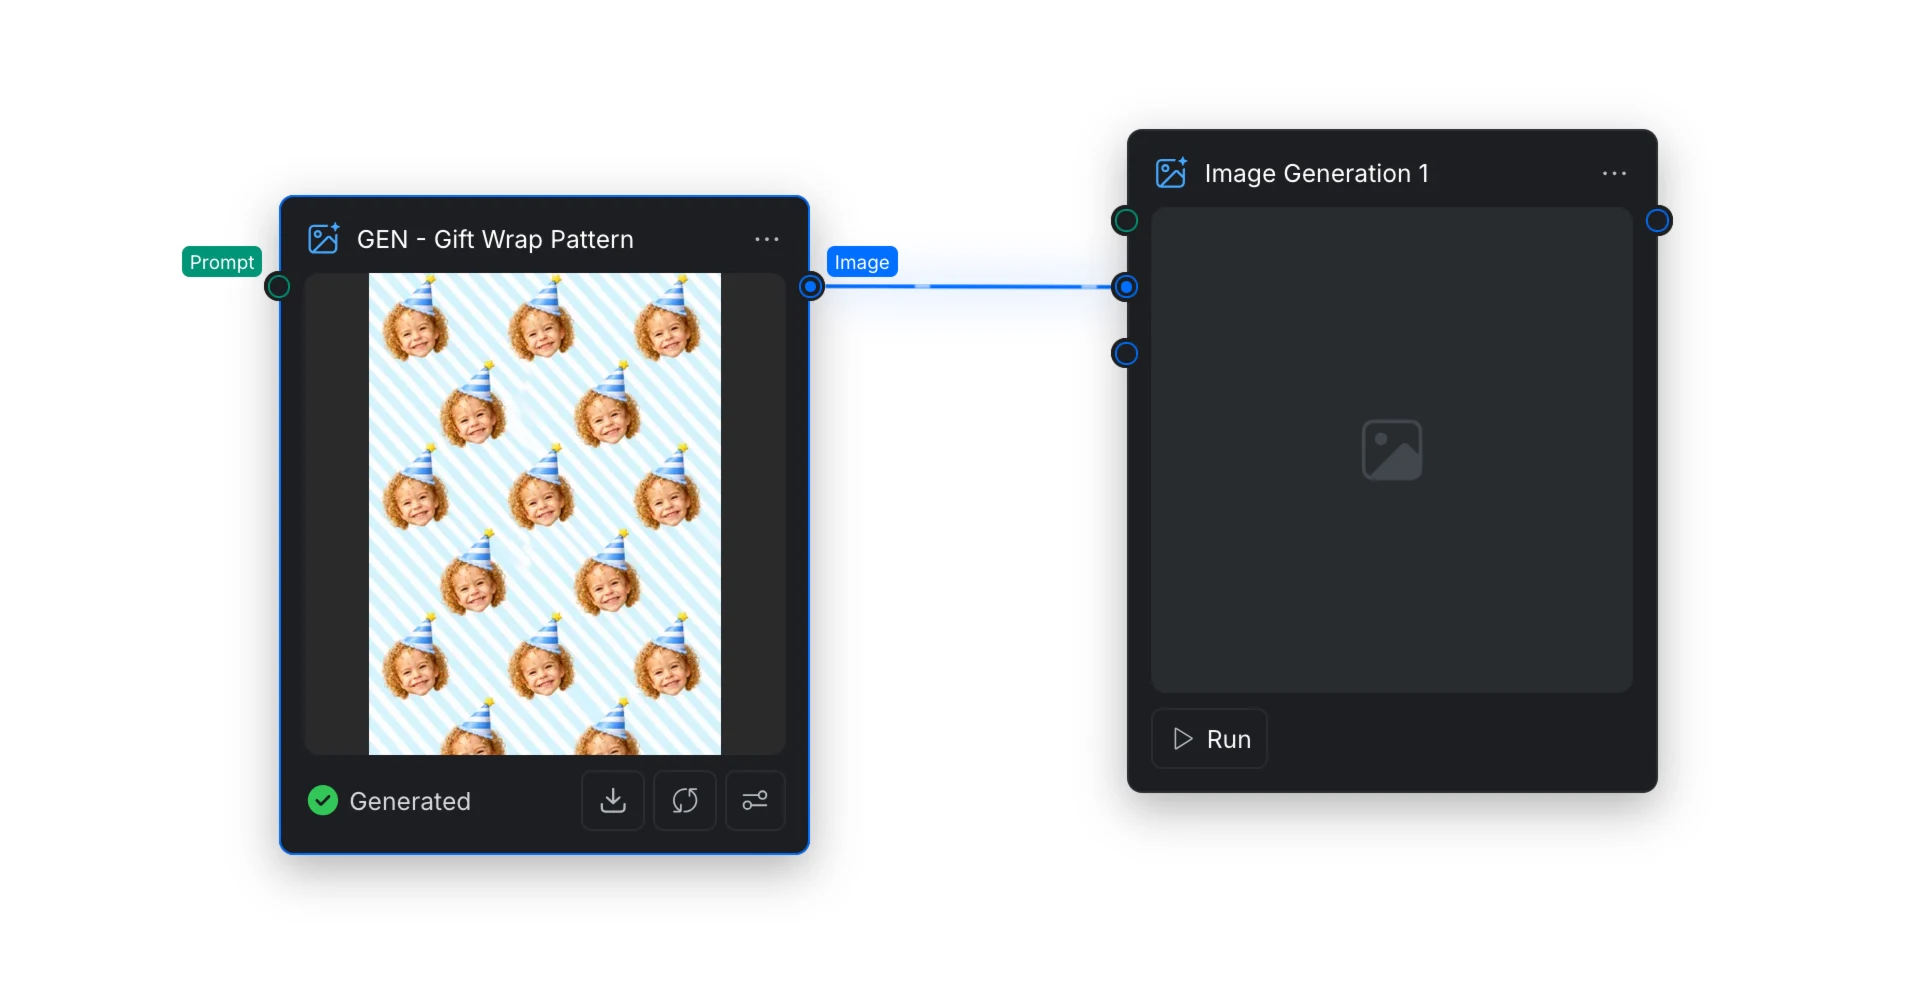
4. Continue connecting nodes until every required downstream input receives the information it needs.
For example, connect an image output to the image input of an Image Generation Node. When the workflow runs, the generated image is passed to the next node automatically.
4.3 Check the Connections
Keep the starting nodes on the left and the final output nodes on the right. Leave enough space between nodes to follow each connection easily, especially when one output is used by multiple downstream nodes.
Before running the workflow, follow each connection from start to finish and confirm that:
- Every connection goes from an output port to an input port.
- The destination input supports the type of information being sent.
- Every required input has a value or a valid connection.
- Each node uses the model and settings you want.
5. Run the Workflow
1. Review the nodes and make sure all required inputs are ready.
2. Click [Run] to start the workflow.
3. CawCut processes the connected nodes in dependency order. A downstream node begins after it receives the output it needs from an upstream node.
4. Review the final result. To try a different result, update a prompt, setting, input, or connection, then run the workflow again.
6. Troubleshoot a Workflow
If the workflow does not produce the expected result, check the nodes from left to right:
- A connection cannot be created: Confirm that the destination port supports the output type from the previous node.
- A node does not run: Check for a missing required input or an error in an upstream node.
- The result is not what you expected: Review the prompt, source files, selected model, and generation settings.
- The workflow is difficult to follow: Rearrange the nodes so the direction and connection lines are easier to read.
If you prefer to learn from an existing setup, open a ready-made workflow from Start with a Template and inspect how its nodes are connected.
After your workflow is ready, see Manage Workflows to share it, control link access, or import and export workflow files.