
1. What is CawCut?
CawCut is a node-based AI workflow platform for creating images, videos, audio, and other media. On an infinite canvas, you can connect AI models and creative tools to build anything from a quick image edit to a complete multi-step production workflow.
2. What can I build with it?
You can create a single image edit, an e-commerce poster, a multi-shot video, or a complete advertising pipeline. CawCut can generate scenes, upscale media, edit images with natural-language instructions, composite elements, add audio, and prepare the final result for export.
The core idea is simple: if you can map your creative process with nodes, you can turn it into a reusable workflow.
3. Navigate the Interface
The left sidebar is the main way to move around the interface:
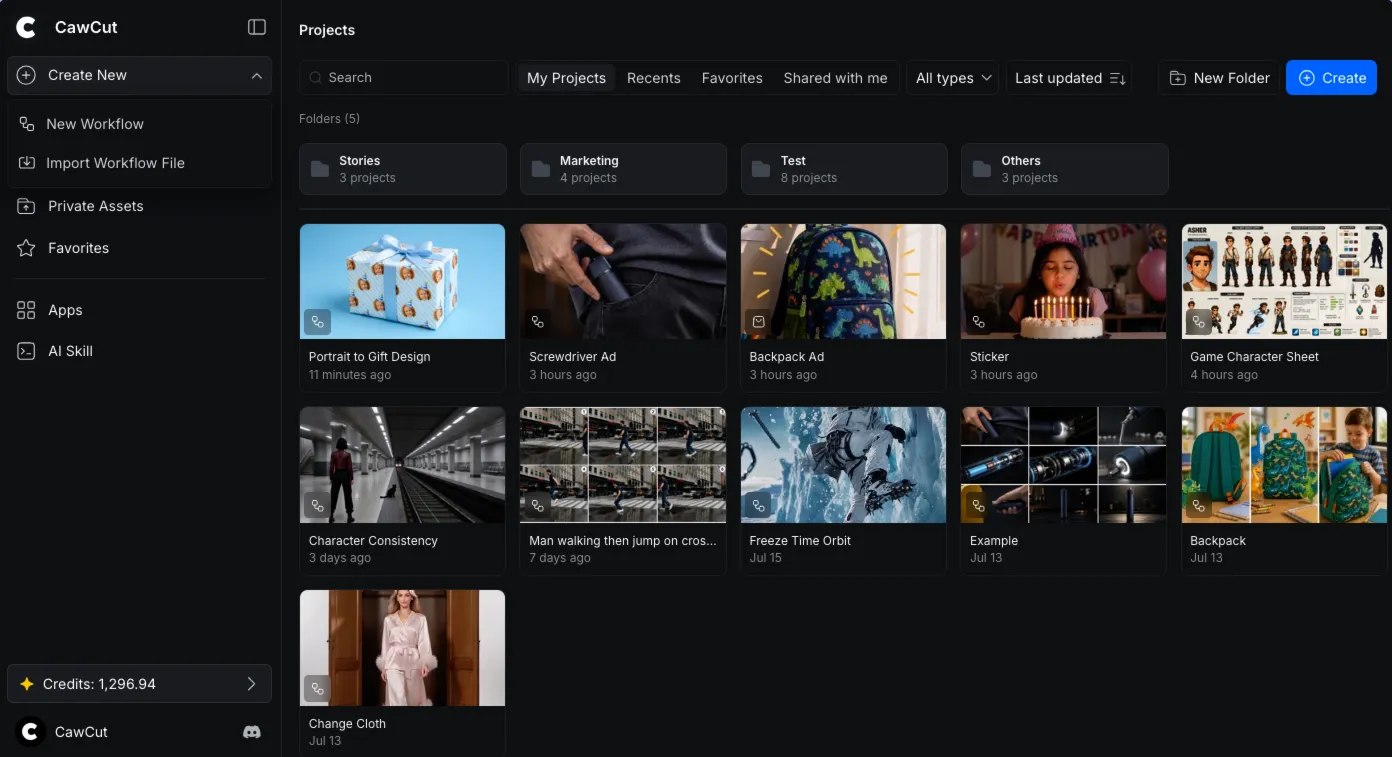
- Create New starts a new project or other supported item.
- Projects opens your project library, where you can search, filter, sort, organize folders, and create projects.
- All Generations collects media generated across your projects.
- Private Assets stores assets available only to you.
- Favorites gives you quick access to saved items.
- Apps opens ready-to-use Apps.
- AI Skill provides access to CawCut's AI skill features.
- Available Credits appears near the bottom of the sidebar.
For a closer look at every area, see Navigate the Interface.
4. Understand Nodes
Nodes are the building blocks of a workflow. Each node handles a specific input, generation, or processing task, and connections pass results from one node to the next.
| Nodes | What It Does | Best For |
|---|---|---|
| Text Generation | Generate, rewrite, combine, or parse text. | Prompts, scripts, and workflow logic |
| Image Generation | Generate images from text and image inputs. | Concepts, ads, and visual assets |
| Storyboard | Turns an idea or script into structured visual shots. | Planning scenes and sequences |
| Video Generation | Generate videos from text, images, or video inputs. | Motion content and video creation |
| Product | Loads product details and media from a product URL. | Product ads and e-commerce content |
For a complete introduction to how nodes connect and pass data, see Understanding Nodes.
5. Create a Workflow
A workflow connects nodes into a repeatable creative process. Start with an input, add the models or processing nodes you need, connect them in the order your media should move, configure each node, and run the workflow. You can adjust individual nodes and run it again without rebuilding the entire process.
Follow Create a Workflow for a step-by-step introduction, or visit Workflows to explore more workflow guides.
Workflows do not have to be single-use. You can save them as local files or share them by email or link, making it easier to repeat your process or collaborate with others. For more, visit Manage Workflows.
6. Use Keyboard Shortcuts
Keyboard shortcuts help you move around the canvas and perform common editing actions more quickly. They are especially useful when working with larger workflows.
See Keyboard Shortcuts for the complete shortcut list.
7. Understand Credits
Credits are used when you run supported AI models and generation tasks on the platform. The amount used can vary by model and generation settings. You can check your current balance near the bottom-left corner of the interface before starting a task.
For more information about usage and your balance, see Credits.
8. Supported Models
The platform supports a range of AI models for generating and processing text, images, and videos. Available options include models from OpenAI, Anthropic, DeepSeek, Google, ByteDance, Kuaishou, Black Forest Labs, Ideogram, Reve, Recraft, and other providers.
See Supported Models for the current model list.