
1. Find and Open an App
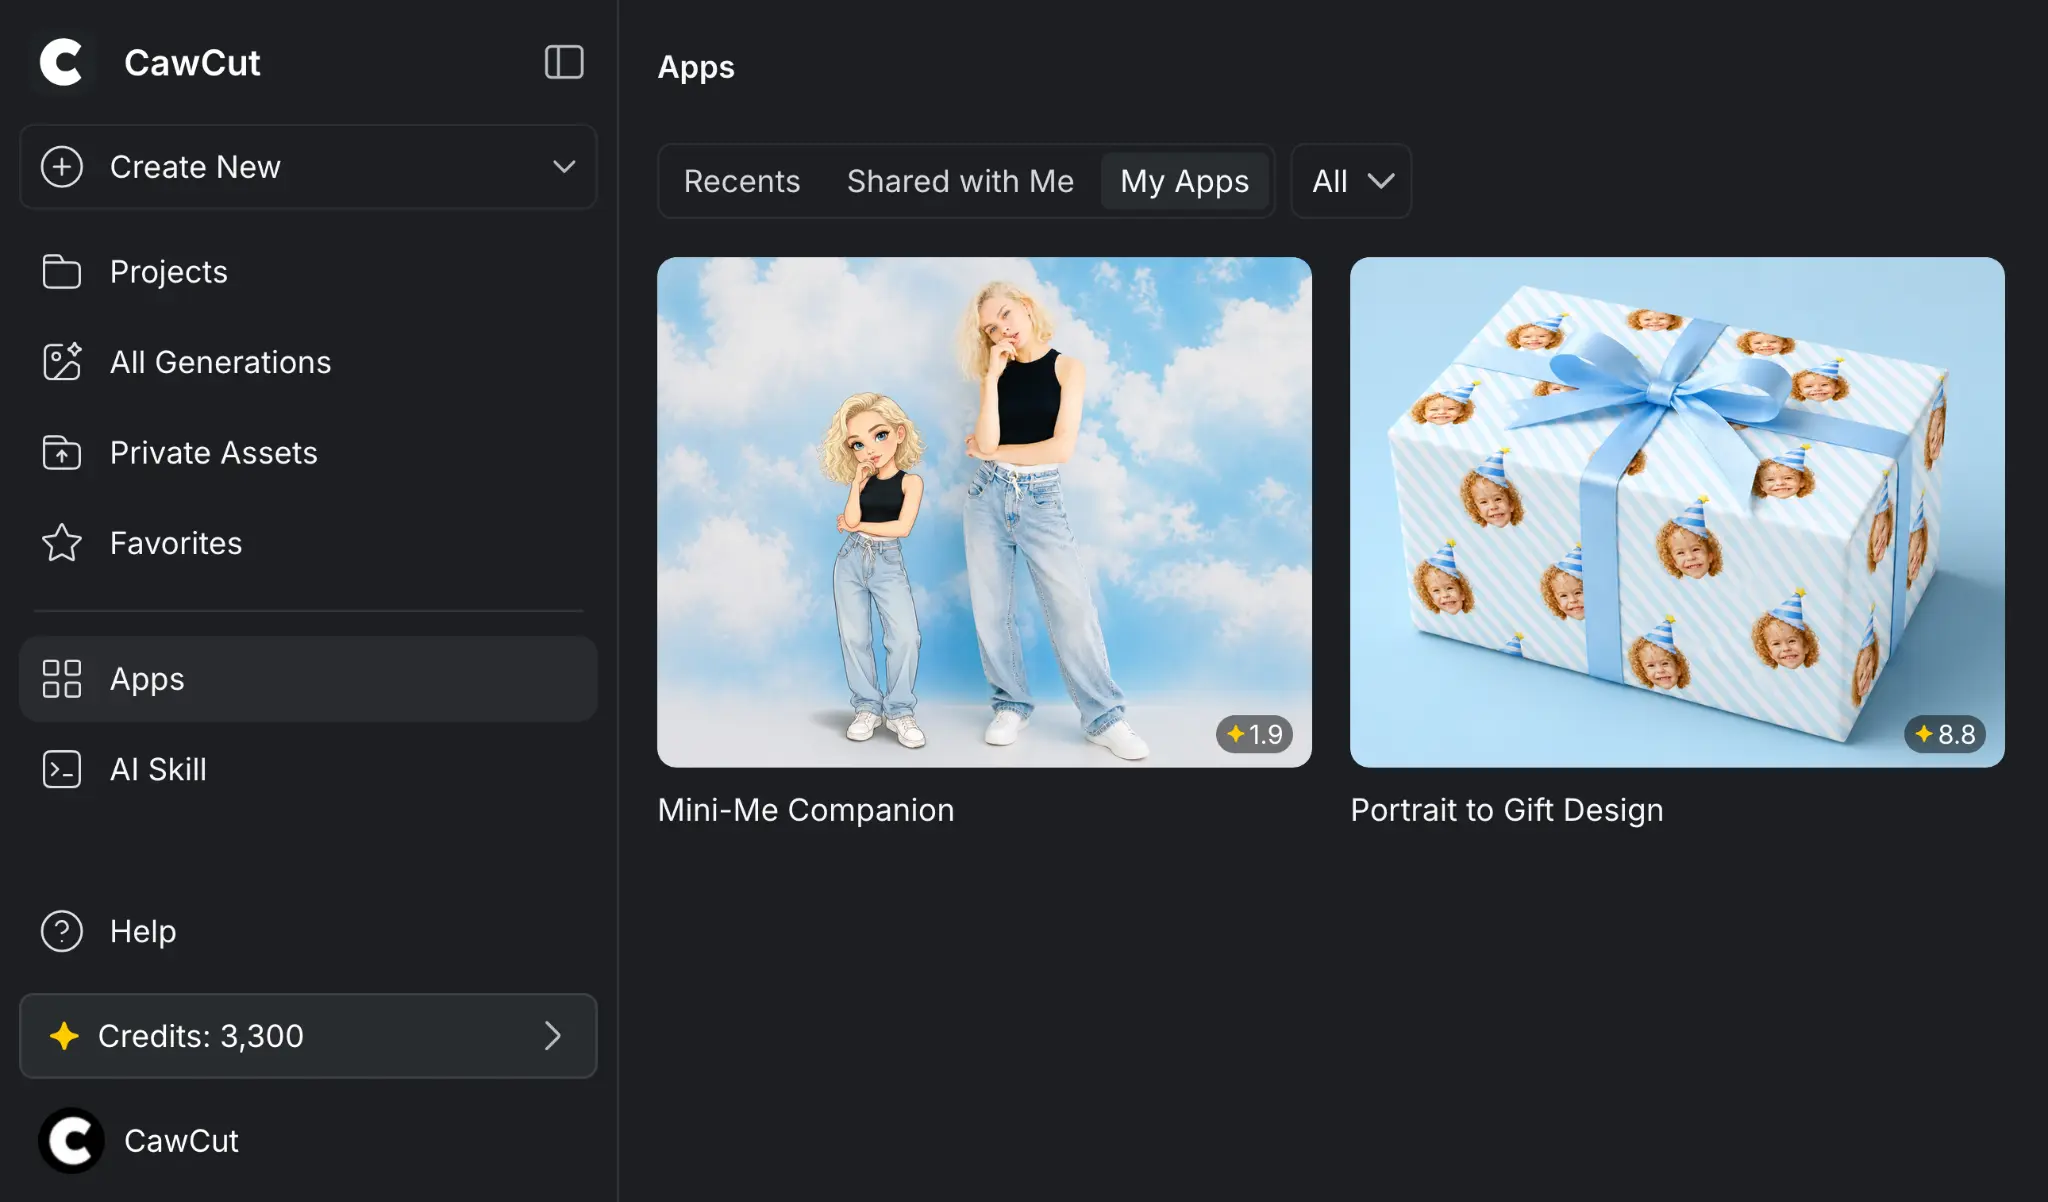
Click [Apps] in the left sidebar, then use [Recent], [Shared with Me], or [My Apps] to find an App. Click its card to open it.
If someone sends you an App access link, open the link to go directly to the App without finding it on the [Apps] page first.
You can also use CawCut Apps in AI Agent through a skill. See Run a CawCut App with a Skill to learn the requirements, setup, and usage process.
2. Understand the App Workspace
The App workspace contains three tabs:
- App: Provide the required inputs and start a generation.
- Generation: Review the latest generation and manage its results.
- History: Return to previous generations from the App.
3. Provide Inputs and Generate
Each App can request different text, image, video, or audio inputs. Review the requirements for every input before adding your own content, then complete the App and start the generation.
3.1 Review the Input Requirements
Hover over the information icon beside a media input to open its requirements panel. The panel identifies the supported file formats, the maximum file size, and an example file that shows what type of input works best.
Compare your file with all three details before uploading it. A supported format and file size allow CawCut to accept the file, while the example helps you choose suitable content, framing, or image quality for the App.
3.2 Add Inputs and Generate
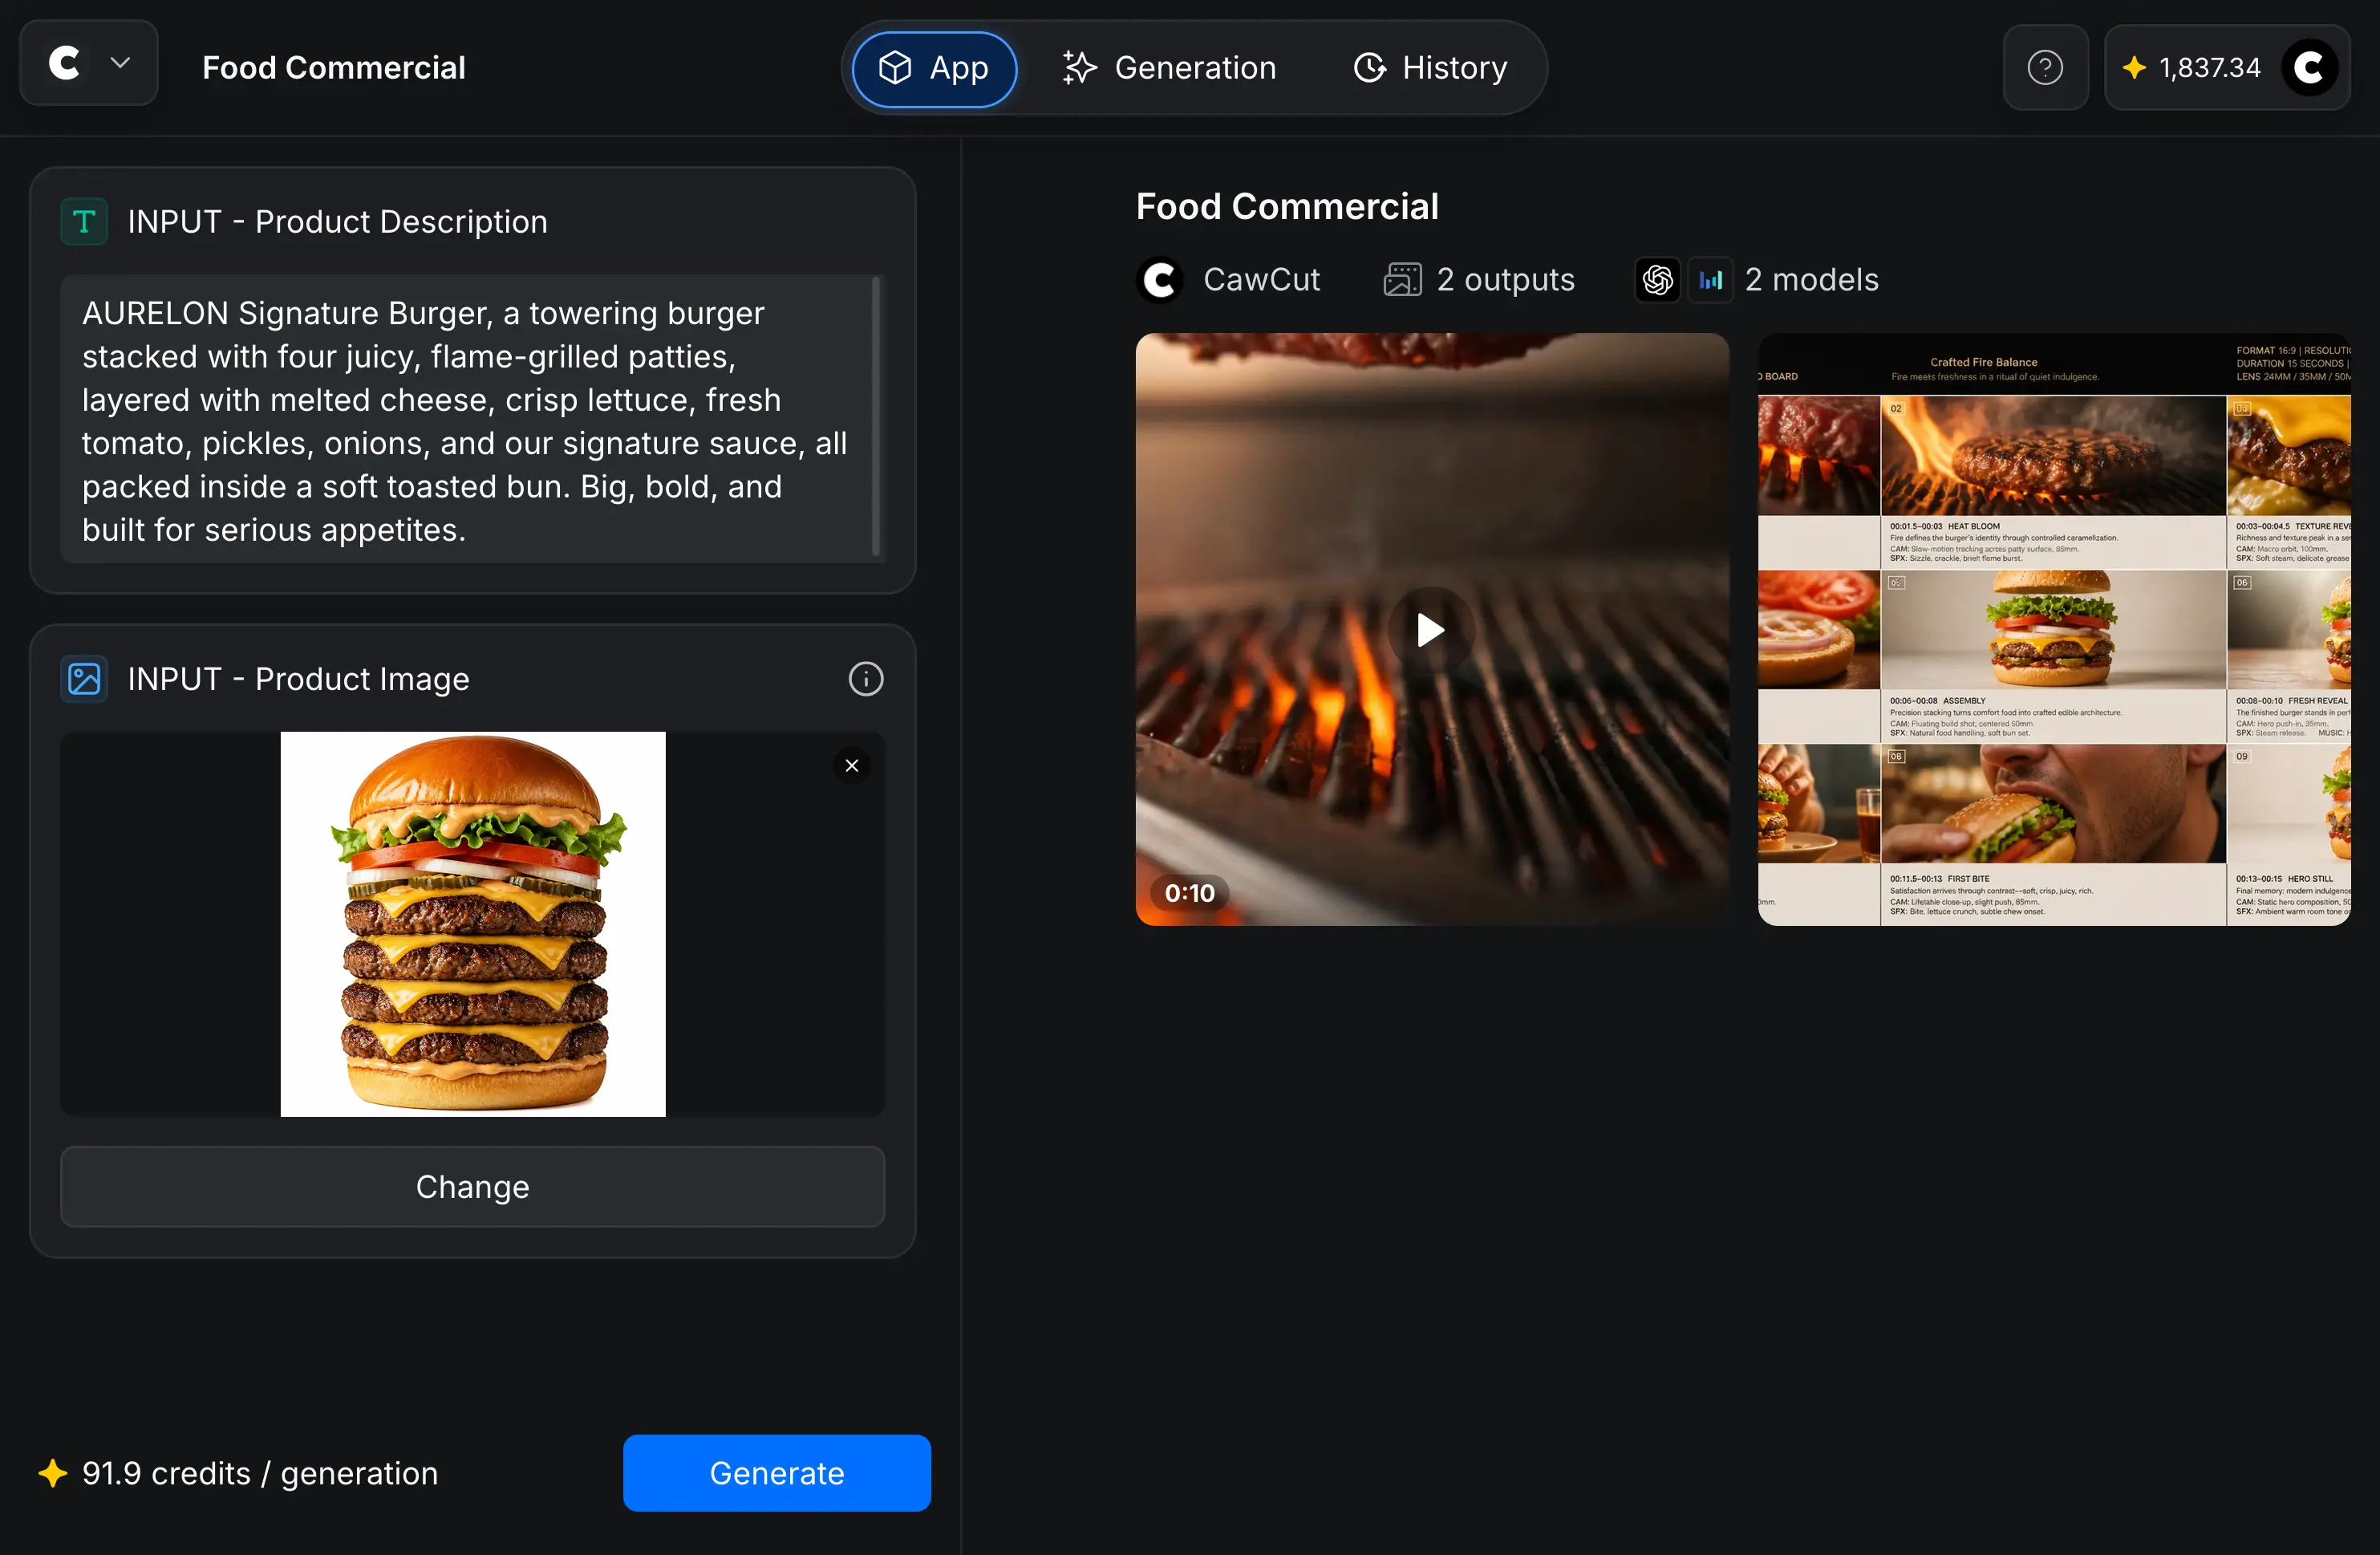
Open the [App] tab, enter the requested text, and upload or replace each required media file. Check that every input follows the requirements described in section 3.1.
Review the estimated credits per generation near the lower-left corner. When the inputs are ready, click [Generate].
CawCut processes your request and opens the [Generation] tab when the results are ready.
4. Review and Manage a Generation
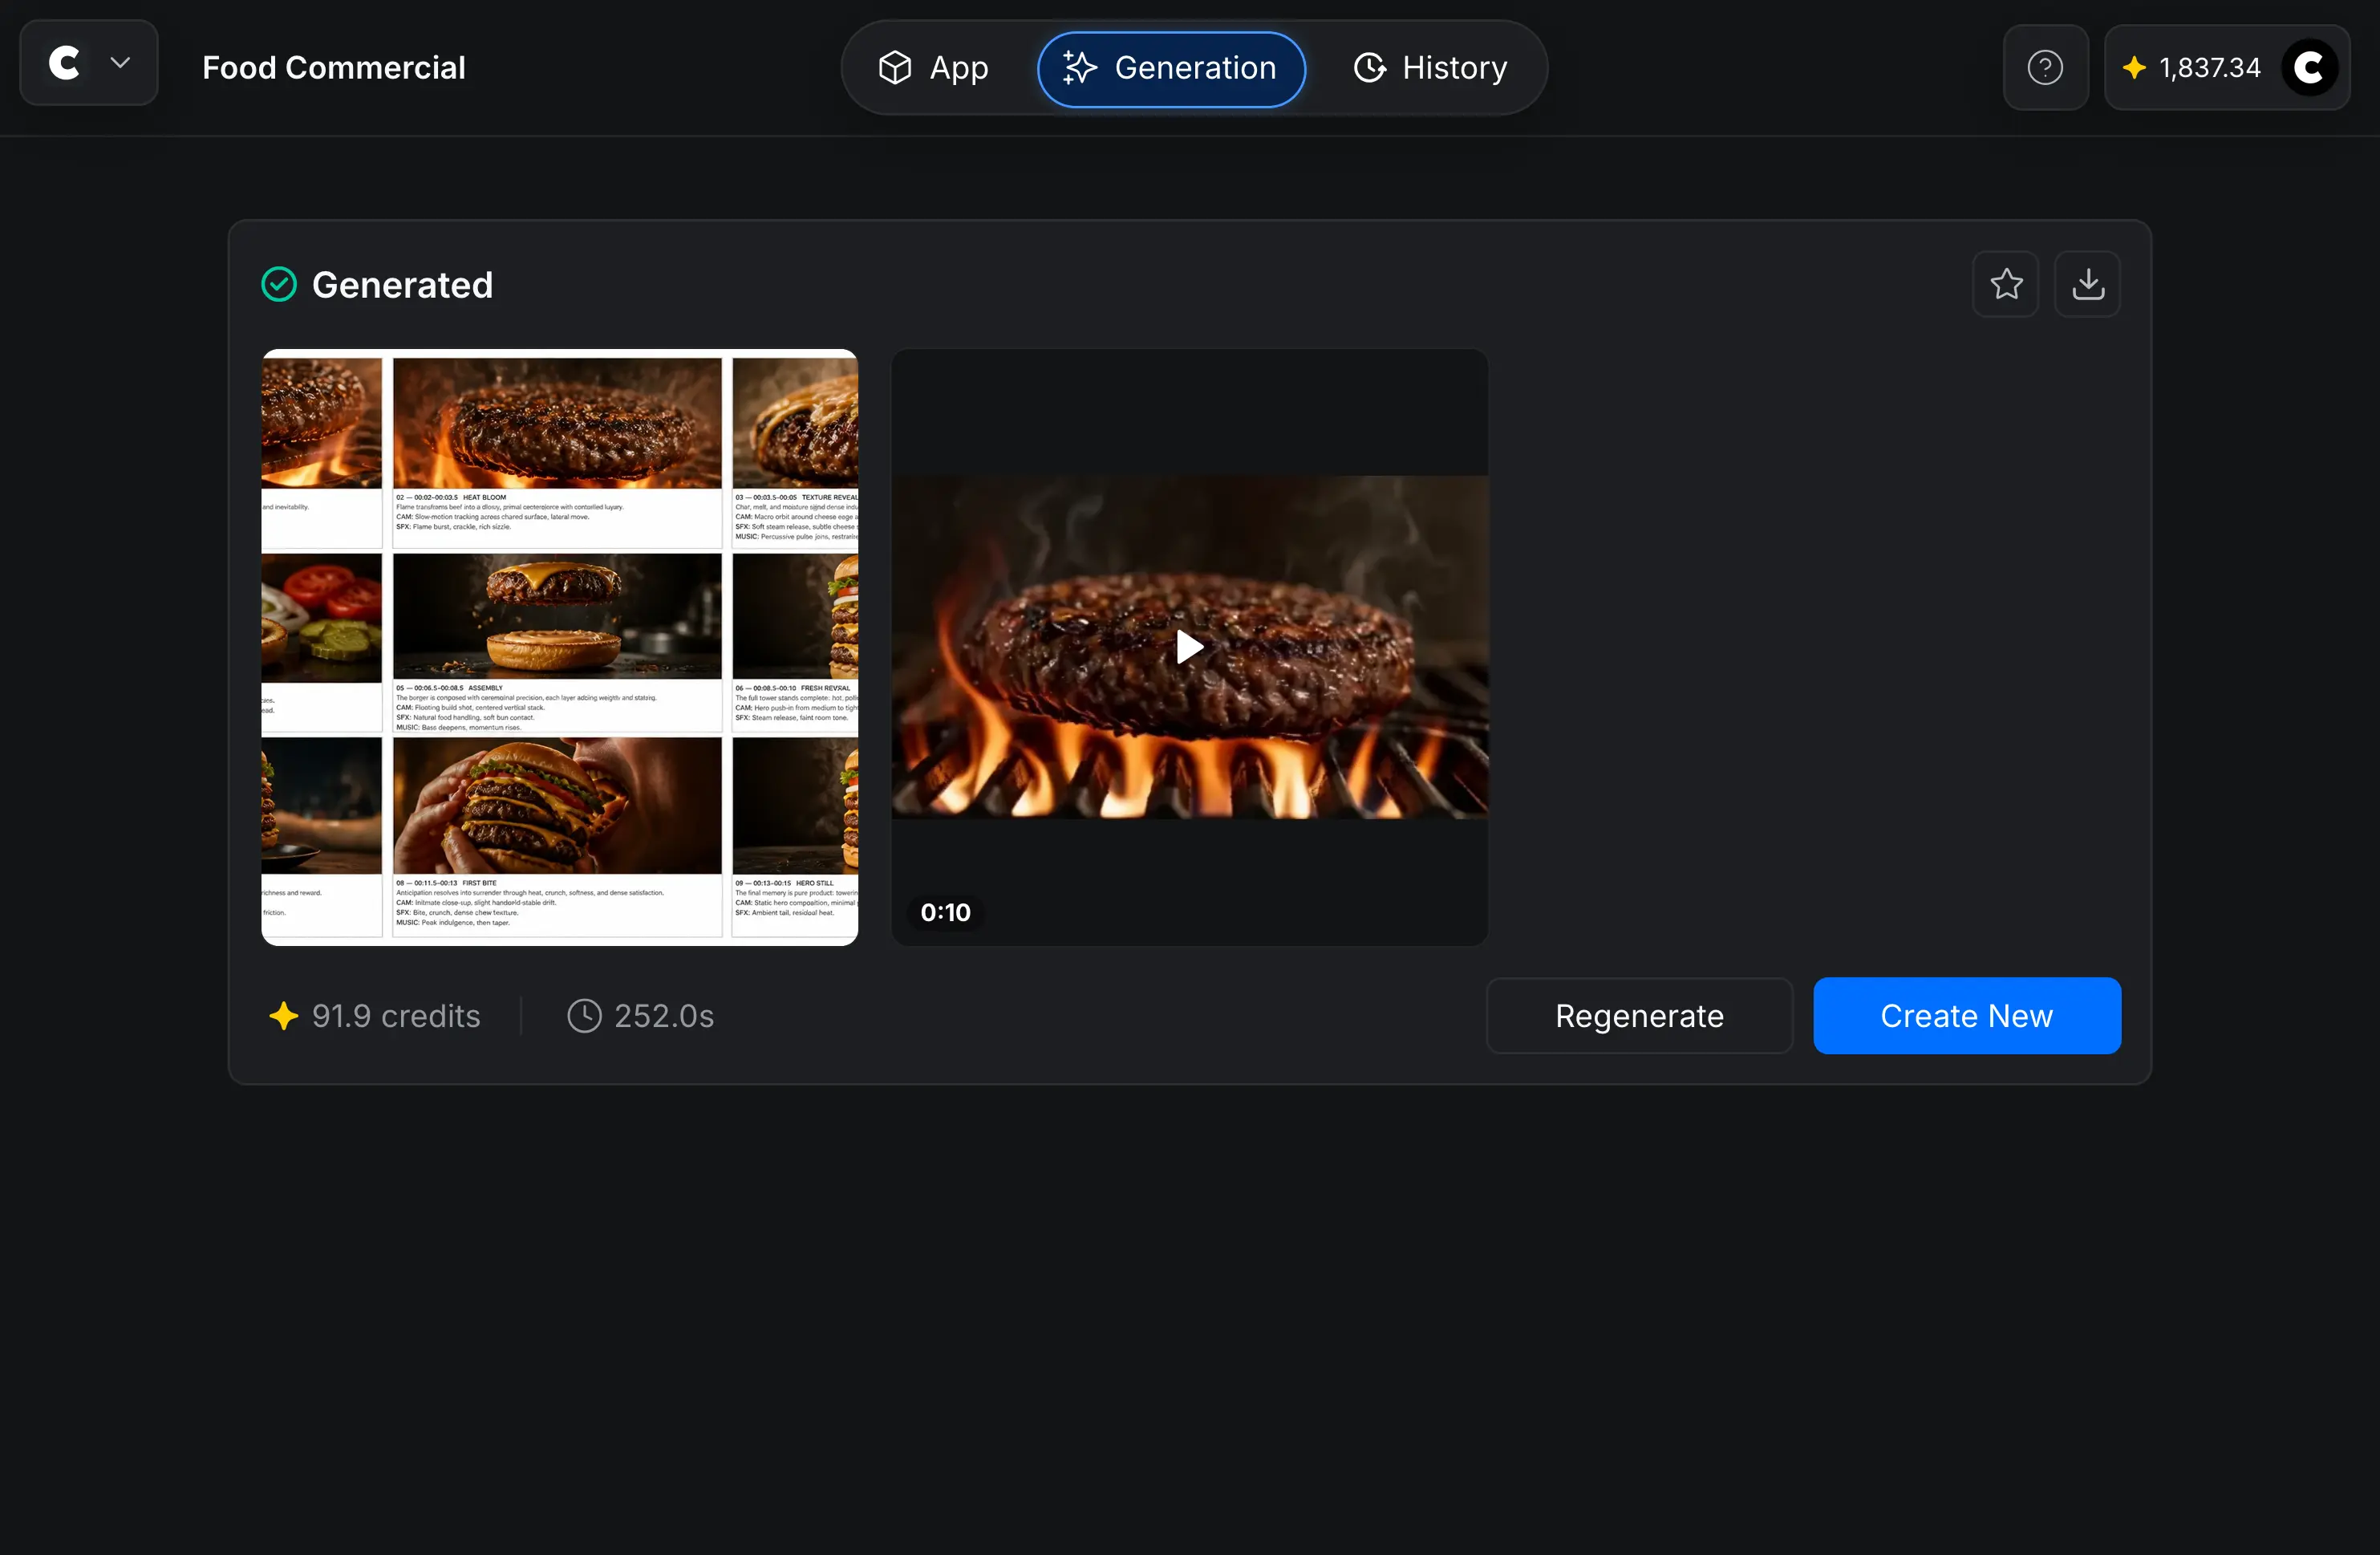
The [Generation] tab displays the generated results. It also shows the credits used and the generation time.
Click [Regenerate] to run the current setup again, or click [Create New] to return to the App and provide new inputs.
4.1 Preview Individual Results
Click an individual result to open its preview. Images appear at a larger size, while generated videos can be played from the preview.
4.2 Manage Individual Results
On the [Generation] tab, hover over an individual generated image, video, or other result to show its actions. You can:
- Favorite the item.
- Download the item.
- Add the item to a folder.
4.3 Manage the Complete Generation
Use the actions in the upper-right corner of the generation card to favorite or download the complete generation.
5. Review Generation History
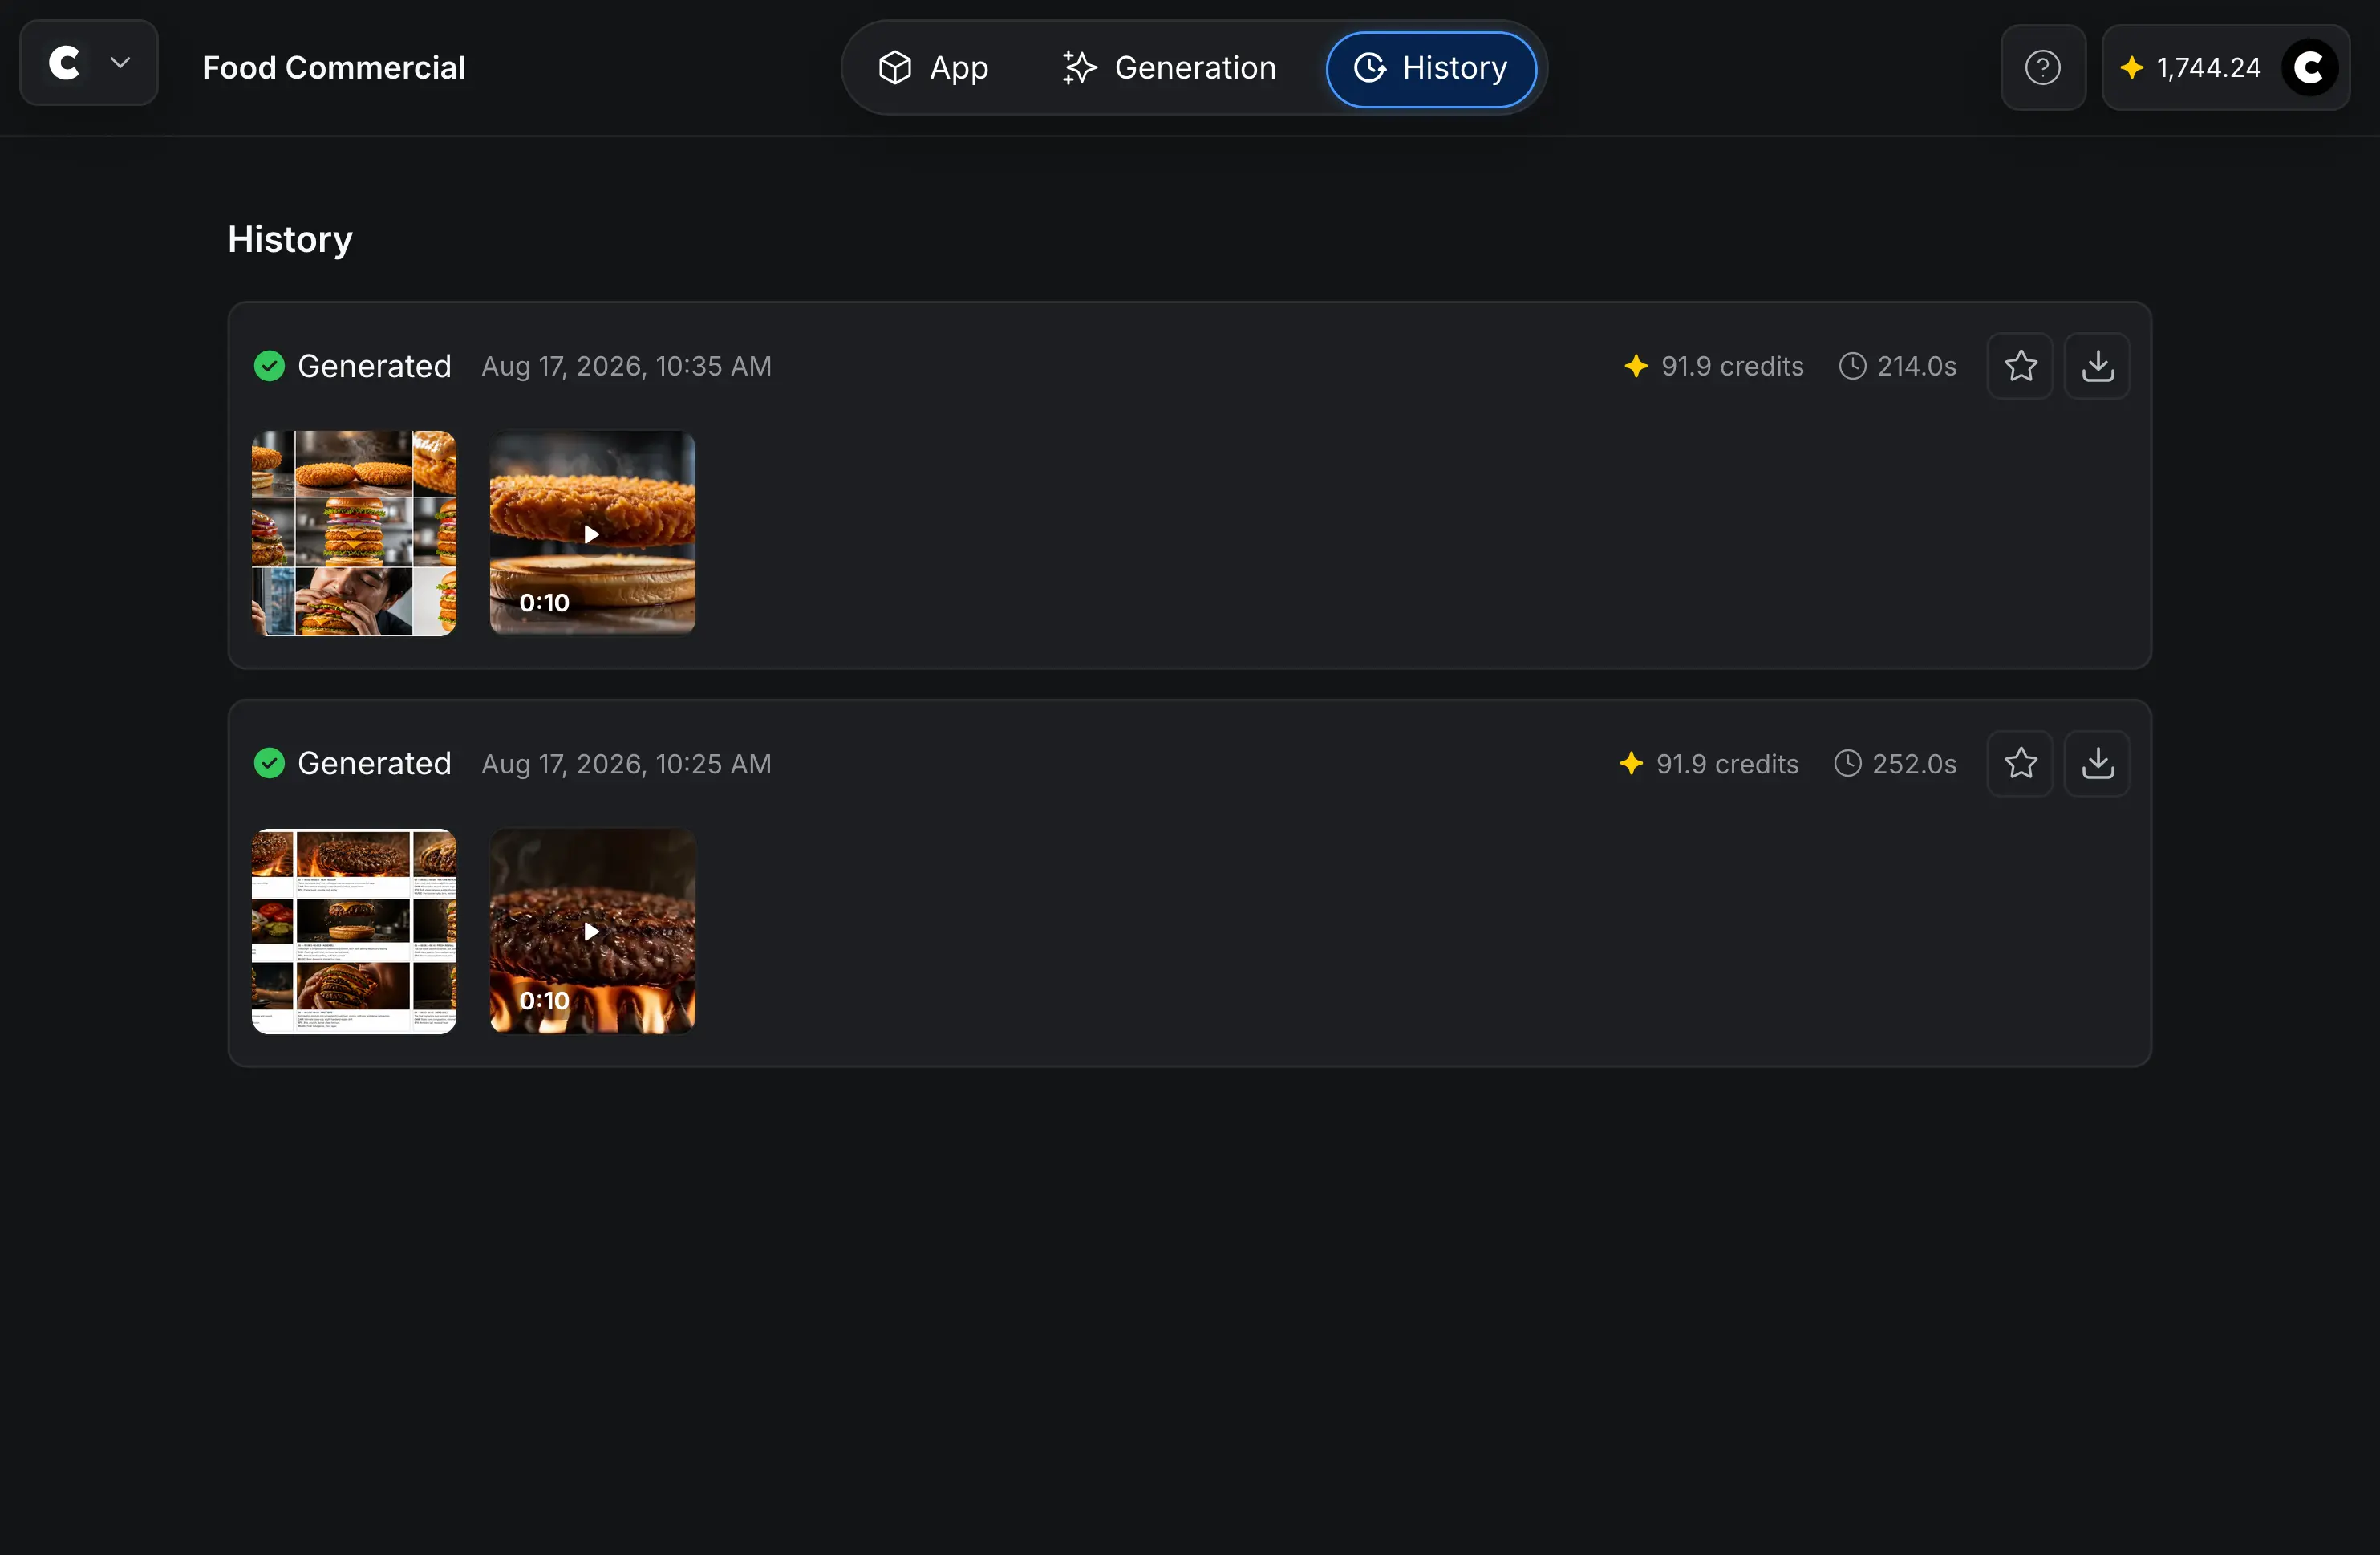
Open [History] to review previous generations from the current App. Each entry shows its results, creation time, credits used, and generation time.
From [History], use the actions on a history entry to favorite or download the complete generation.
5.1 Preview and Download Individual Results
Click an individual result in [History] to open its preview. You can view an image at a larger size or play a generated video, then use the [Download] button to download that result.
6. Create Your Own App
You do not need to understand workflows or nodes to use an App. If you want to create your own App, the following resources explain how to build and publish one for other users.
Use these resources to get started:
- CawCut 101 introduces the main CawCut concepts and supported creative tools.
- Workflows explains how to create, connect, run, and organize a workflow.
- Nodes introduces the node types available for building your workflow.
- Create and Share an App explains how to select user inputs and outputs, add App information, publish the App, and configure access.
Build and test the workflow first, then follow the publishing guide to turn it into an App.