
Creating a workflow opens the canvas where you can combine AI models and other tools into a reusable process. New users can start with a template to see how a working workflow is organized, or open a blank file to build one from the beginning.
1. Choose How to Start
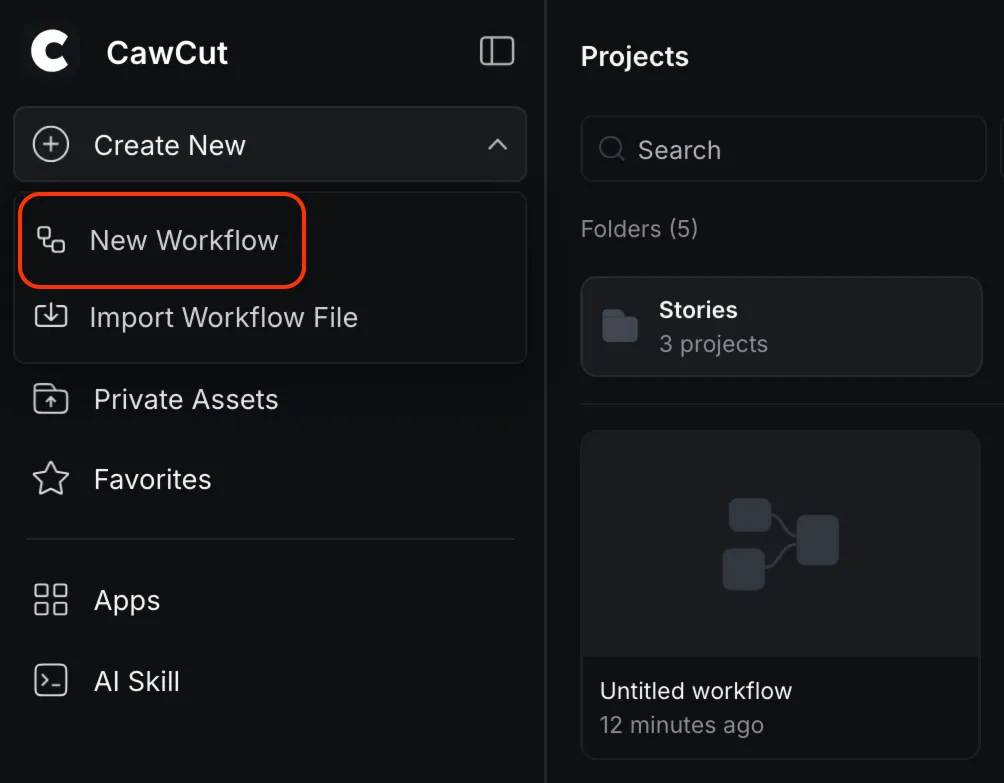
1. On the [Projects] page, open [Create New], then select [New Workflow].
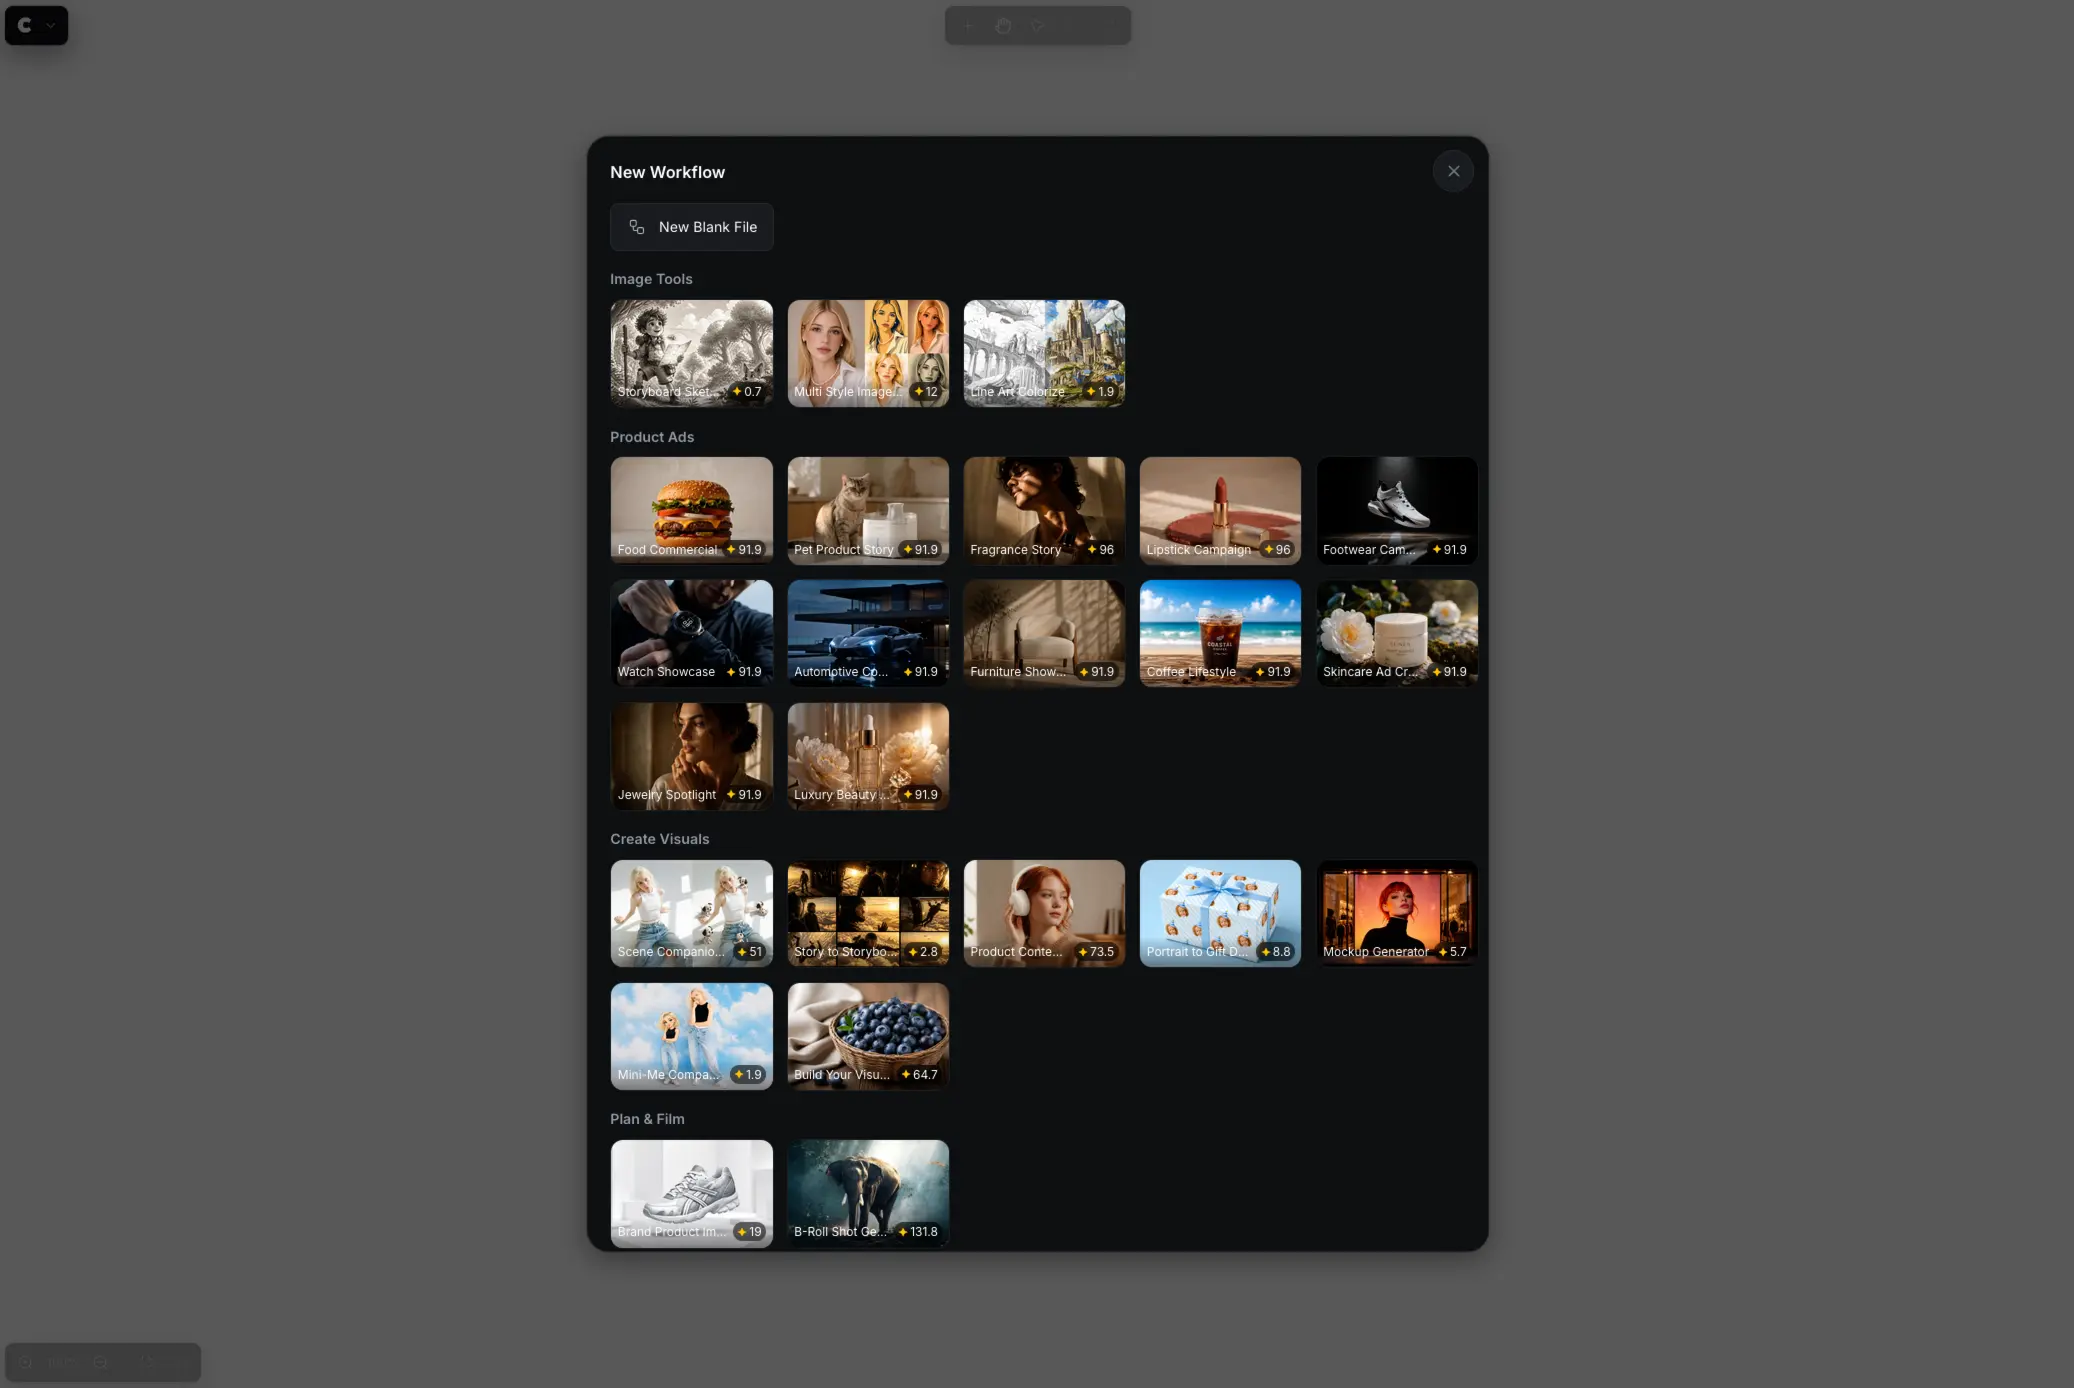
2. In the [New Workflow] window, choose a template or a blank workflow.
1.1 Start with a Template
Templates are the easiest way to begin if you are new to AI workflows. Each template provides connected nodes and settings for a specific task, so you can run a working example before changing it.
1. Select a template that matches the type of content you want to create.
2. Review the included nodes and connections, then replace the example inputs with your own content.
3. Follow Connect Nodes and Run a Workflow to learn how information moves between nodes, make changes, and run the workflow.
For more help choosing and customizing a template, see Start with a Template.
1.2 Start with a Blank Workflow
1. Select [New Blank File] to open an empty canvas.
2. Add nodes, drag supported media files onto the canvas, or select one of the suggested options to begin.
3. Continue to Connect Nodes and Run a Workflow for step-by-step instructions on adding, connecting, and running nodes.
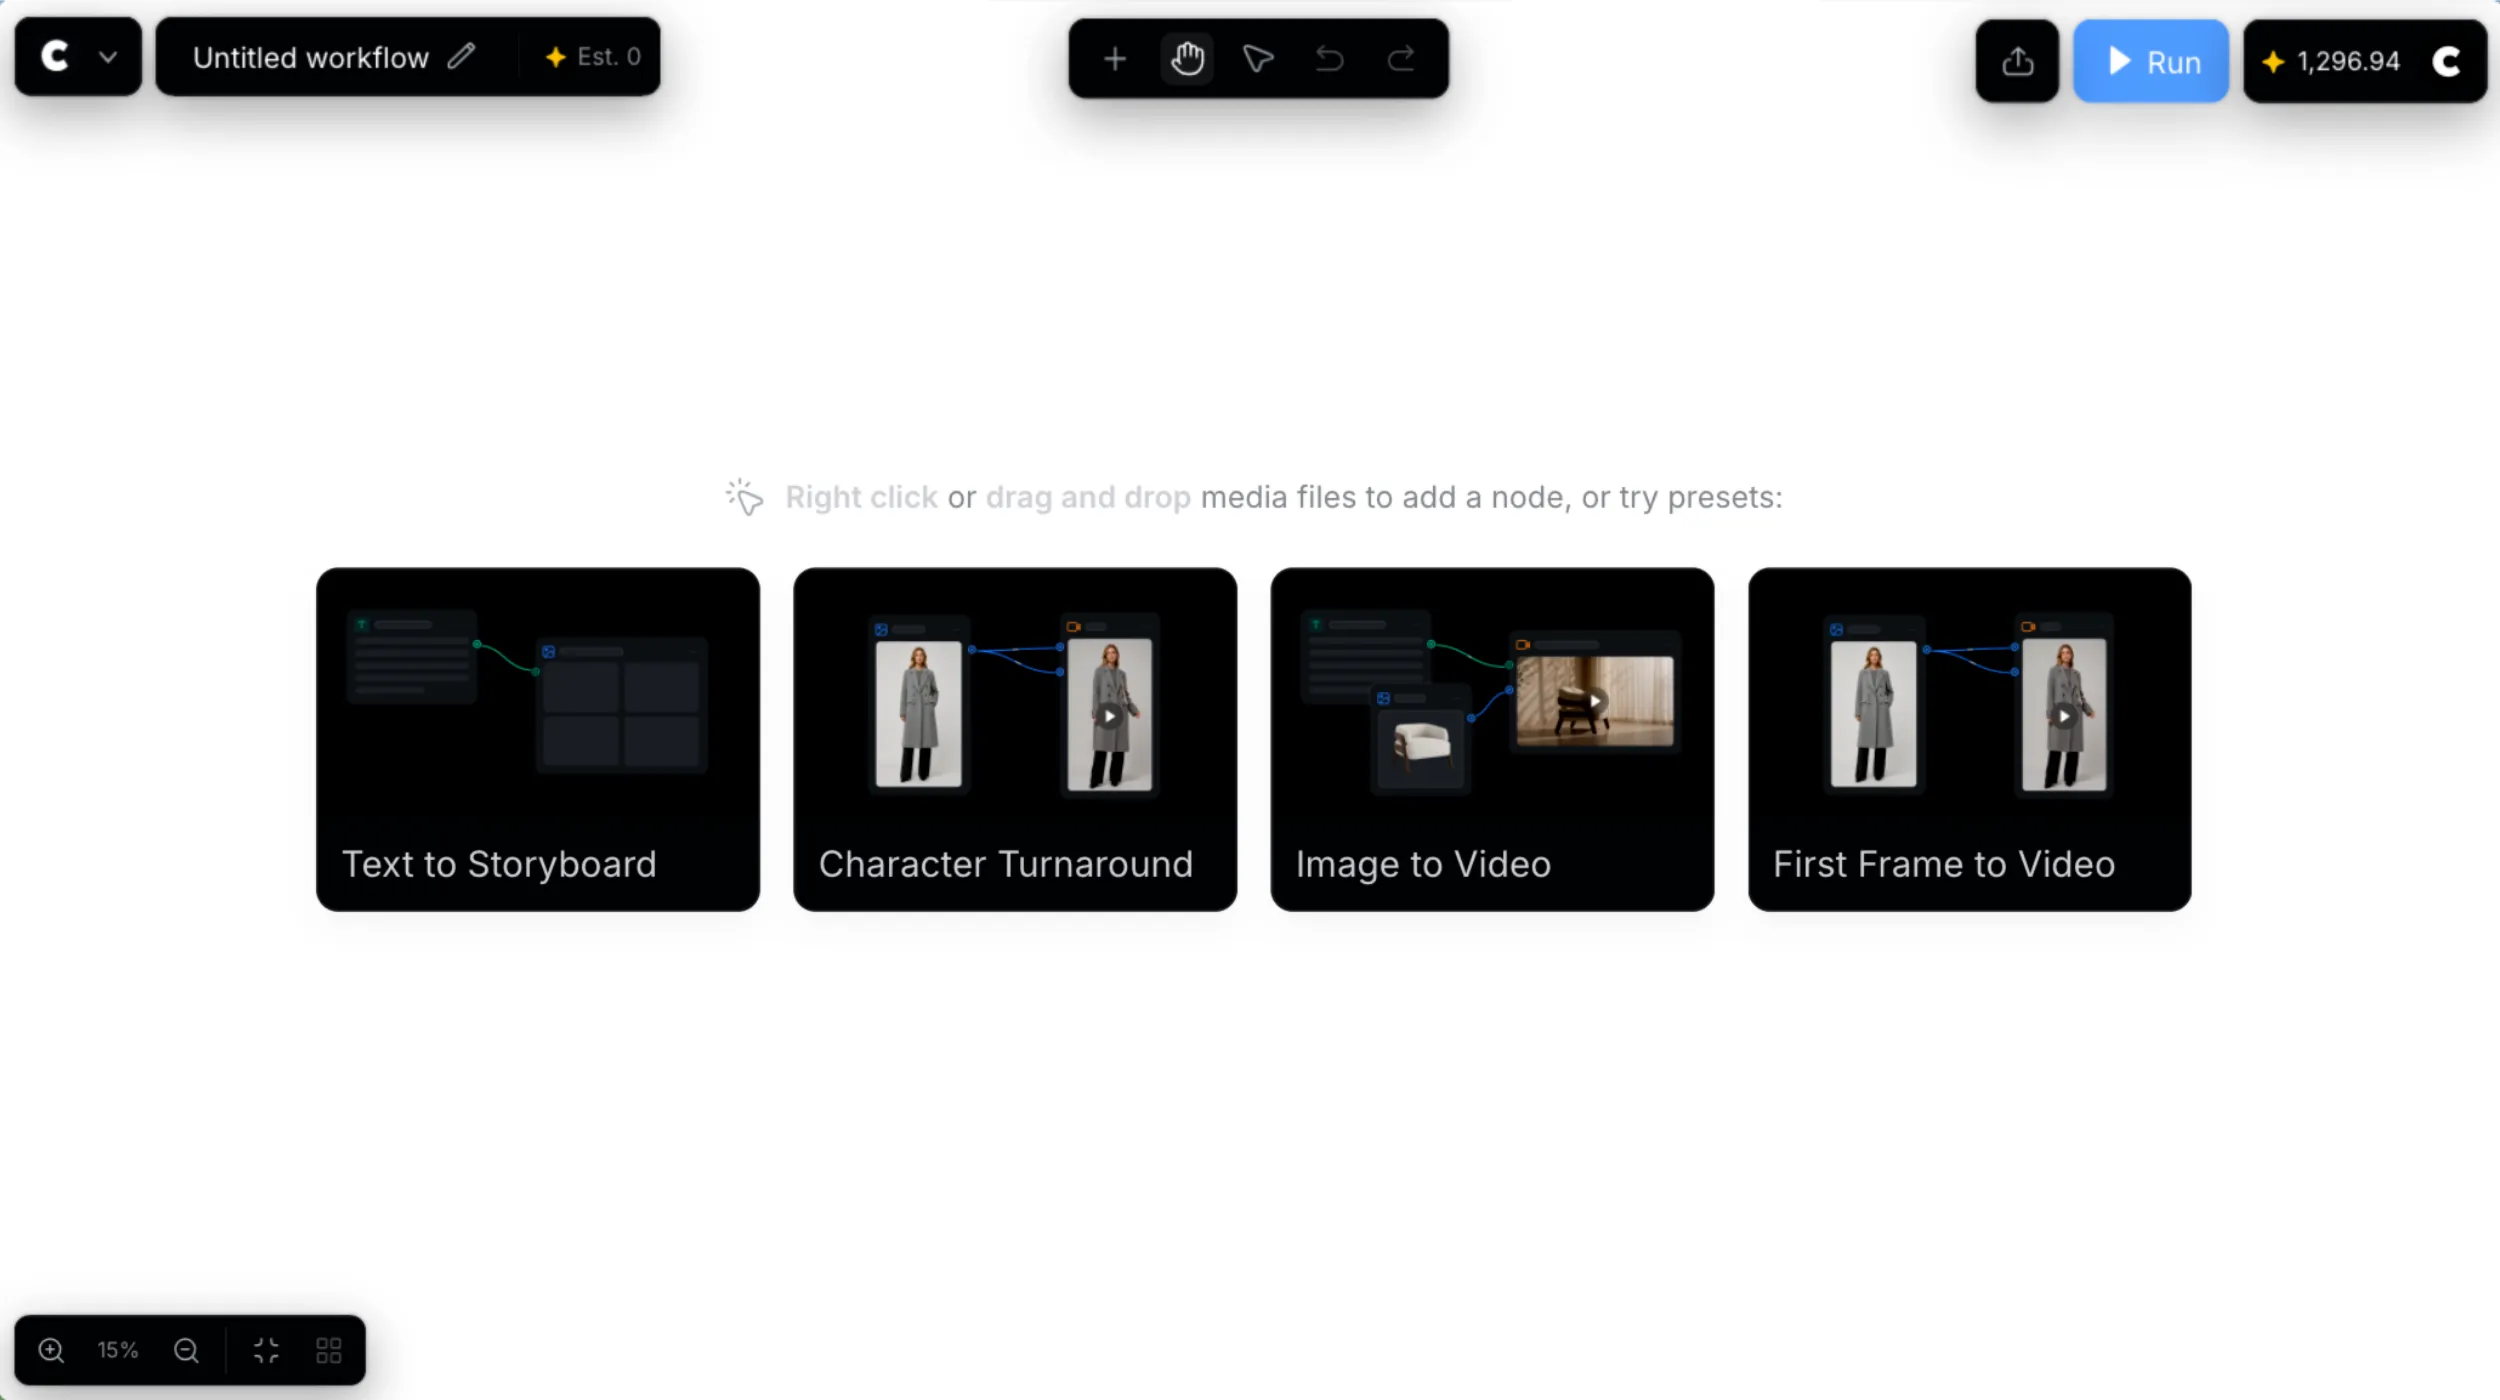
2. Continue Building Your Workflow
After the canvas opens, continue with Connect Nodes and Run a Workflow. It explains how to:
- Add the nodes needed for your task.
- Prepare each node’s inputs and settings.
- Connect compatible output and input ports.
- Run the workflow and review the result.
- Troubleshoot connections or nodes that do not run.
To share a completed workflow or transfer a workflow file, see Manage Workflows.