
Overview
A VN Template turns a working CawCut workflow into a guided experience that other people can run from VN. You decide what users can change, which results they receive, and whether any existing workflow inputs are included as starting content.
Before creating the template, run the workflow once and check that every required node completes successfully. Clear input names and a predictable final result make the template easier to use. If the workflow is still being built, follow Create Workflows first.
The template builder has four steps:
- Define the text and image inputs users can customize.
- Select the image or video outputs users will receive.
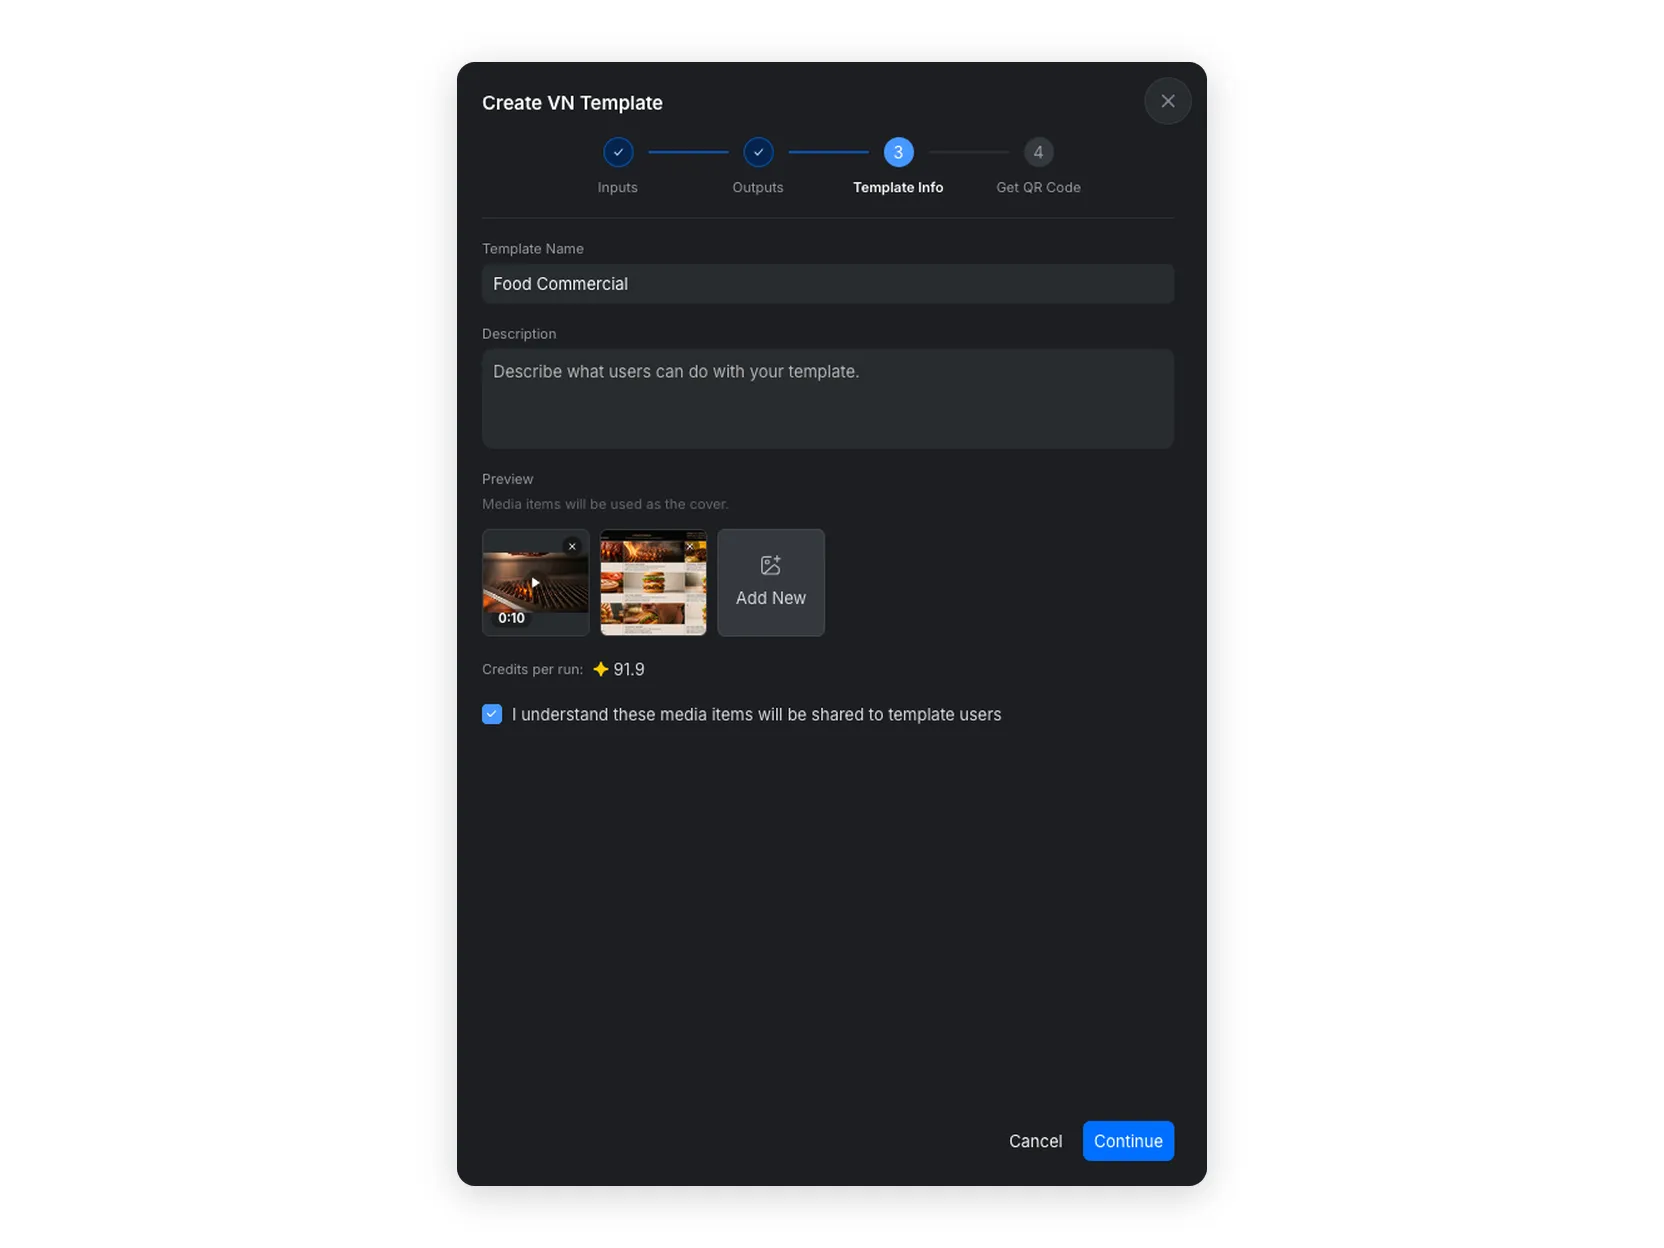
- Add the template name, description, preview, and sharing details.
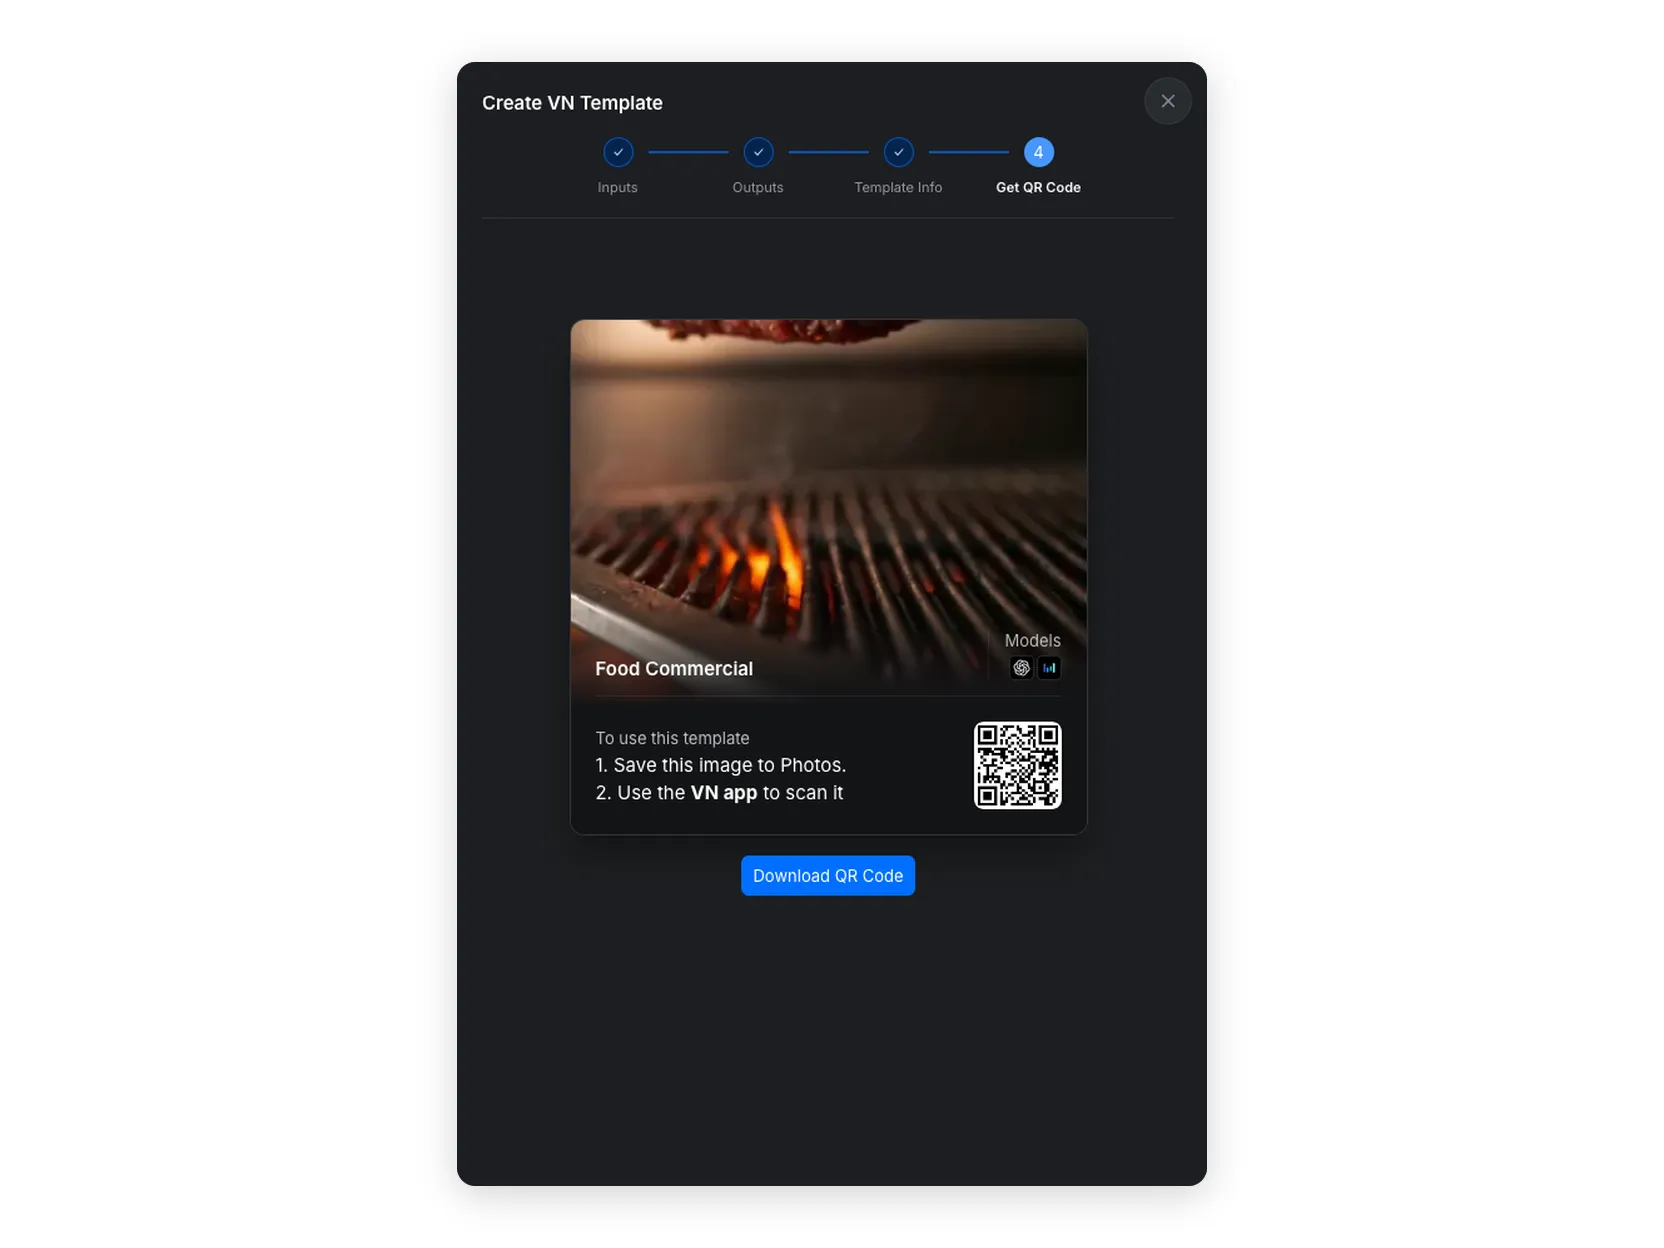
- Generate a QR code that opens the template in VN.
Open the Template Builder
Open the workflow you want to publish, select the Share button near Run, and choose Create VN Template.
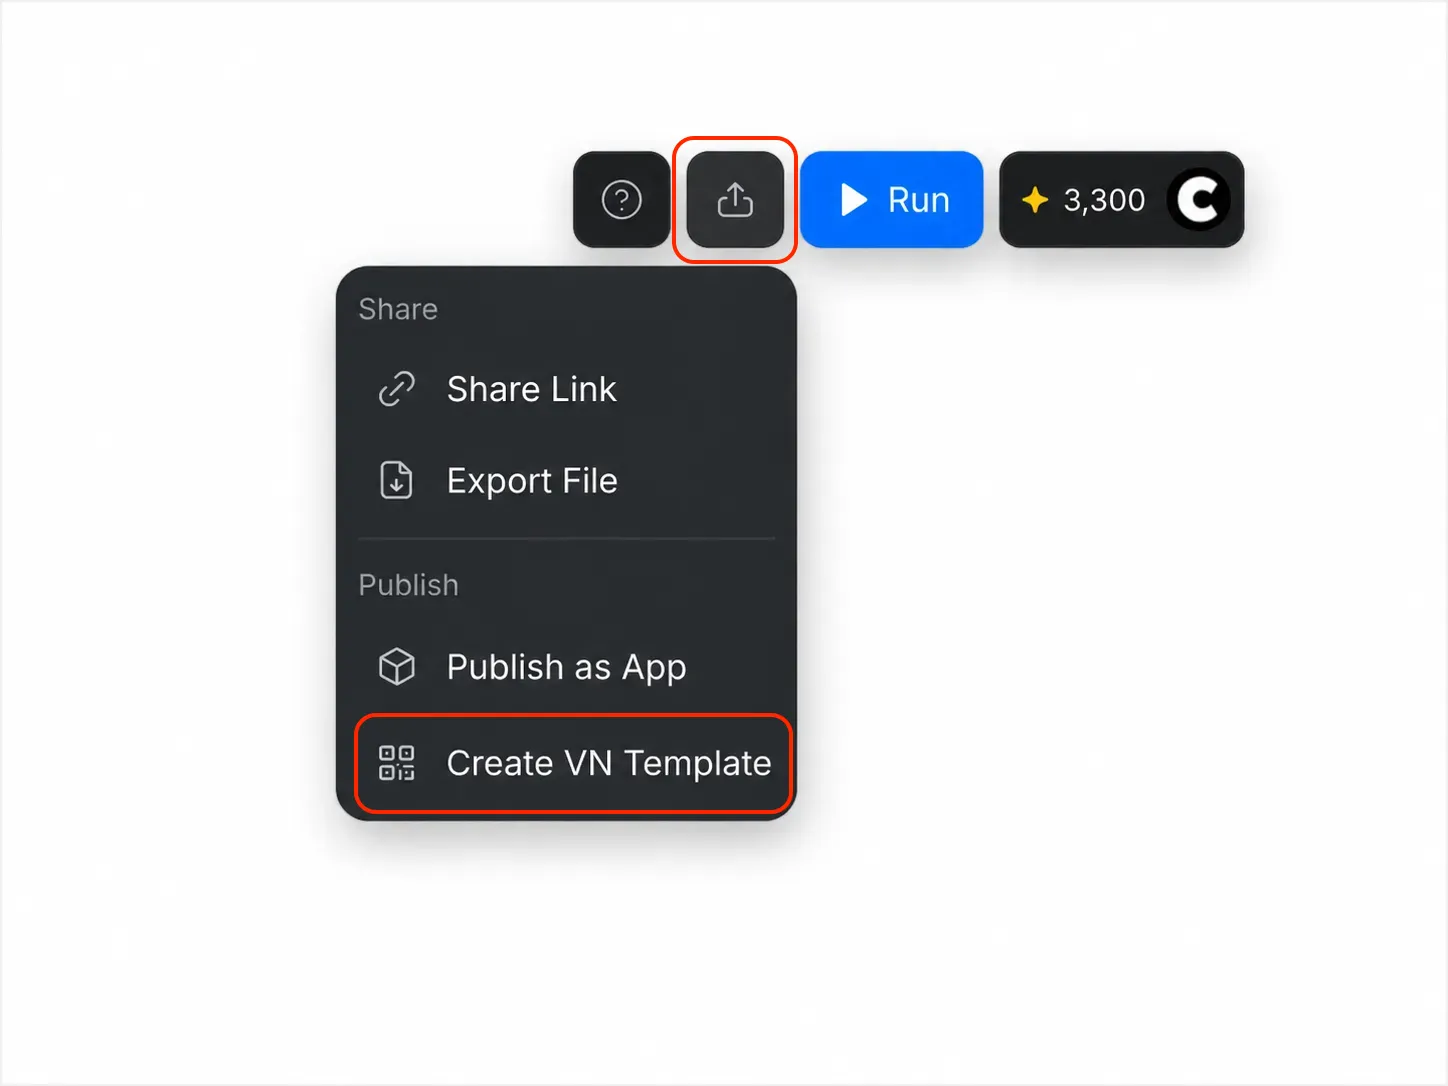
Step 1 · Define Inputs
Inputs are the parts of your workflow that VN users can supply or customize. A useful template exposes only the decisions the user needs to make while keeping the rest of the workflow focused on producing a consistent result.
Choose User Inputs
Use the All, Text, and Image filters to find available inputs. Select an input when the end user should be able to enter new text or upload a different image.
For each selected input:
- Give it a short, user-facing name that describes what to provide.
- Add an instruction or example, such as “Enter a one-sentence product description” or “Upload a clear front-facing product image.”
- Set a practical character or file-size limit for the type of content the workflow expects.
- Avoid selecting internal prompts, technical settings, or reference assets that users should not change.
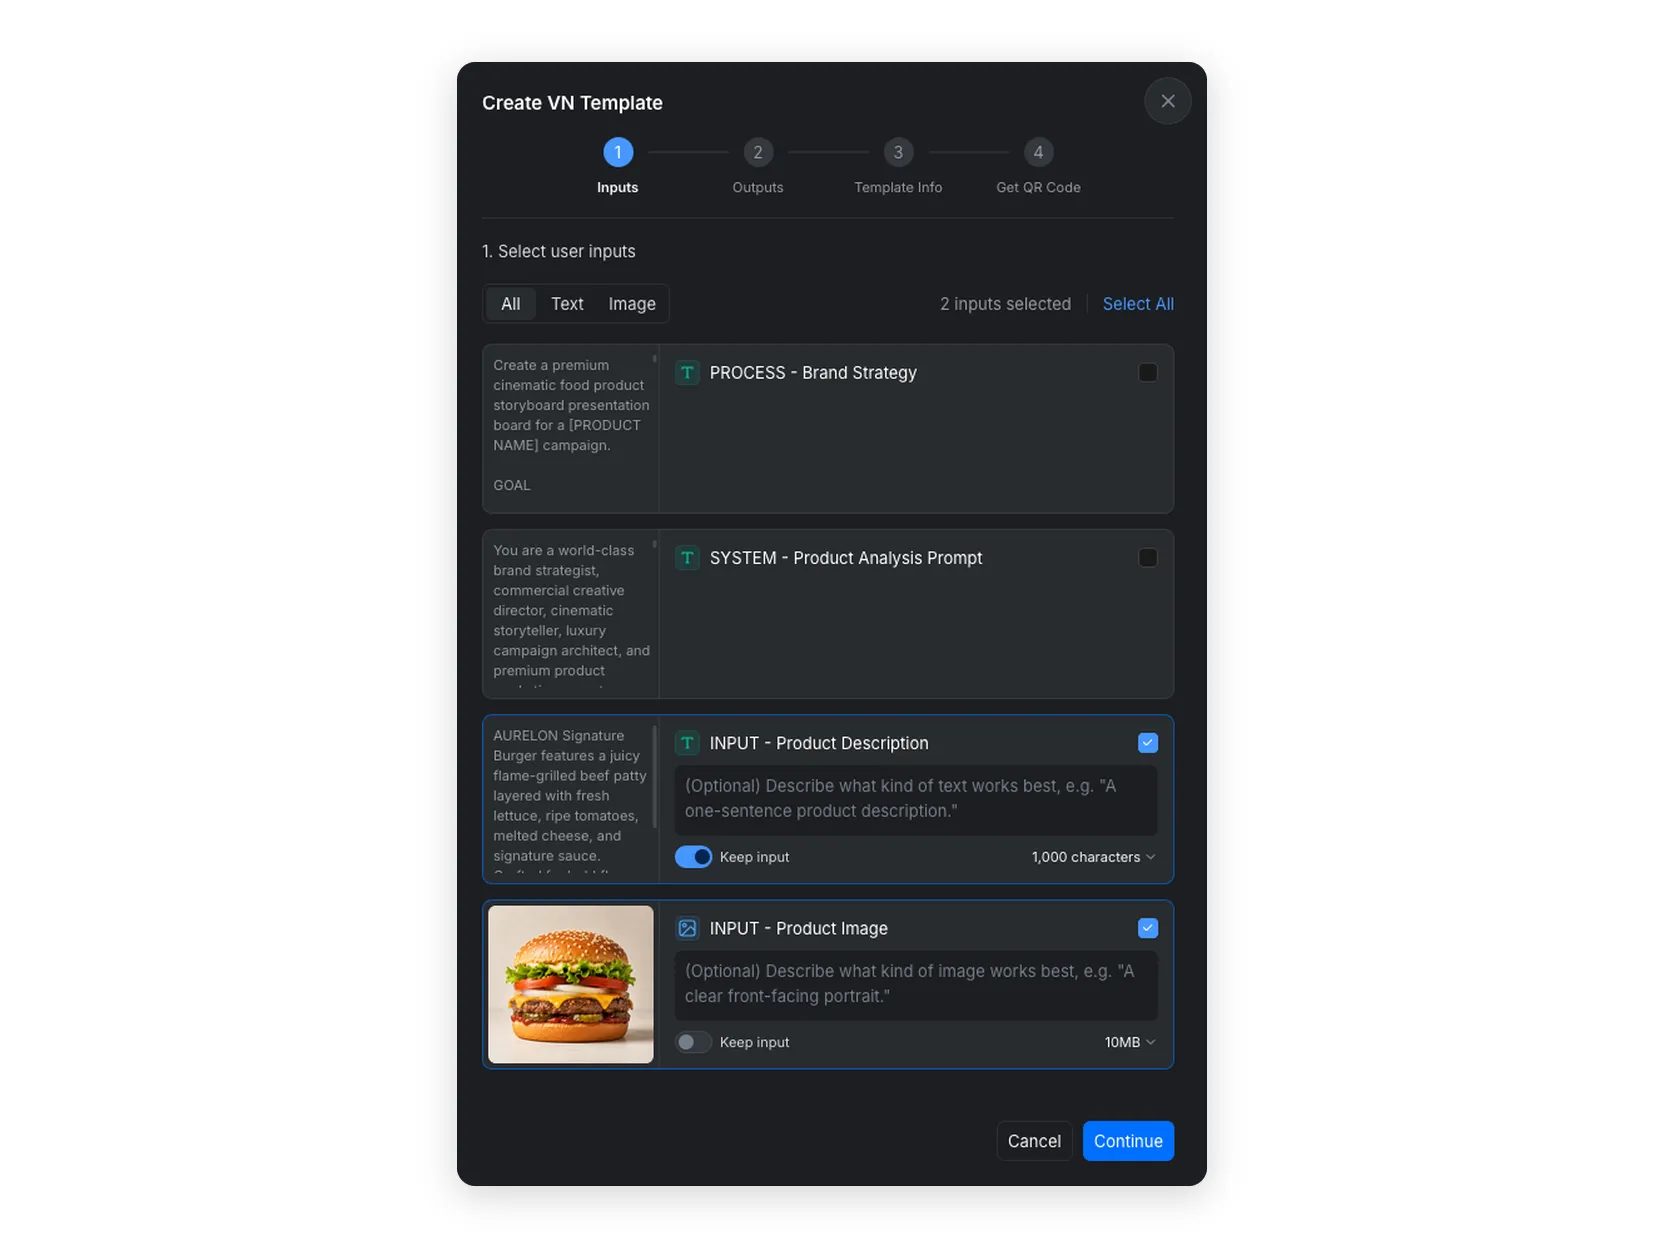
Good input instructions reduce failed runs. Explain the subject, format, or framing that works best, but keep the wording short enough to scan inside VN.
Choose Whether to Keep Included Inputs
Use Keep input to control whether the value already stored in the workflow is included with the template:
- Turn Keep input on when the included text or image can be used as a ready-made starting point. The end user can run the template with that content instead of supplying a replacement.
- Turn Keep input off when the included value should not be available to the end user. They must provide their own content for that input.
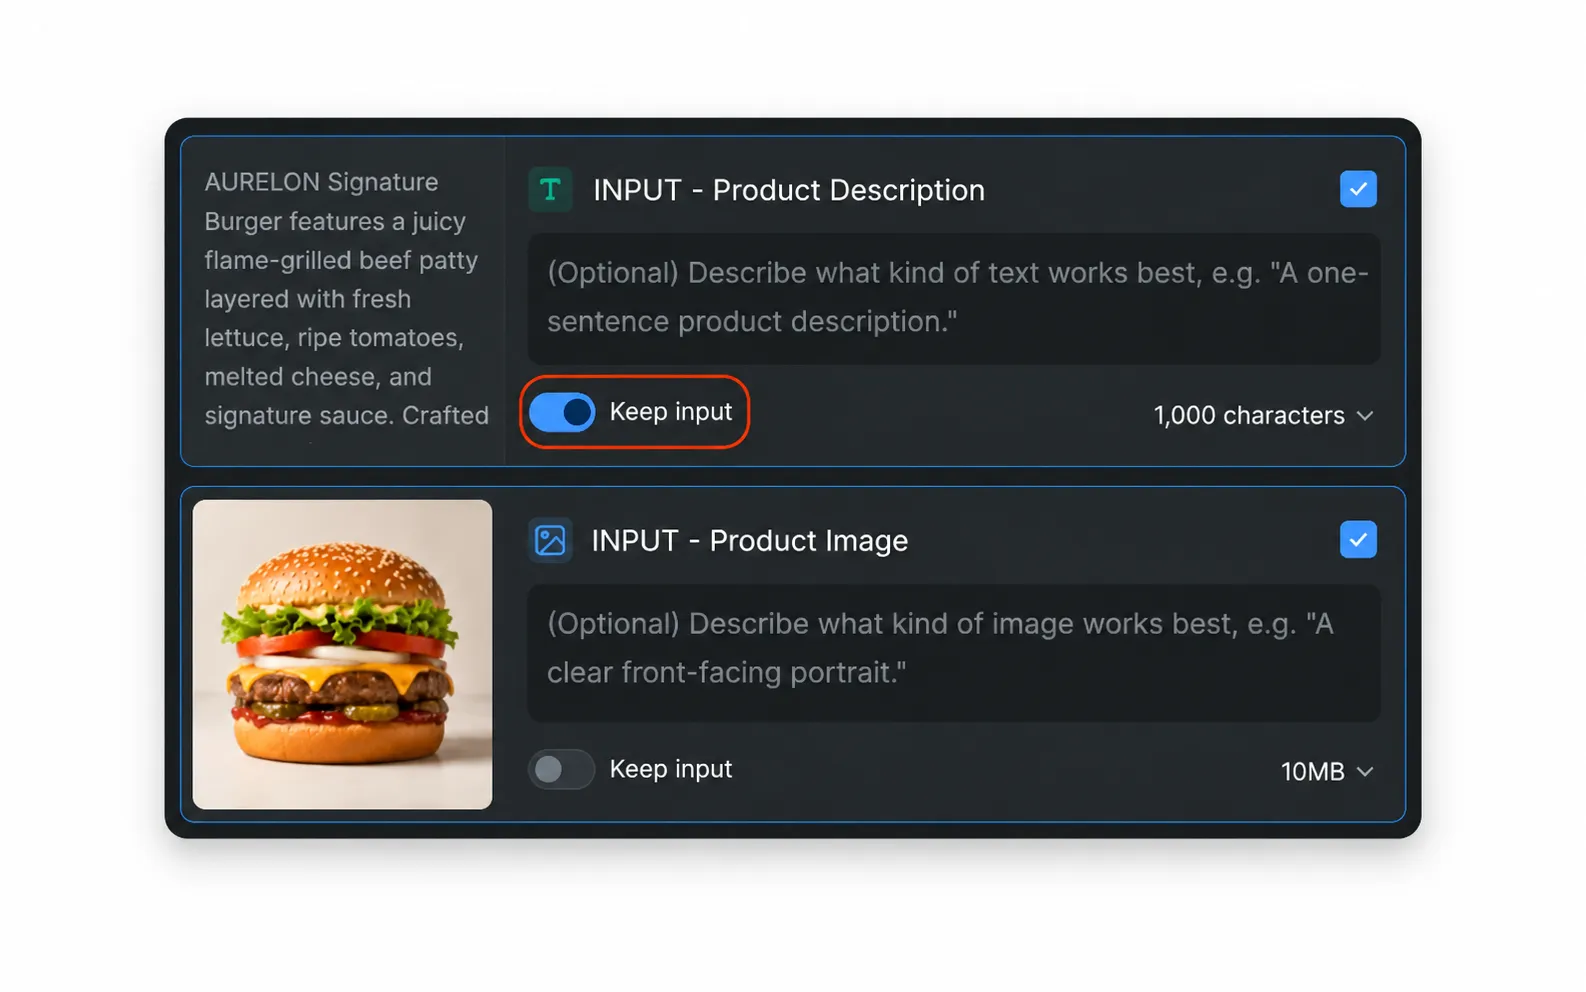
This setting is useful when a template includes an example prompt, reusable reference image, or other optional starter content. Turn it off for private assets, one-off client materials, licensed content that cannot be redistributed, or any input that should always be unique to the user.
Step 2 · Define Outputs
Outputs are the results VN users receive after the workflow runs. Choose the smallest useful set so users can immediately identify the main result.
Choose Final and Medium Outputs
The output list separates results by their position in the workflow:
- Final Nodes usually contain the completed image or video and should be your first choice.
- Medium Nodes contain intermediate results. Include one only when it gives the user something useful in addition to the final result, such as a storyboard, reference image, or alternate asset.
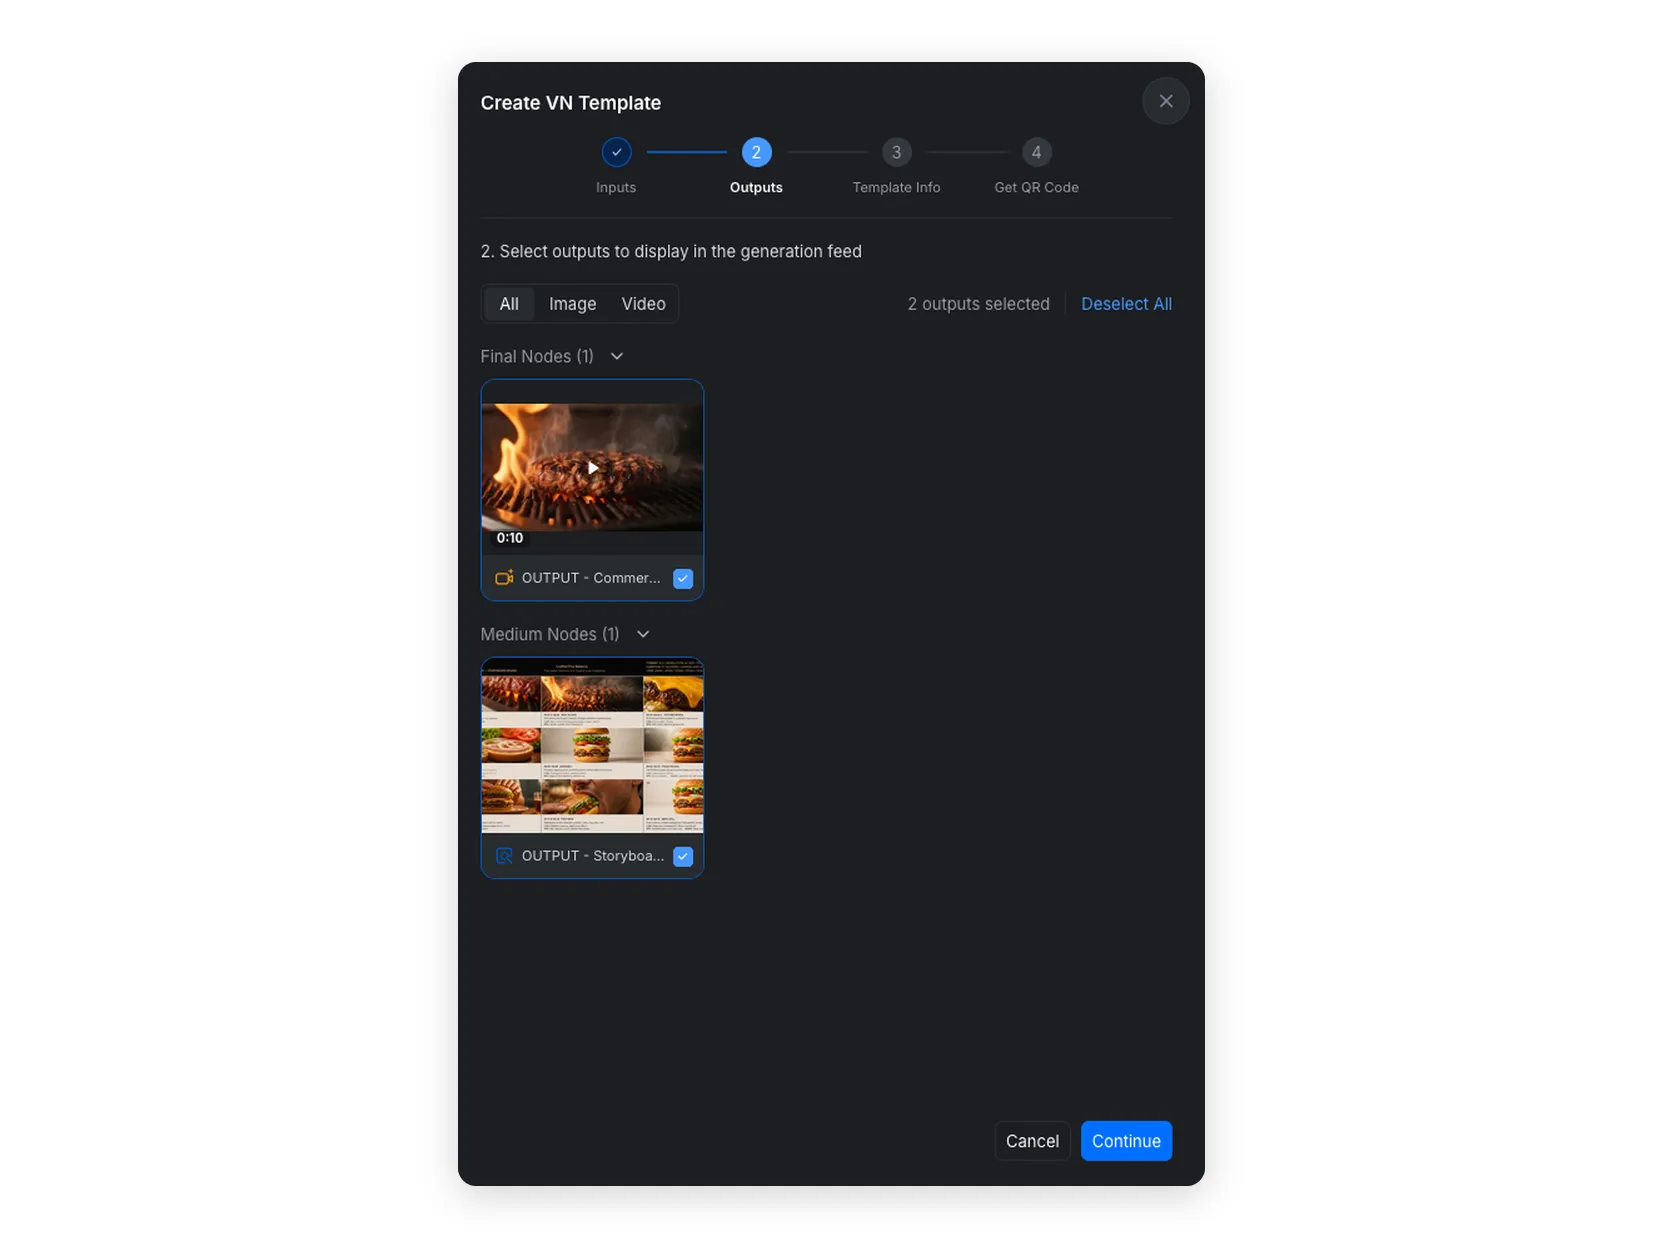
Do not select temporary previews, test generations, or internal review assets unless the user needs them. If an image-generation node produces multiple useful results, see Image Generation Node for more information about configuring image outputs.
Step 3 · Add Template Information
The Template Info step explains what the template does before a user runs it. Treat this as a compact instruction page rather than a technical description of the workflow.
Name and Description
Choose a clear name that describes the result, such as “Food Commercial” or “Product Storyboard.” In the description, tell users:
- What the template creates.
- Which text or images they should prepare.
- What style or format to expect.
- Any important limitation that may affect the result.
Avoid node names or internal workflow terminology. Users should be able to understand the template without knowing how it was built.
Preview Media, Credits, and Sharing
Choose preview media that represents the result users can expect. You can use suitable media from the workflow or select Add New to provide another preview.
The page also shows the estimated Credits per run. Review this estimate after selecting the outputs because the nodes required to produce those outputs determine the template’s run cost.
Before continuing, confirm the media-sharing acknowledgment. Only use preview media and kept input assets that you own or have permission to share with template users.
Step 4 · Generate and Test the QR Code
After the template information is complete, CawCut generates a VN Template card and QR code. The card includes the preview, name, creator information, and model details so users can identify the template before opening it.
Test the Template in VN
Save or display the QR code, open the VN app, and scan it. Follow the instruction in How to Use VN Template if you don't know how to use VN Code.
Complete a full test run as an end user would:
- Check that every input has a clear name and instruction.
- Confirm that inputs with Keep input enabled can use the included content.
- Confirm that inputs with Keep input disabled require new content.
- Run the template and verify that only the intended outputs are returned.
- Check that the preview and credit estimate match the experience.
If something is unclear, close the builder and update the workflow or template configuration before distributing the code.
Download and Share the QR Code
Select Download QR Code to save a shareable copy. You can publish the code on a creator page, tutorial, social post, or other channel where users can scan it with VN.
Keep the template name and a short explanation near the QR code so users understand what it creates and what input they should prepare. If you want to package a workflow as a CawCut experience instead of a VN Template, see CawCut Apps.