
The script is the plan for your Ad Video. It divides the video into shots and describes what viewers should see, how the camera should move, and what should be said or heard. Review the generated script before creating a storyboard or video so the final result matches your message and fits the available time.
1. Expand and Review the Script
After you choose or write an ad idea, Ad Video generates a script before creating the storyboard.
- Review the script table and check the order of the shots.
- Click the [Expand] button in the top-right corner of the script panel to open the script in full-screen mode.
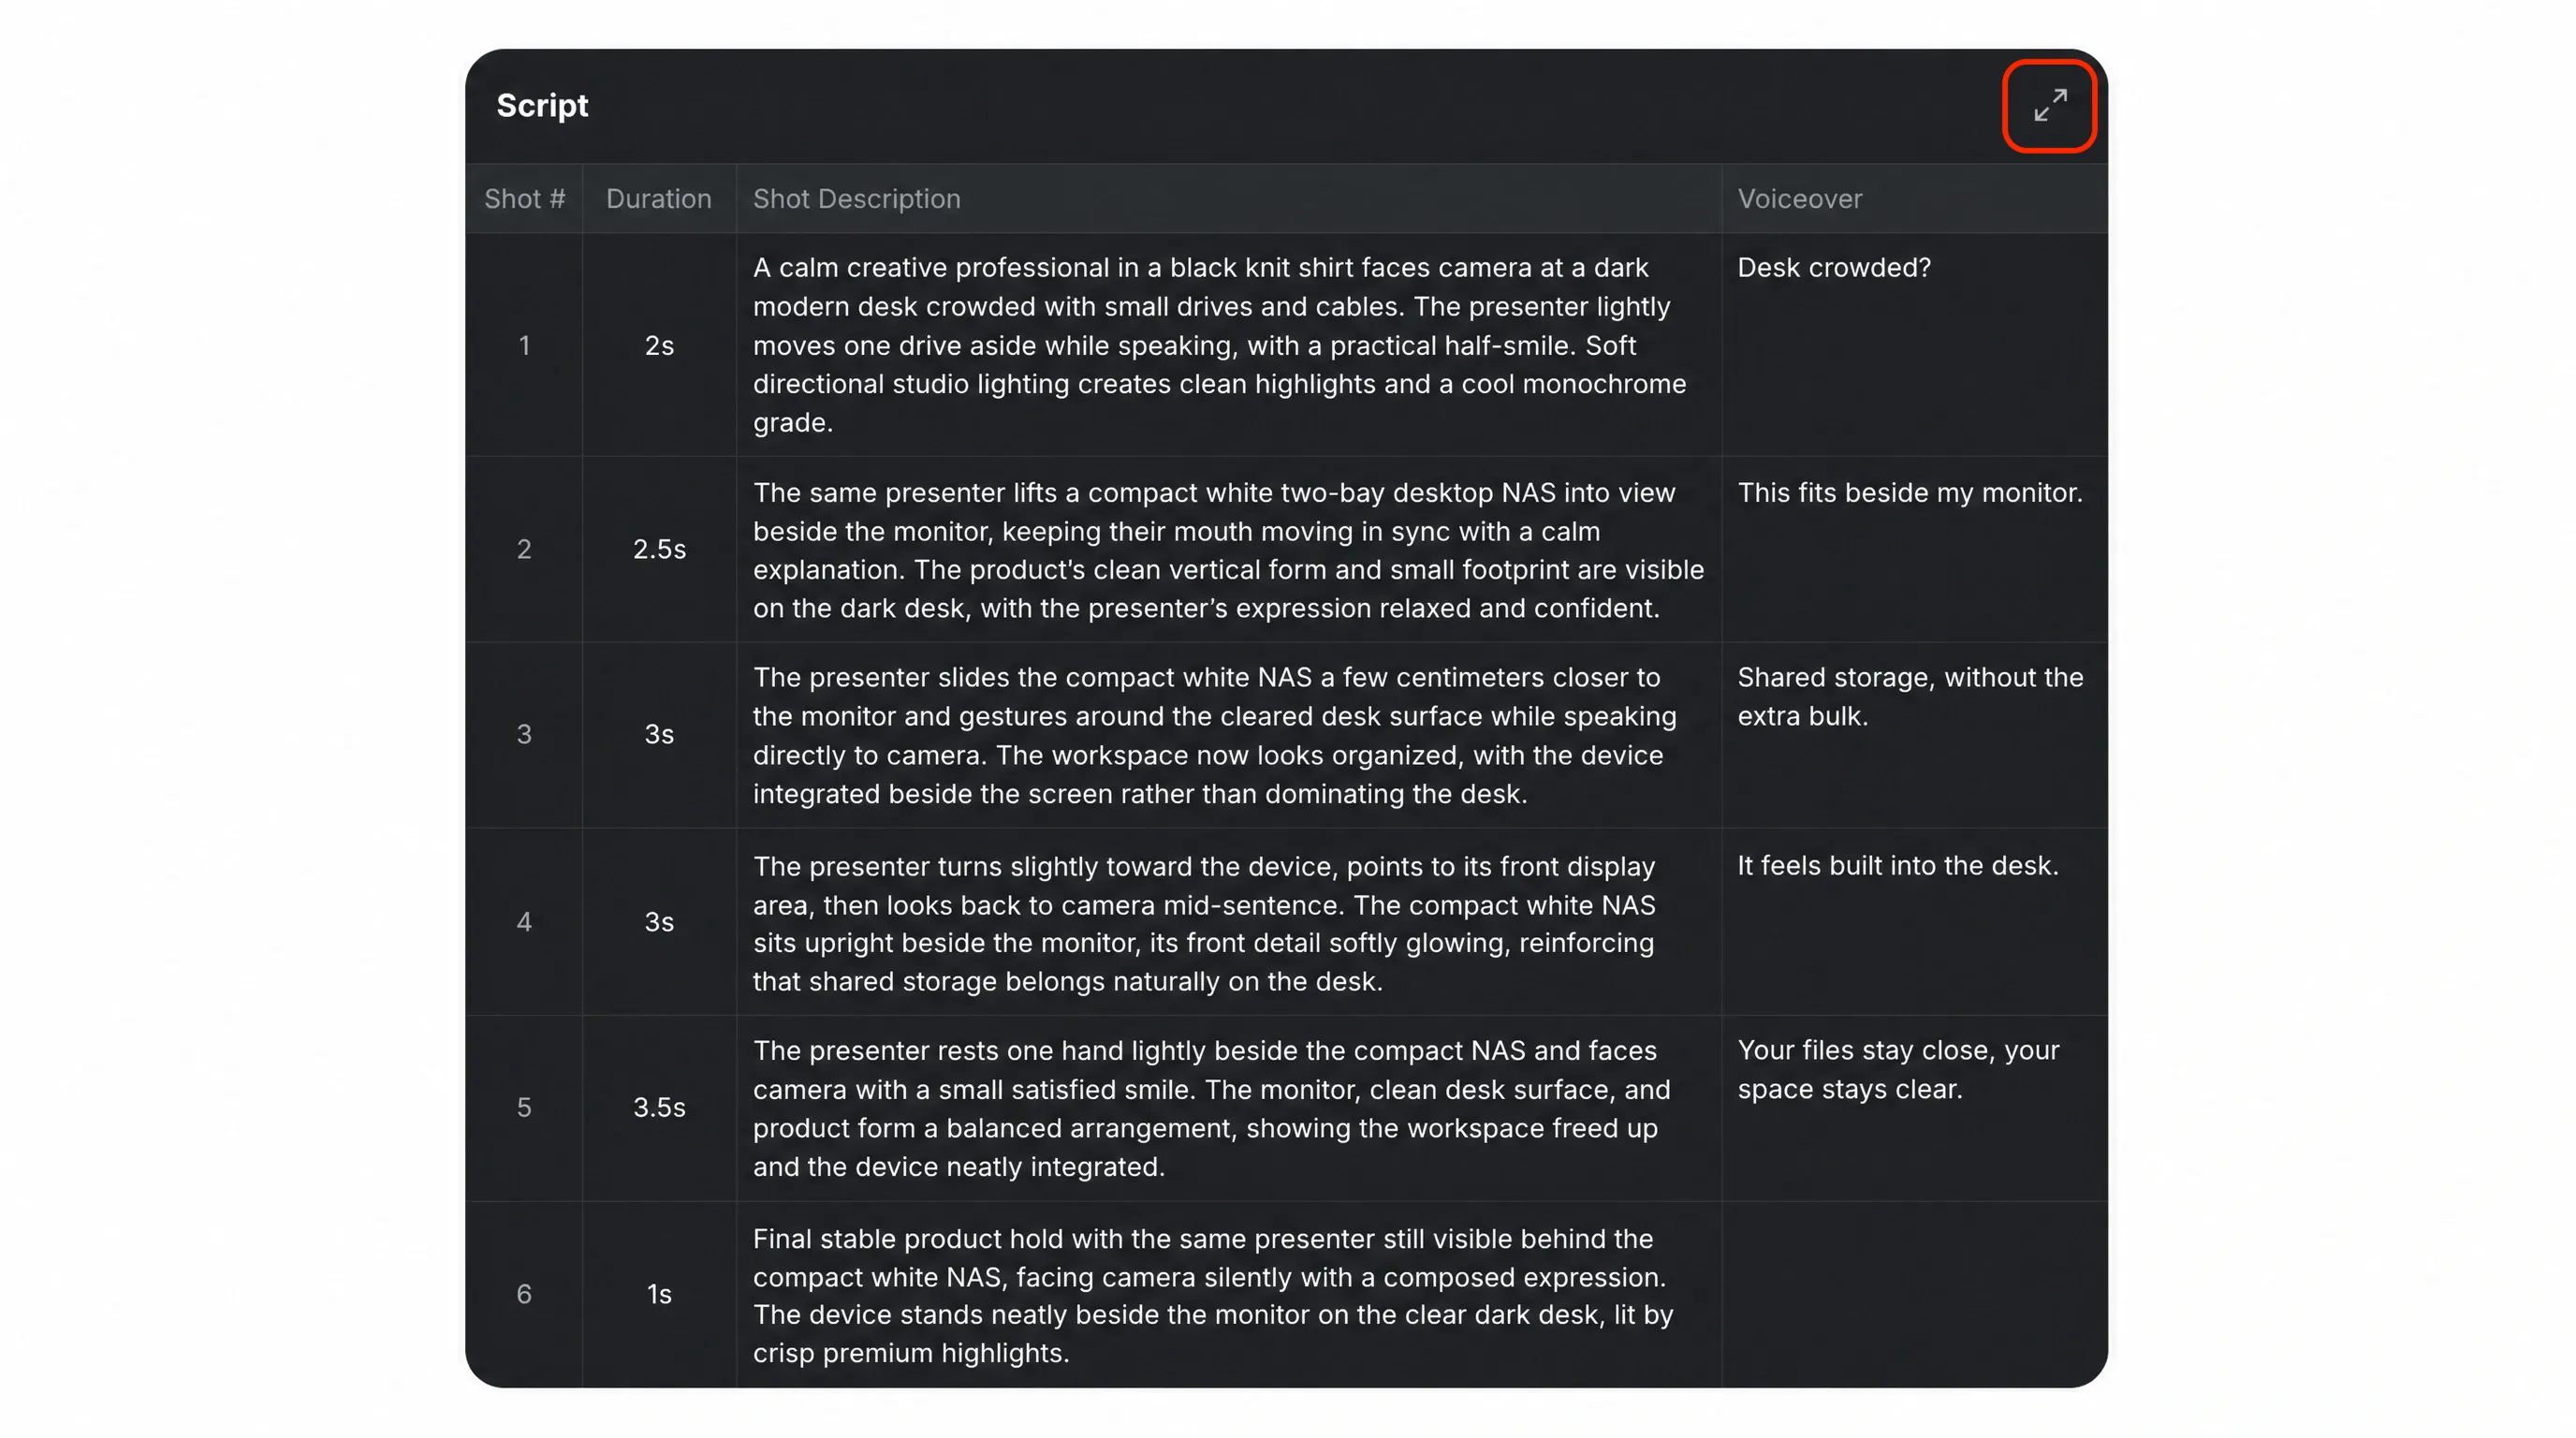
- In both script view modes, hover over a cell to reveal the copy button in the lower-left corner, click the button to copy the cell content.
- Select the text or field you want to change, then revise it directly.
- Review the complete script again before generating a storyboard or continuing to the video.
The total duration selected in the previous configuration step is the main limit for the script. For a 10- or 15-second ad, keep the concept focused and make sure the durations of all shots add up to the selected video length.
2. Understand the Script Fields
Depending on the selected video type, the script may include the following fields:
| Field | What it controls | Editing tip |
|---|---|---|
| Duration | How long the shot remains on screen. Ranges from 1 to 11 seconds. | Check the total video duration and give each shot enough time for its action to be understood. |
| Shot Type | The framing and distance of the shot. The available selections are [Extreme Wide Shot], [Wide Shot], [Full Shot], [Medium Shot], [Cowboy Shot], [Medium Full Shot], [Medium Close-Up], [Close-Up], [Big Close-Up], and [Extreme Close-Up] | Choose a framing that makes the product or action easy to see. |
| Shot Description | The action, setting, product presentation, or visual moment. | Keep it focused because most shots last only 2 to 3 seconds. |
| Voiceover | The words spoken during the shot for Product with Voiceover or Talking Video ads. | Check accuracy and make sure the number of words fits naturally within the shot duration. |
| Camera | The camera direction or movement. Available selections are [Static], [Push In], [Pull Out], [Tilt Up], [Tilt Down], [Pan Left], [Pan Right], [Tracking], [Follow], [Dolly In], [Dolly Out], [Drone Shot], and [Fly Through] | Use movement that supports the action instead of adding unnecessary motion. |
| Light | The lighting direction, quality, color, and shadow treatment for the shot. | Describe lighting that keeps the product visible and supports the mood, setting, and material details. |
| SFX | Sound effects, ambience, or music direction for the shot. | Keep the sound consistent with the action and avoid describing too many simultaneous sounds. |
| Shot Prompt | Additional visual instructions used to guide generation. | Include only details that help define the composition, subject, and style of the shot. |
| Video Prompt | The complete visual and motion direction used to generate the shot. | Include the duration, framing, subject action, camera behavior, and important visual details in one consistent prompt. |
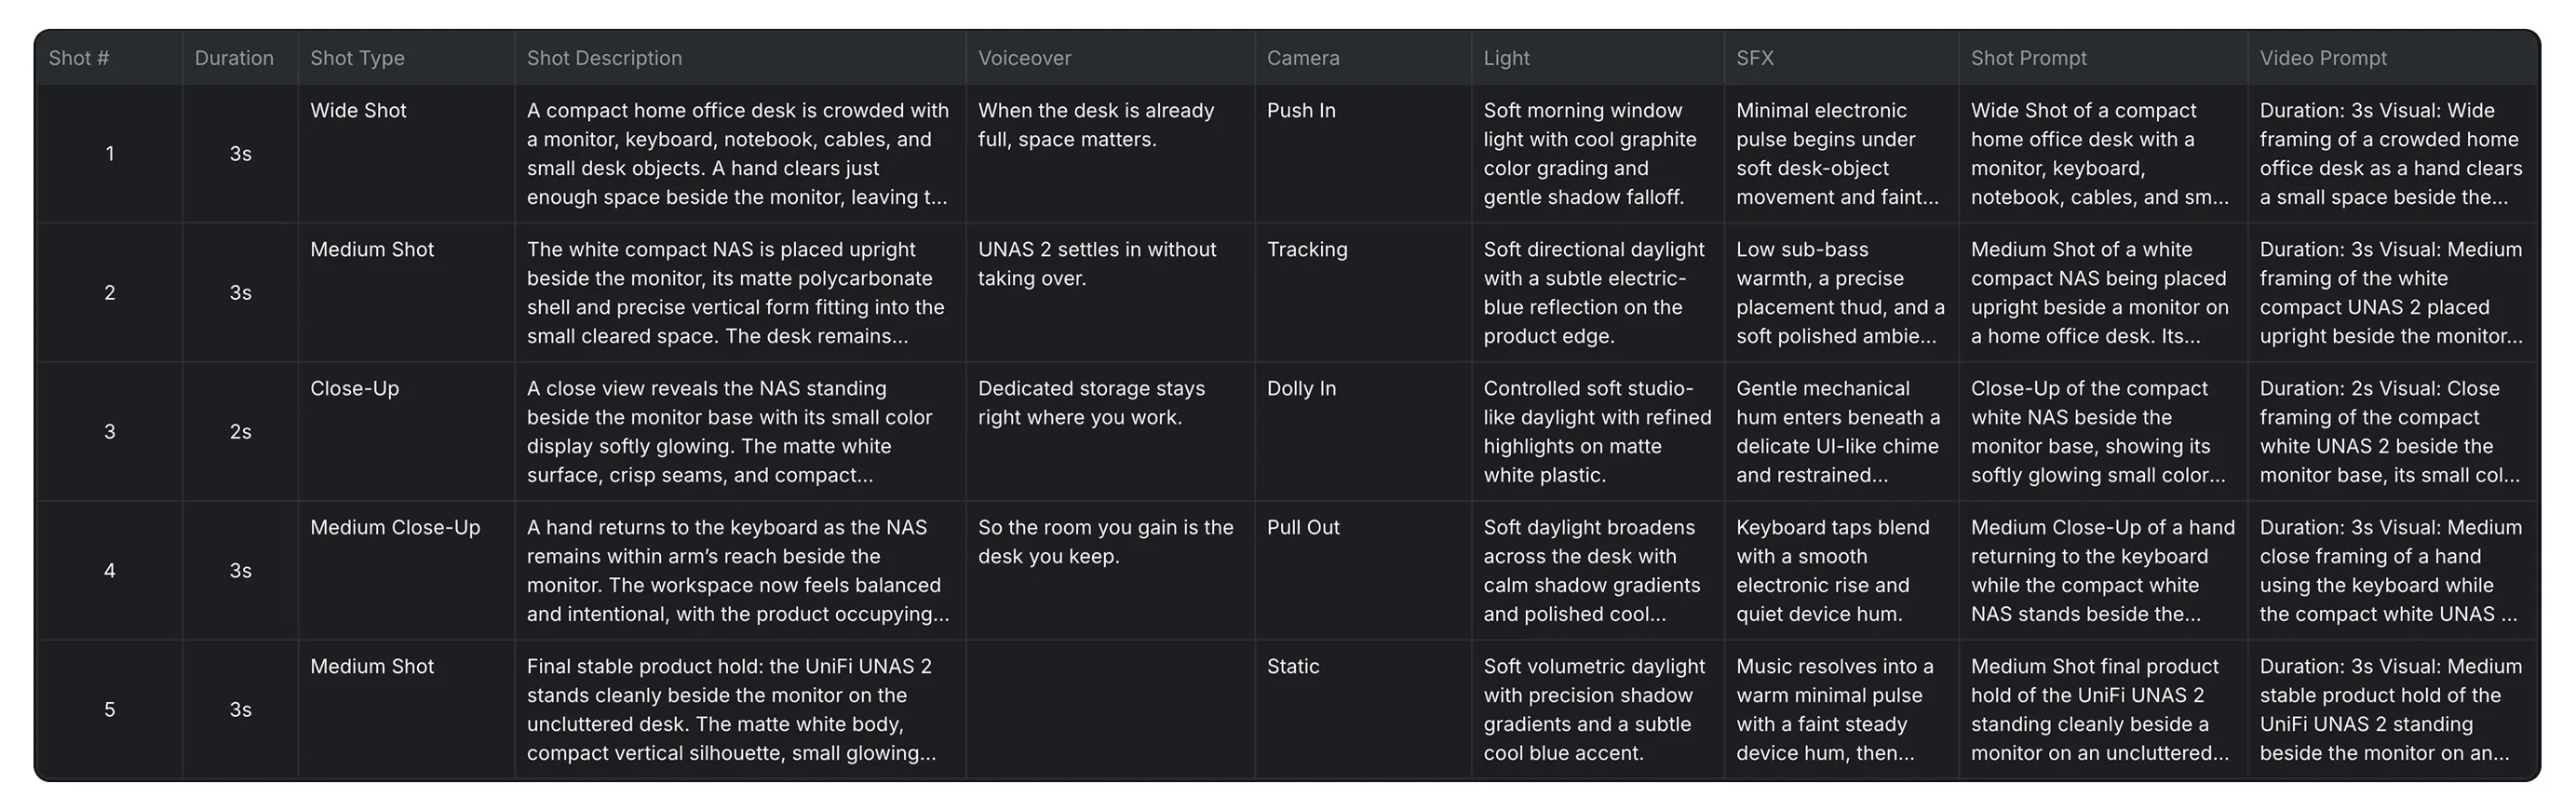
Click any cell in the script table to edit that specific field. The selected cell opens in an editing window so you can refine its content without changing the rest of the script.
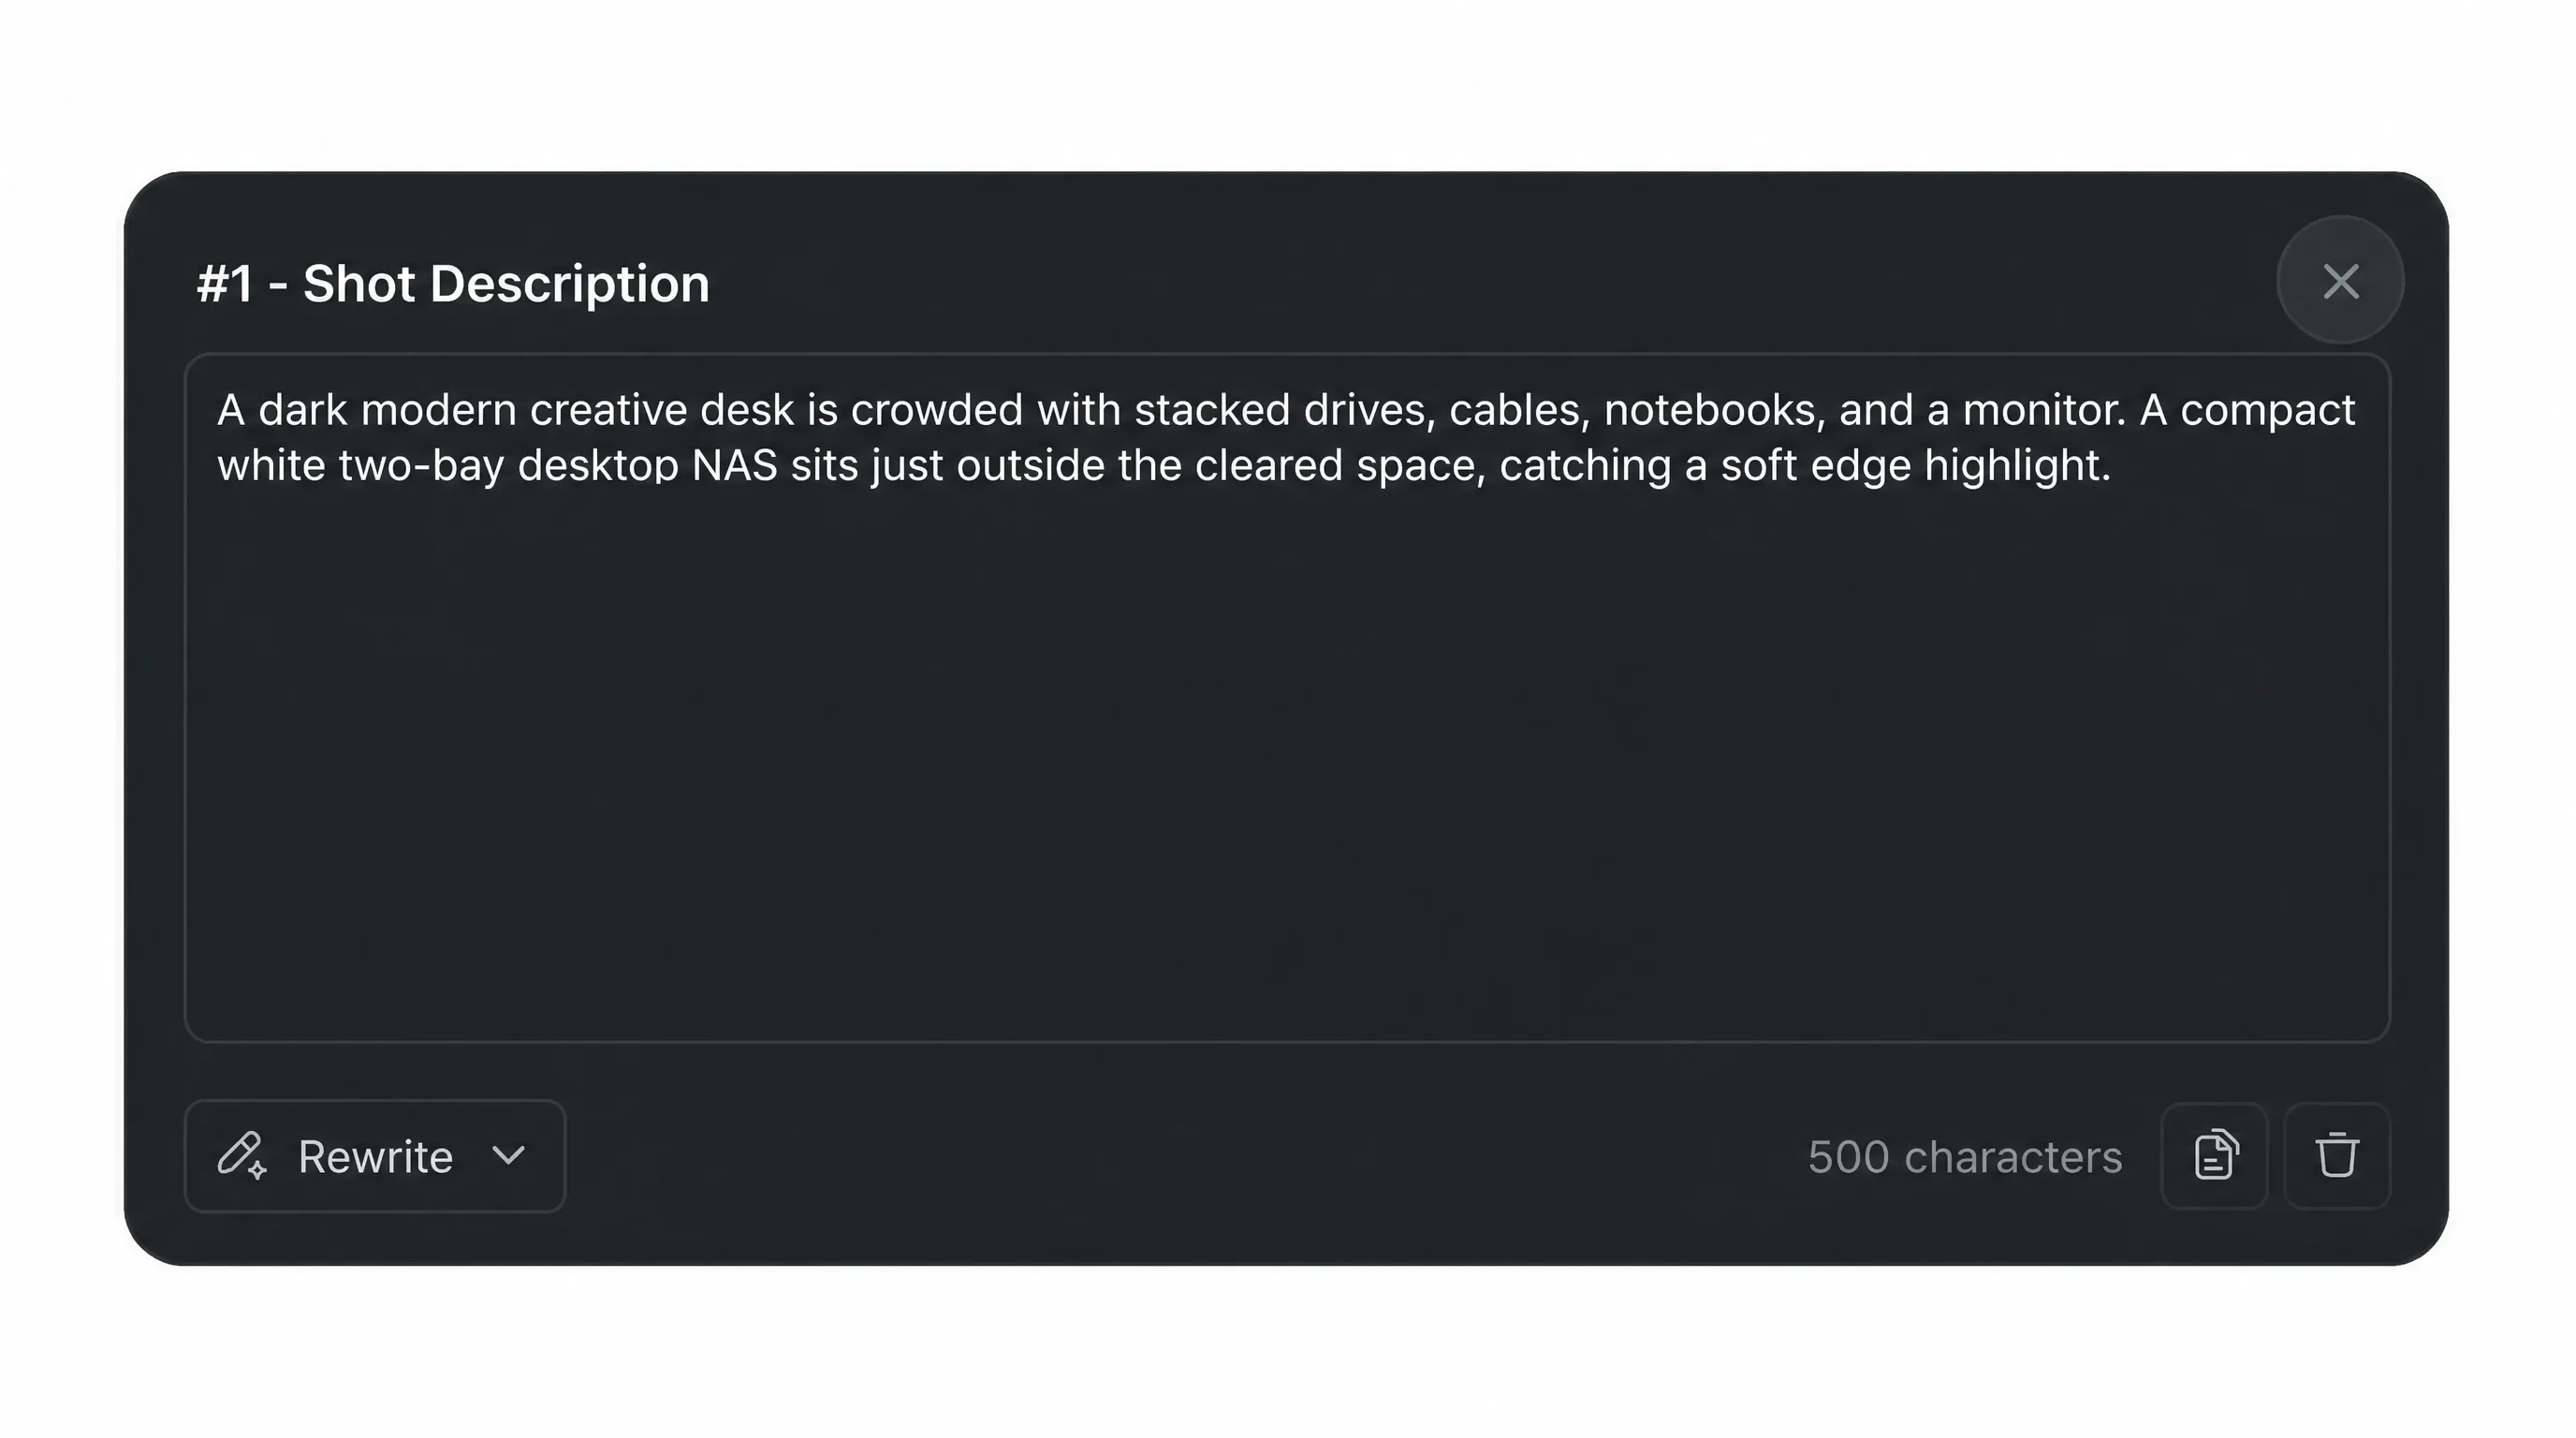
In the cell editor window, click [Rewrite] to use the built-in LLM function to revise the selected content. Choose a rewrite option such as:
* [Optimize Prompt] * [Expand], [Shorten] * [More Precise] * [Break into Steps] * [Casual], [Professional], [Formal].
Select [Custom] when you want to provide your own rewriting instruction.
2.1 Edit the Duration
The duration determines how long viewers have to understand the shot. Check the total target duration selected earlier—10s or 15s—before changing individual shots. Duration is edited with a slider, and each individual shot can be set to a maximum of 11 seconds.
- Make sure the durations of all shots add up to the selected video length.
- Give important product actions enough time to be seen clearly.
- Use shorter shots for simple transitions or a final product hold.
- Avoid assigning a long duration to a shot that contains very little visual information.
- Keep the total of all shot durations within the selected 10- or 15-second video length.
The generated script may use shots of around 2 to 3 seconds, with some shots lasting only about 1 second. If a shot contains several actions, either simplify the description or give the shot more time by shortening other shots.
2.2 Edit the Shot Type
Shot type controls how closely the viewer sees the subject. Choose the shot type based on the purpose of the shot:
| Shot Type | Best for |
|---|---|
| Extreme Wide Shot | Establishing a broad environment and placing the subject within the setting. |
| Wide Shot | Showing the subject and surrounding environment with more visual context. |
| Full Shot | Showing a person or product in full, from top to bottom. |
| Medium Full Shot | Showing most of the subject while keeping a balanced view of the environment. |
| Cowboy Shot | Framing a person from approximately the thighs up, making gestures and the upper body easy to see. |
| Medium Shot | Framing a person or product more closely while keeping enough surrounding context. |
| Medium Close-Up | Focusing on the upper body or main product area while retaining some context. |
| Close-Up | Highlighting a specific product feature, action, or facial expression. |
| Big Close-Up | Showing a smaller detail more prominently, such as a display, button, or connection. |
| Extreme Close-Up | Showing a very small detail at maximum emphasis. |
For example, use an Extreme Wide Shot or Wide Shot to establish the setting, a Medium Shot or Medium Full Shot to show a person using the product, and a Close-Up, Big Close-Up, or Extreme Close-Up when the viewer needs to see a button, port, screen, or other small detail. If you change the shot type, update the shot description and shot prompt so they describe the same framing.
2.3 Edit the Shot Description
The shot description explains what happens in the shot. Keep it short, specific, and easy to visualize.
When editing a shot description:
- Focus on one main action or visual moment.
- Mention the important subject, product benefit, or change in the scene.
- Remove background details that do not help communicate the idea.
- Consider the shot duration. A shot lasting 2 to 3 seconds should not include several separate actions, product features, or camera changes.
For example, “A hand guides the cable into the rear port” is more practical for a short shot than describing the cable, the desk, the monitor, several accessories, a lighting change, and a camera move at the same time.
2.4 Edit the Voiceover
The Voiceover field contains the words spoken during a shot. It appears when you choose [Product with Voiceover] or [Talking Video]. Edit it so the spoken message follows the shot description and matches the visual action.
- Check product names, features, prices, promotions, and other claims.
- Use wording that sounds natural when read aloud.
- Match the number of words to the shot duration. A 2-second shot should have much less spoken content than a 3.5-second shot.
- Leave room for natural pauses and for viewers to understand the visual.
- Do not use one short shot to explain several benefits or complete multiple ideas.
Read each line aloud at a comfortable pace. If you need to rush, remove extra words or simplify the sentence. Check spelling, pronunciation, grammar, product claims, prices, and promotions. For Talking Video ads, make sure the presenter’s spoken line matches the presenter’s action and the shot description.
2.5 Edit the Camera and Light
The Camera field describes the overall camera framing or movement. The Light field describes how the scene is illuminated, including the light source, softness, color, highlights, and shadows.
The available Camera selections are:
| Camera | What it does |
|---|---|
| Static | Keeps the camera still while the subject or scene provides the movement. |
| Push In | Moves the camera closer to the subject. |
| Pull Out | Moves the camera away from the subject to reveal more of the scene. |
| Tilt Up | Rotates the camera upward. |
| Tilt Down | Rotates the camera downward. |
| Pan Left | Moves the camera horizontally toward the left. |
| Pan Right | Moves the camera horizontally toward the right. |
| Tracking | Moves the camera while following the subject or action. |
| Follow | Follows a moving subject through the scene. |
| Dolly In | Moves the camera forward toward the subject, usually on a straight path. |
| Dolly Out | Moves the camera backward away from the subject, usually on a straight path. |
| Drone Shot | Creates an elevated or aerial camera perspective. |
| Fly Through | Moves the camera through the environment or around the subject. |
Keep the two fields consistent. If the camera is Static, describe movement from the subject rather than adding a camera move. If the camera is Tracking, describe what it follows. Use Push In, Pull Out, or Dolly In when the change in distance helps reveal a product detail or transition in focus.
Keep movement simple enough to complete within the shot. A 2-second shot usually works better with one gentle camera move than with several changes in direction.
For the Light field, describe the lighting that should remain visible throughout the shot:
- Identify the source or direction, such as soft window light, a front key light, or a warm practical lamp.
- Specify the quality and color when they affect the product, such as diffused, directional, warm, or cool light.
- Mention important highlights, reflections, or shadow falloff on the product and its surroundings.
- Keep the lighting consistent with the setting and the ad style. Avoid adding a dramatic lighting change unless it is part of the intended action.
2.6 Edit the SFX
The SFX field describes the sound atmosphere or effects that support the visuals. Use it to reinforce a clear action, such as a connector click, product placement sound, or subtle electronic ambience.
Keep the direction brief and relevant to the shot. Avoid packing several unrelated sound effects into a short shot, and make sure the sounds fit the selected ad style. If the shot contains voiceover or talking video, SFX should support the spoken content without competing with it.
2.7 Edit the Shot Prompt
The Shot Prompt provides additional visual direction for generation, including composition, subject placement, lighting, and style. Use it to clarify details that are important for the shot but are not fully explained in the shot description.
Keep the prompt aligned with the rest of the row. It should not introduce a different product appearance, setting, action, or camera direction. For a short shot, prioritize the details that must be visible and remove decorative instructions that may distract from the main subject.
2.8 Edit the Video Prompt
The Video Prompt is the complete instruction for generating the shot as moving video. It brings together the duration, framing, subject, action, camera behavior, and essential visual details from the other fields.
- Start with the assigned duration and shot framing when they are shown in the prompt.
- Describe one clear action or motion that can happen naturally within the duration.
- Keep the camera behavior consistent with the Camera field and the subject motion consistent with the Shot Description.
- Carry over important Light details so the product remains readable and the look stays consistent from frame to frame.
- Remove conflicting directions, extra actions, and details that cannot be shown clearly in a short shot.
3. Complete the Final Script Review
Before leaving the script editor, read the script from beginning to end and check the complete sequence:
- Confirm that the shot durations add up to the selected 10- or 15-second video length.
- Check that each shot has one clear purpose and does not contain too many actions.
- Make sure the shot type, description, camera, light, SFX, shot prompt, and video prompt do not contradict one another.
- Verify all product information, claims, prices, promotions, and spoken lines.
- Decide whether to select [Generate Hand-Drawn Storyboard] or [Generate Photo-Realistic Storyboard], or continue without generating a storyboard.
After the script is confirmed, you can review the storyboard if you generate one, or proceed to generate the video directly.