
Overview
Learn how to edit images directly inside CawCut using View, Annotation, and Mask tools.
After opening an image node, CawCut provides several built-in editing options to help you inspect, annotate, and prepare images for AI workflows.
Open an Image
To open an image editor:
- Simply click the image in the Image Node.
From here, you can preview and edit your image.
Understanding the Image Editor
The image editor includes three main modes:
View Mode
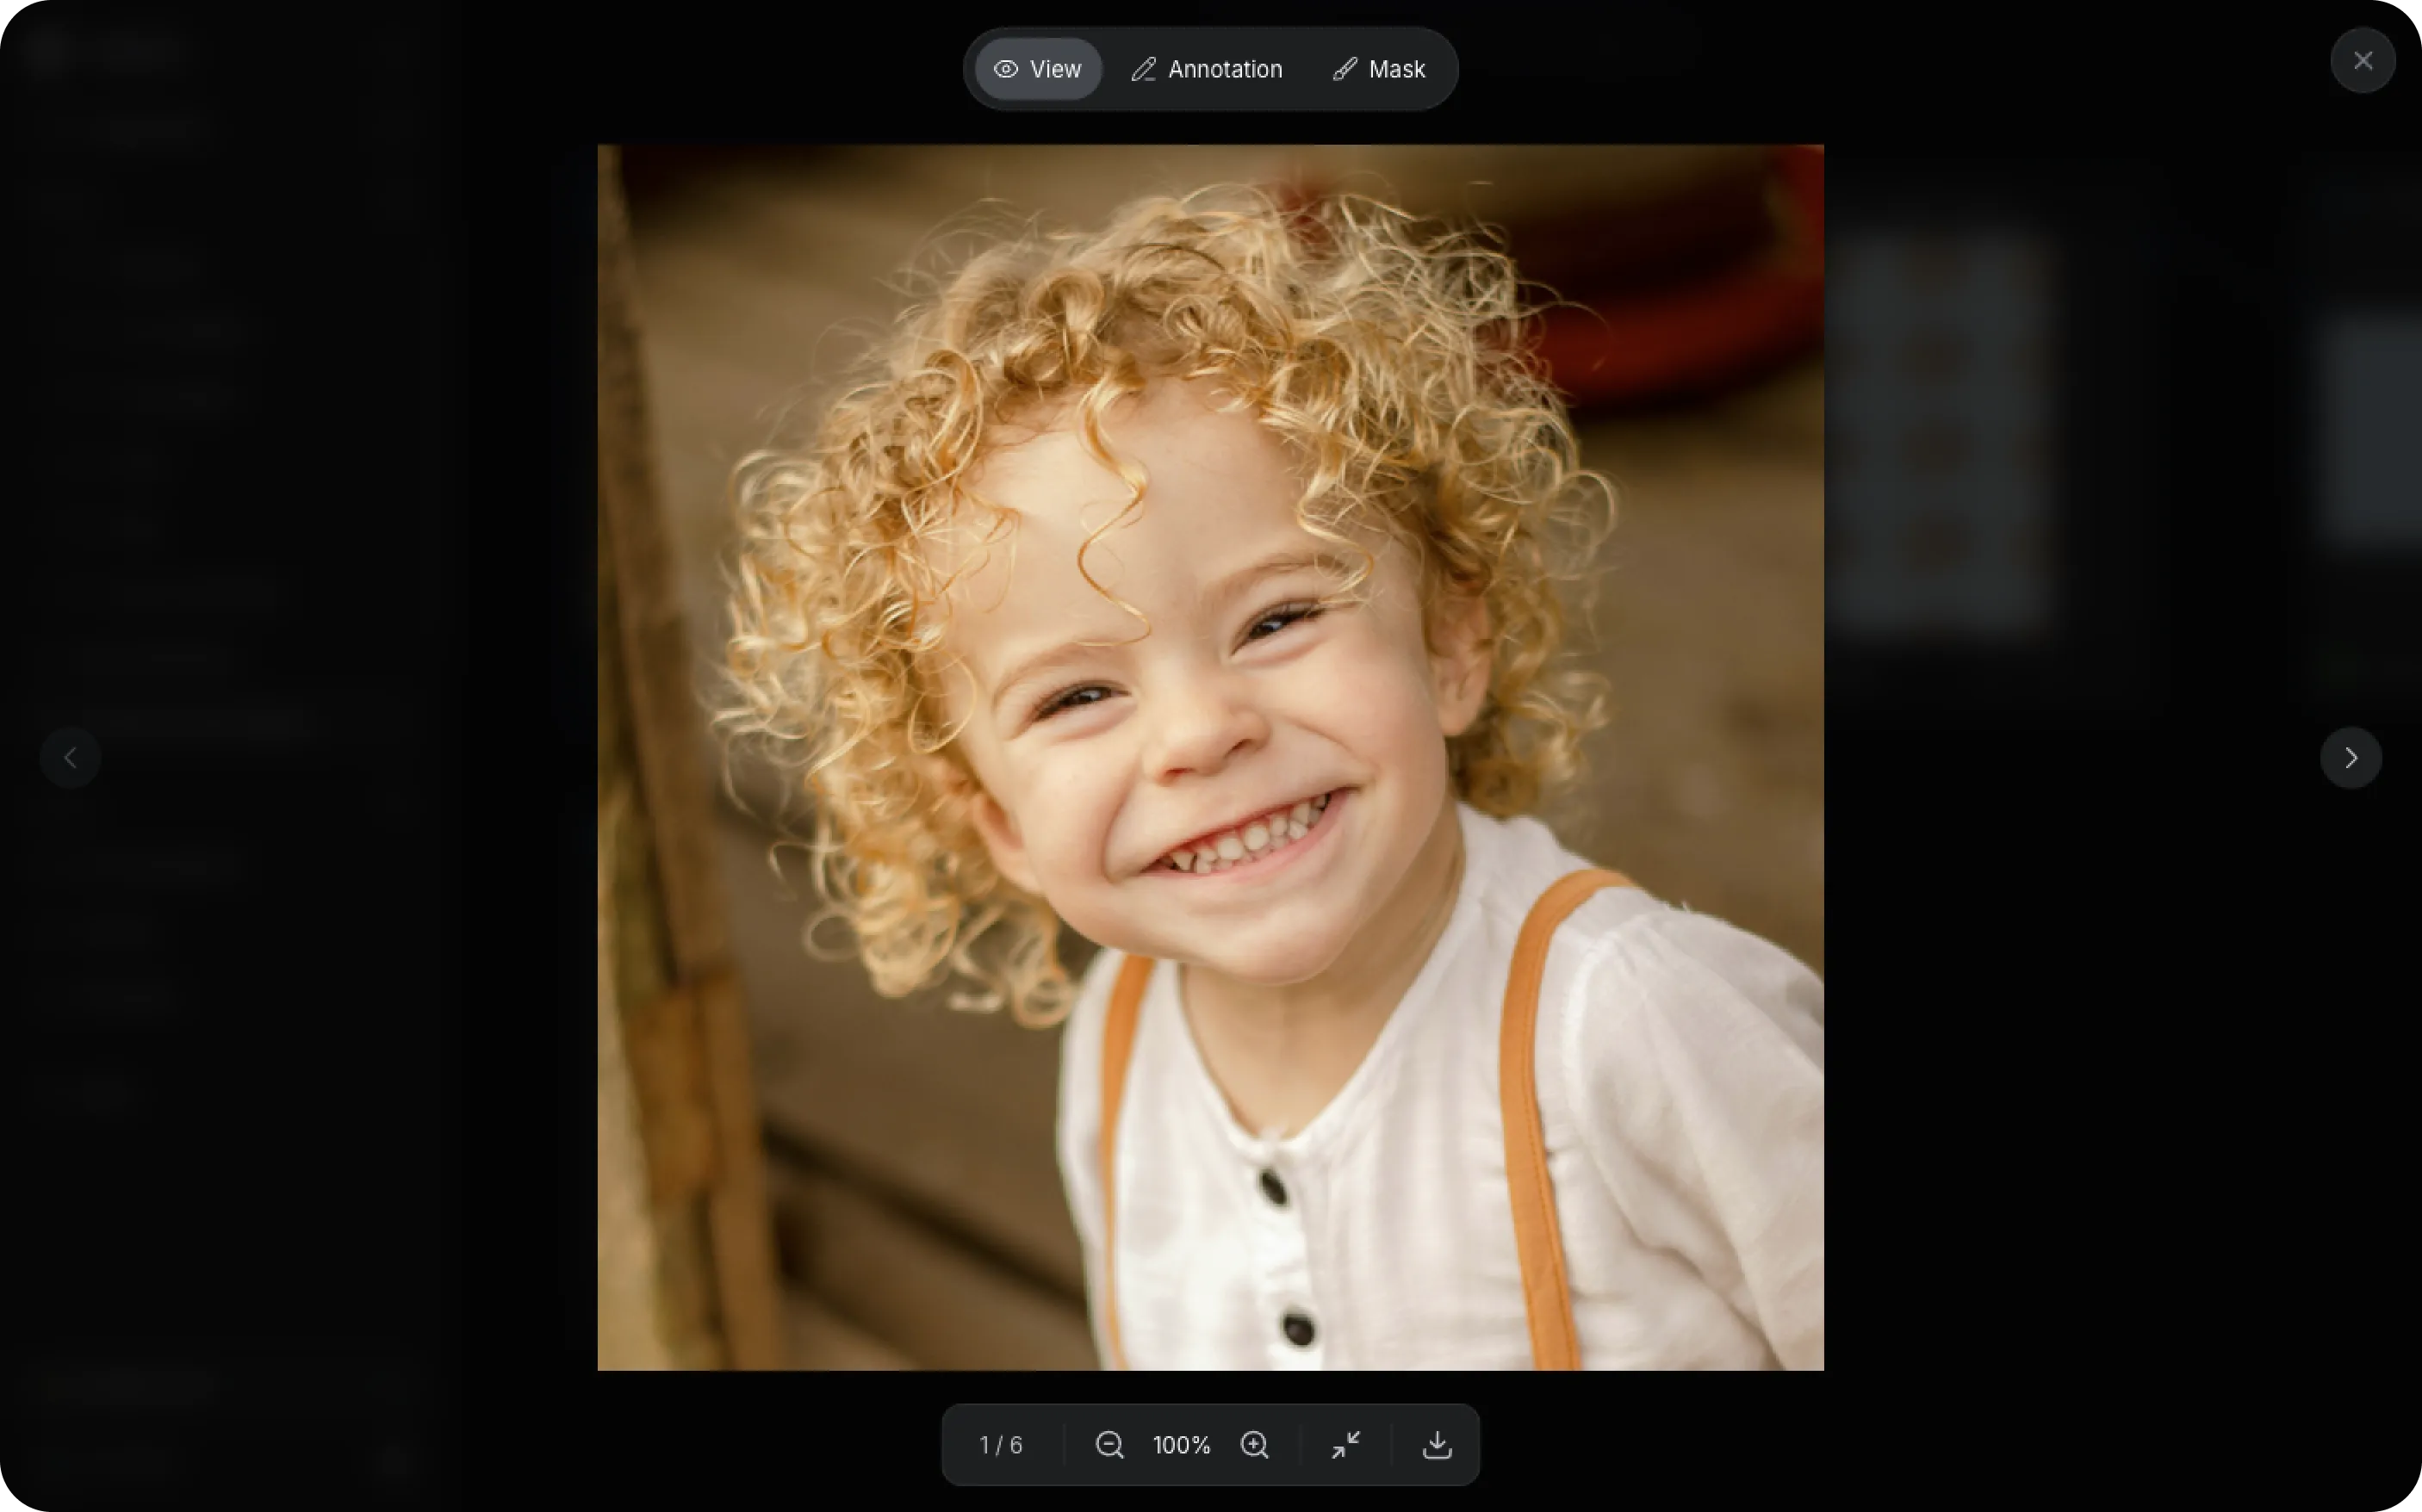
In this mode, you can:
- Preview the image in full size
- Zoom in or out
- Switch between multiple images
- Download the image
Use View Mode when checking image quality or reviewing generated results.
Annotation Mode
Use Annotation mode to draw directly on an image.
This is useful when you want to:
- Highlight areas for editing
- Add visual instructions
- Mark important regions
- Provide references for image generation
Simply draw on the image to indicate the changes or areas you want to focus on.
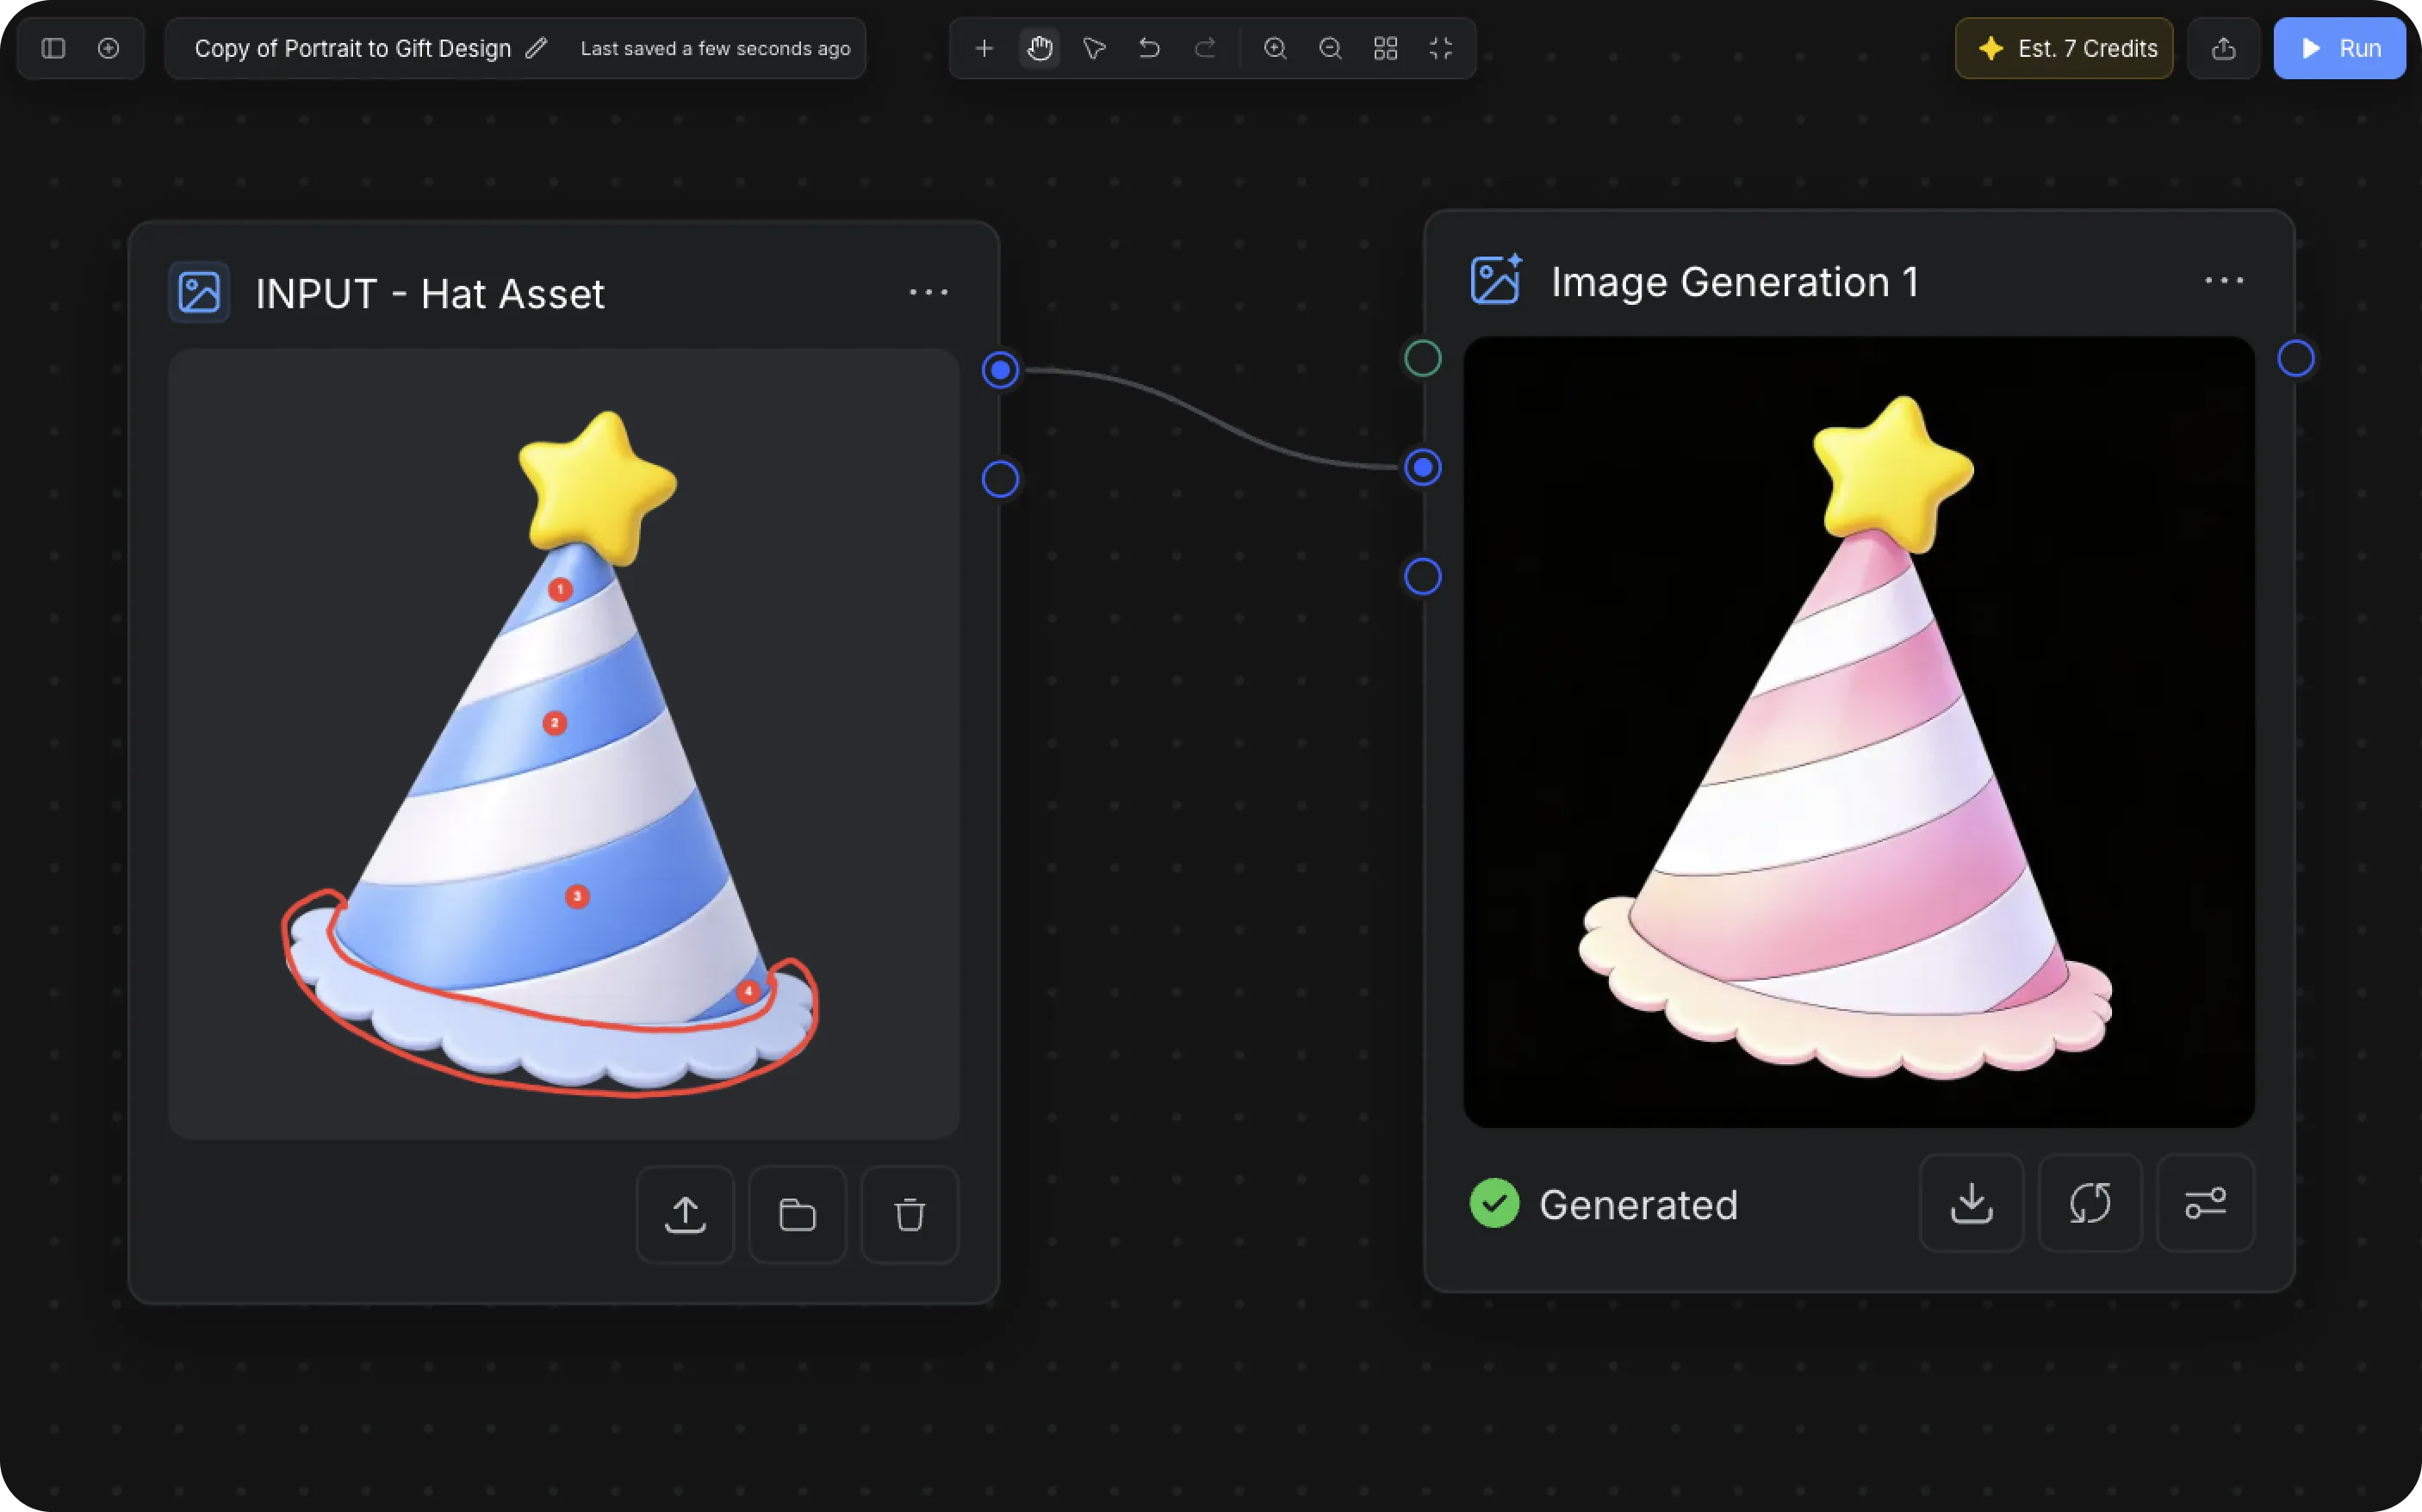
In this example, the blue stripes (1, 2, 3) and the bottom edge (4) of the party hat are annotated for editing.
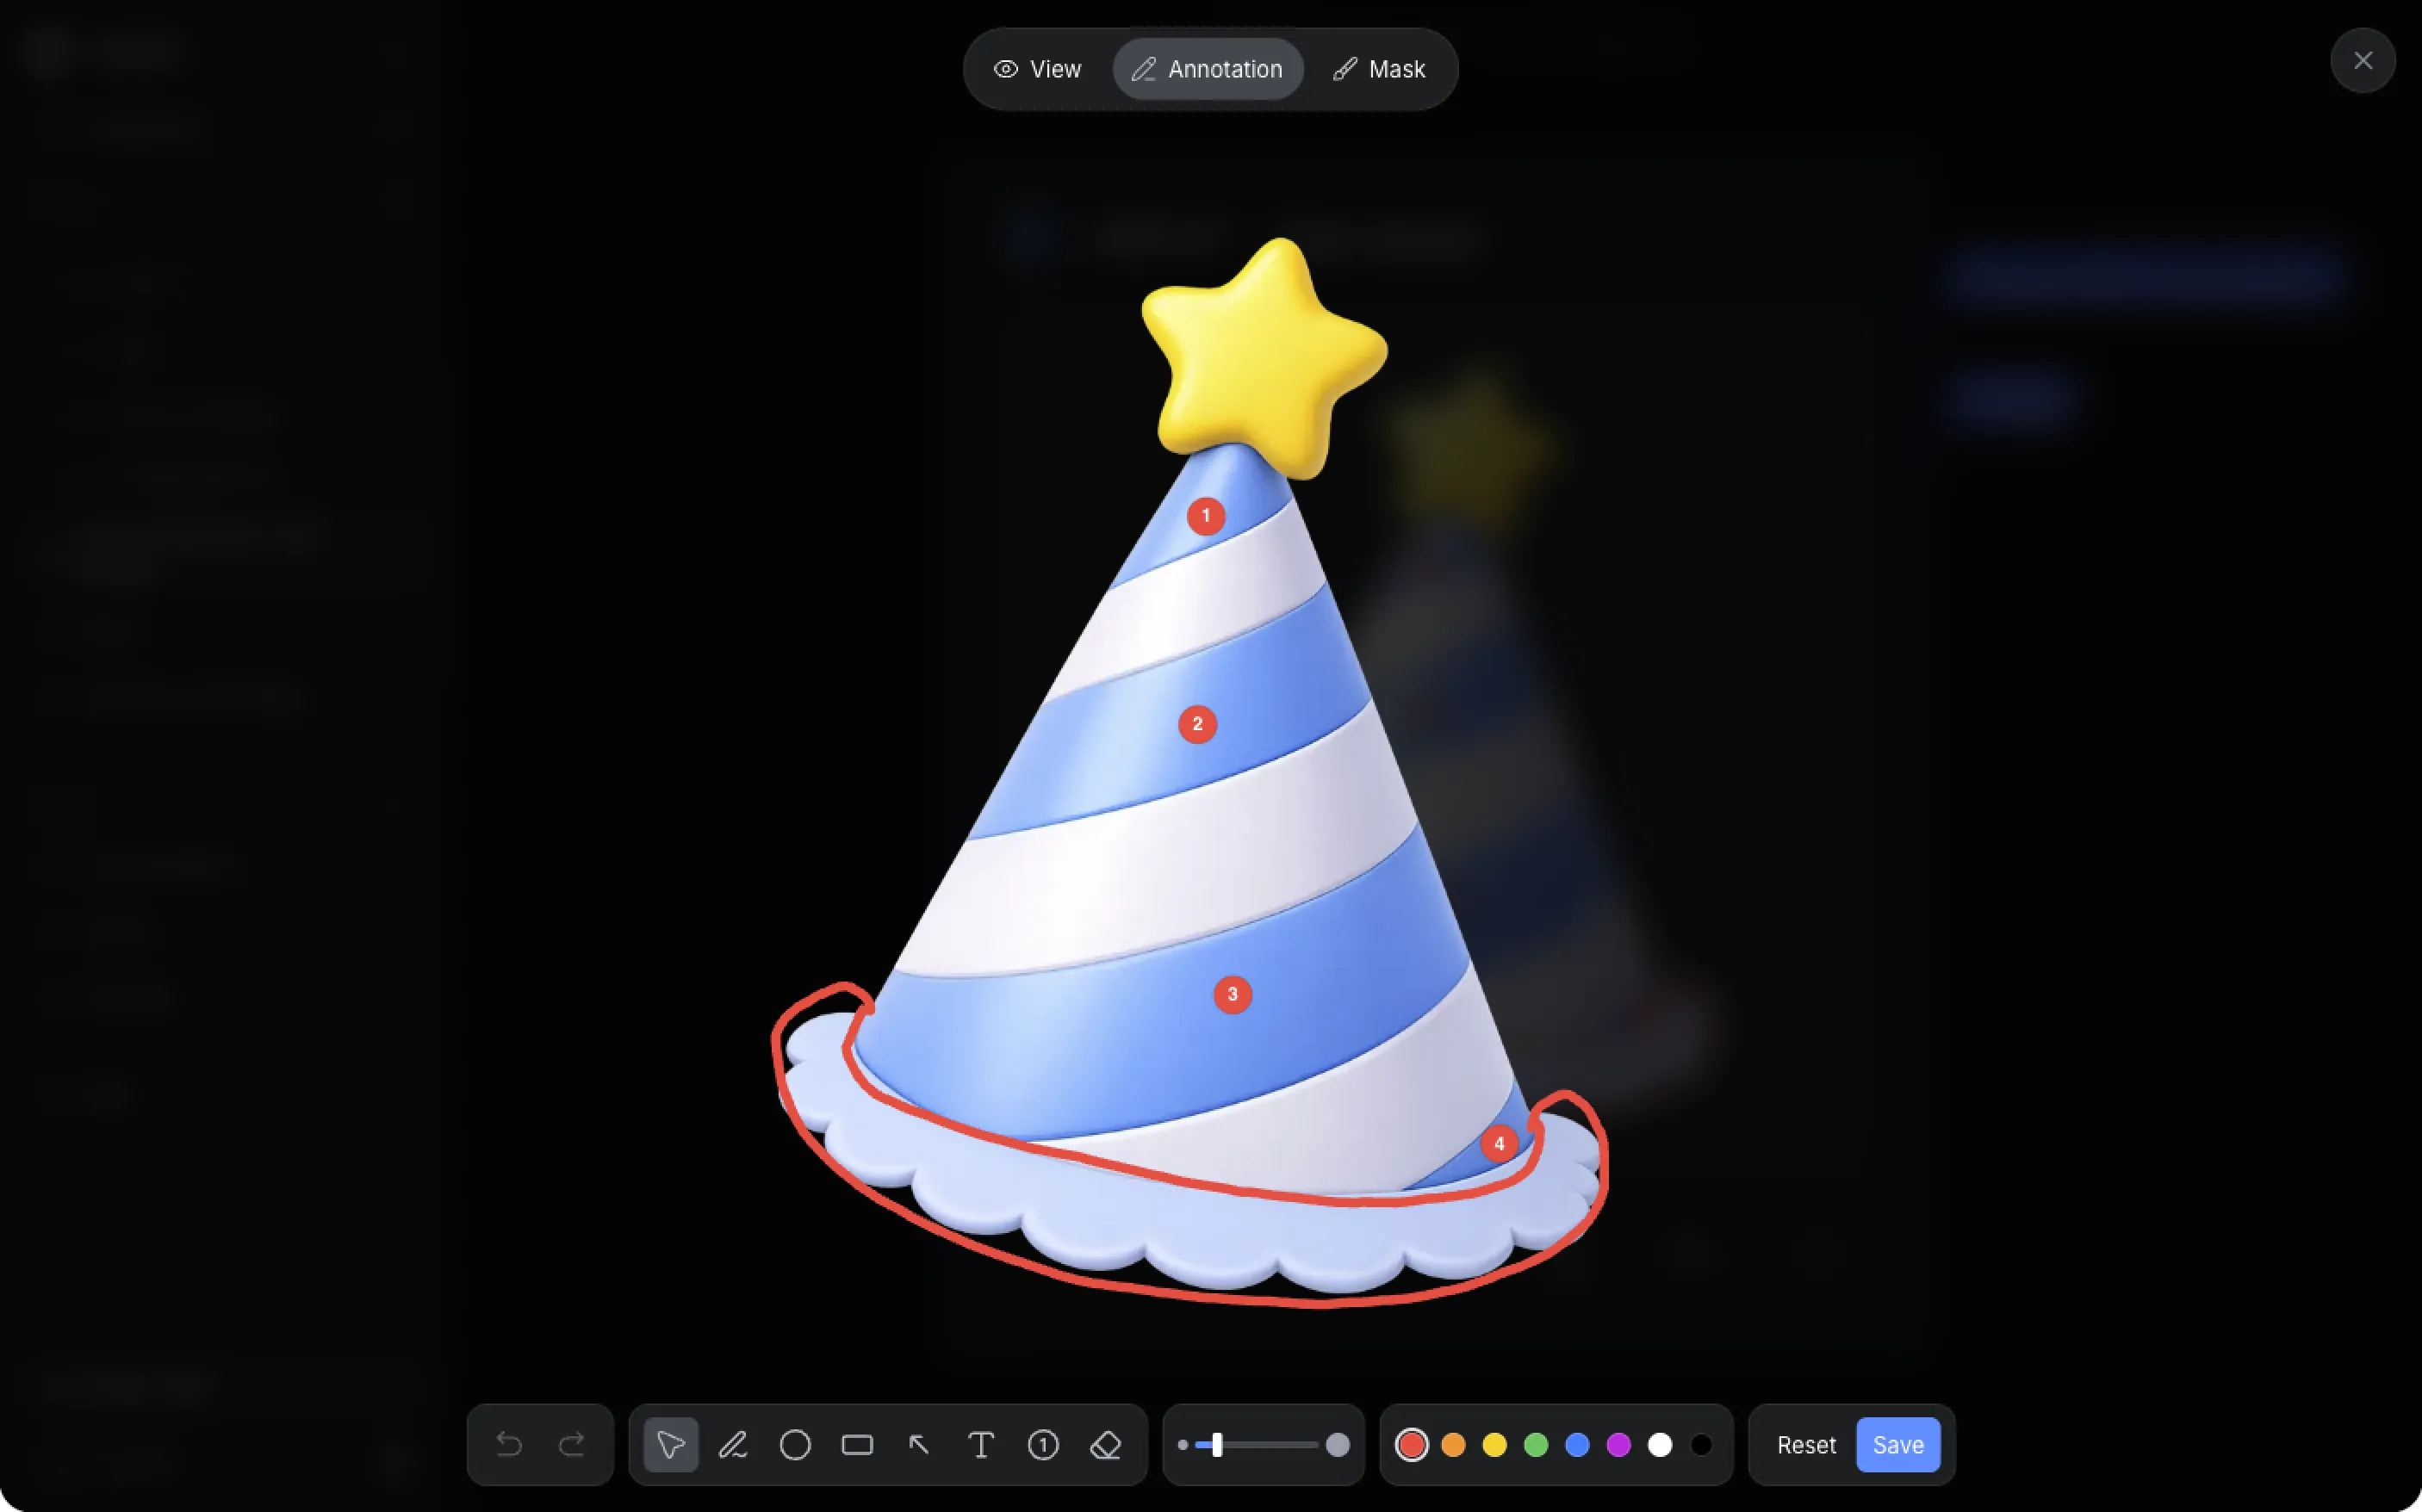
This allows AI to modify only the selected regions while preserving the original structure, style, and untouched areas of the image.
Mask Mode
Use Mask mode to select specific parts of an image.
Masking helps AI understand:
- Which areas to edit
- Which parts to preserve
- Where modifications should happen
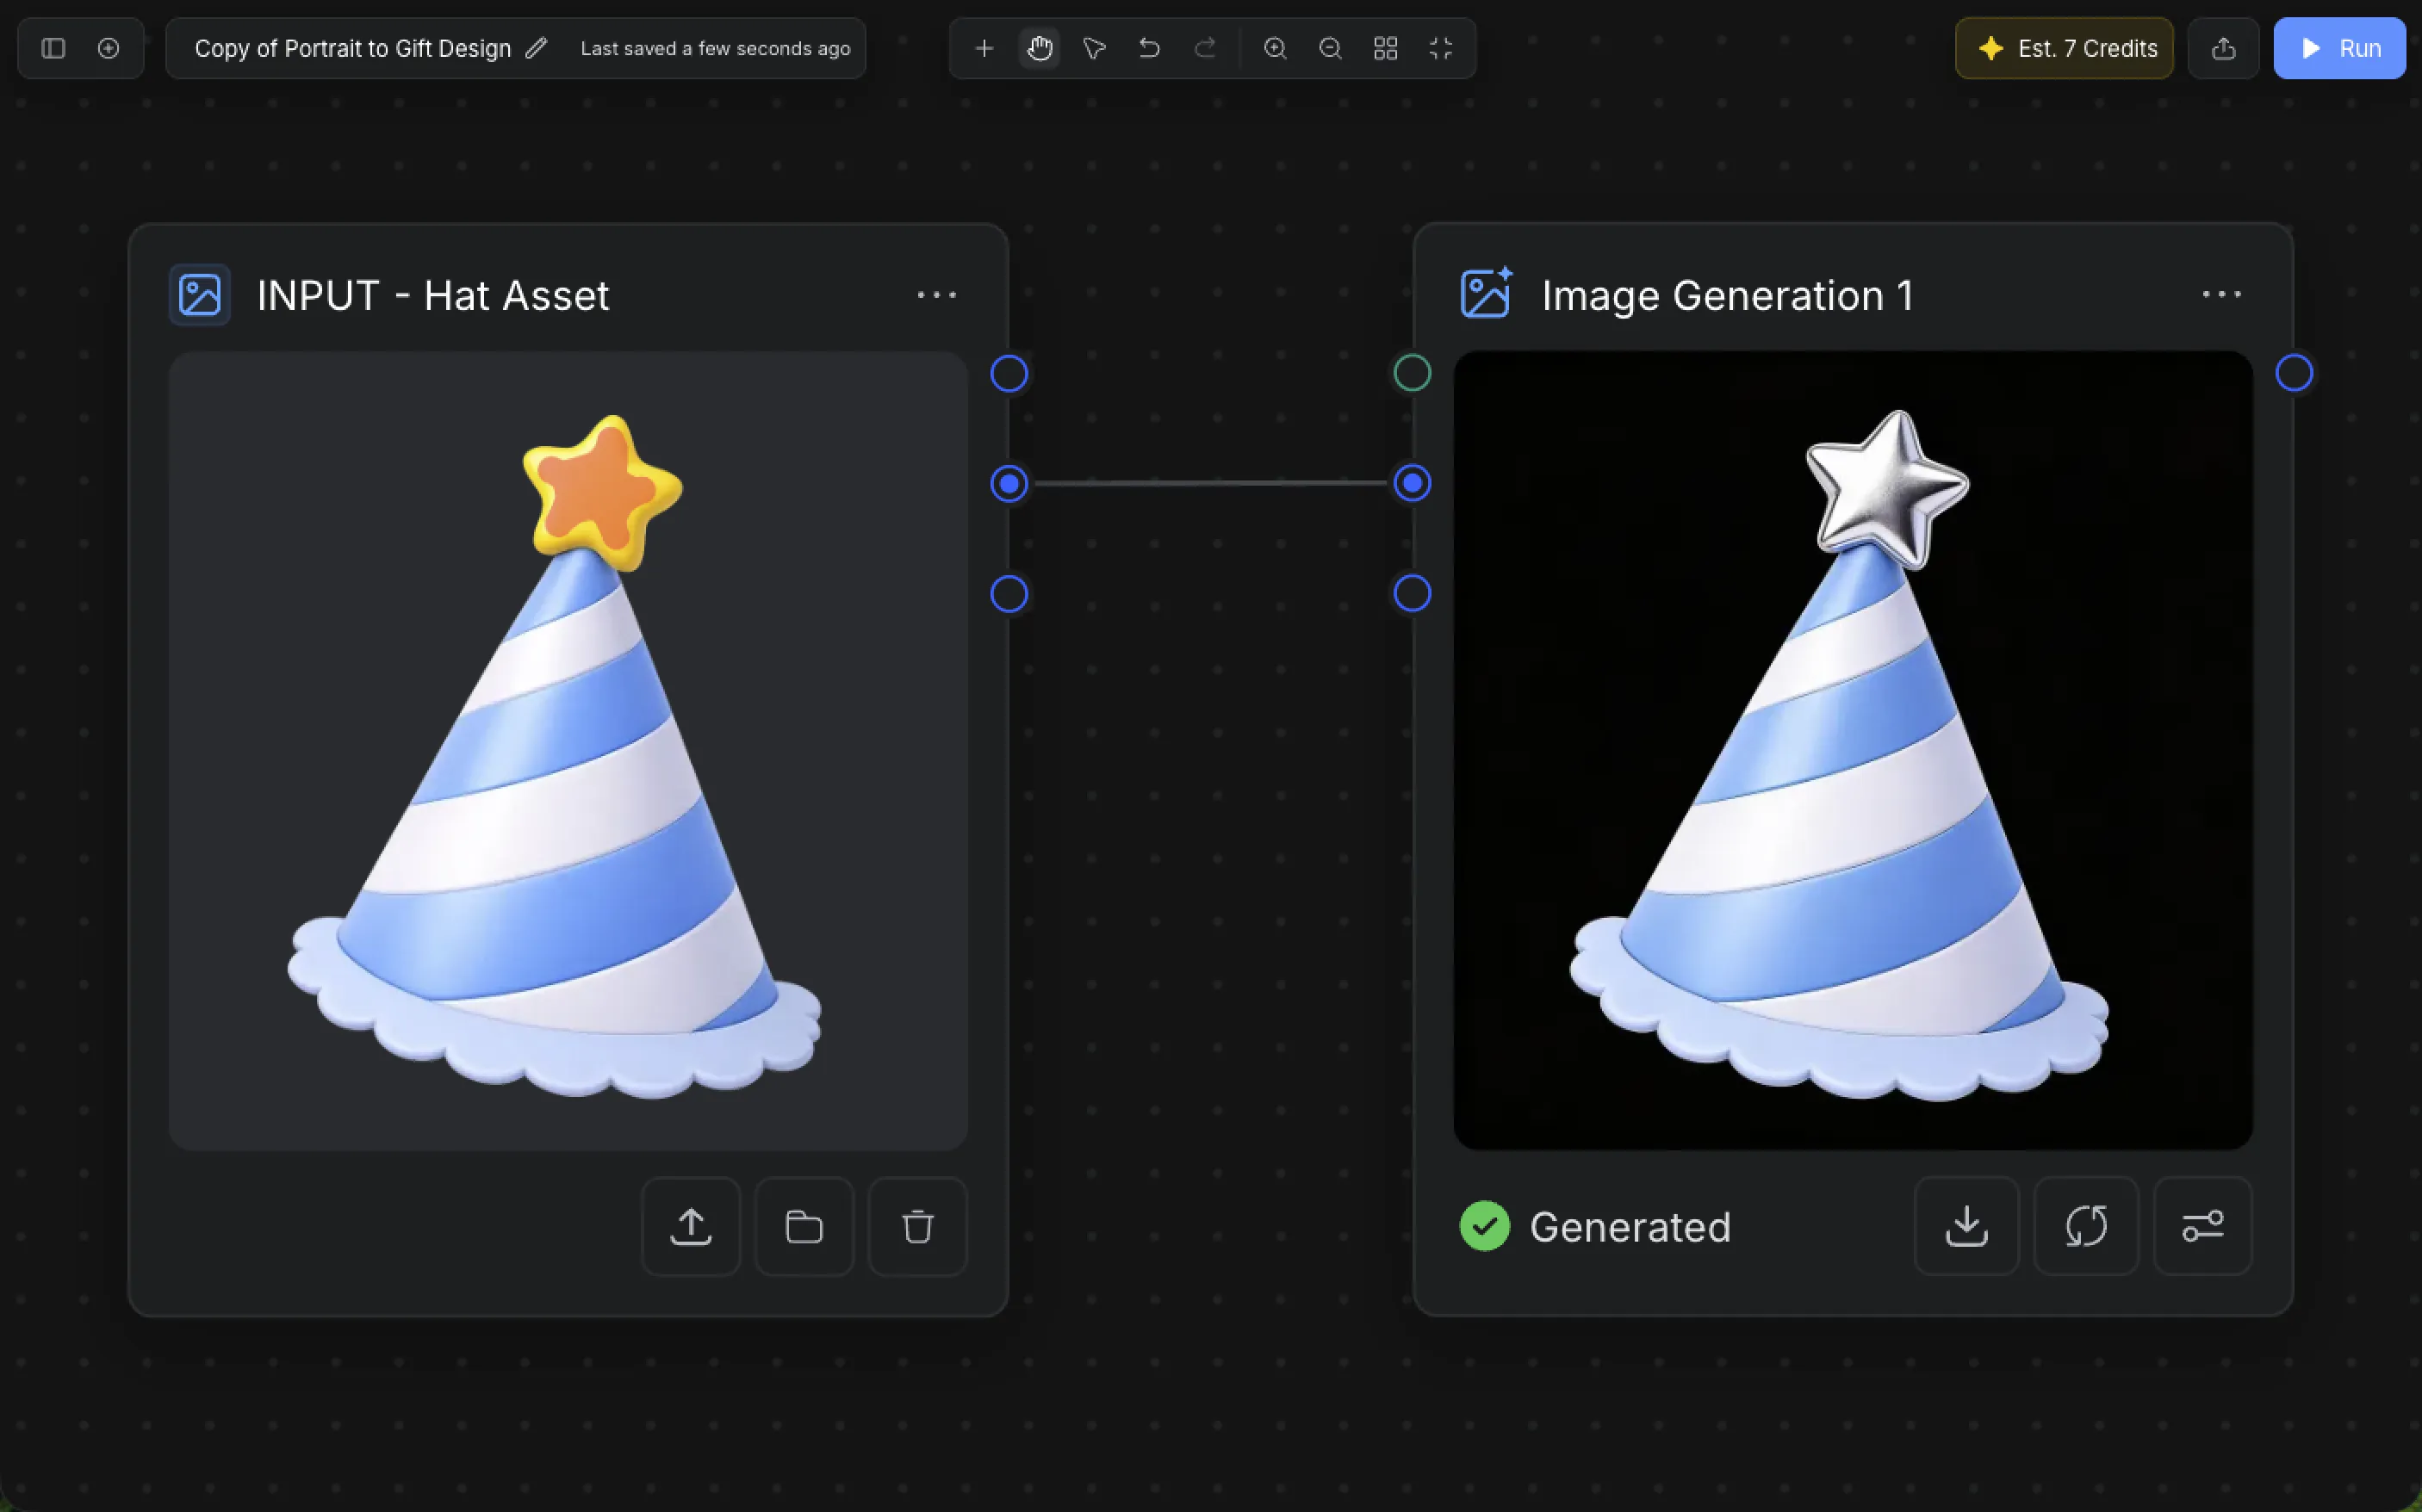
In this example, only the star on top of the party hat is masked.
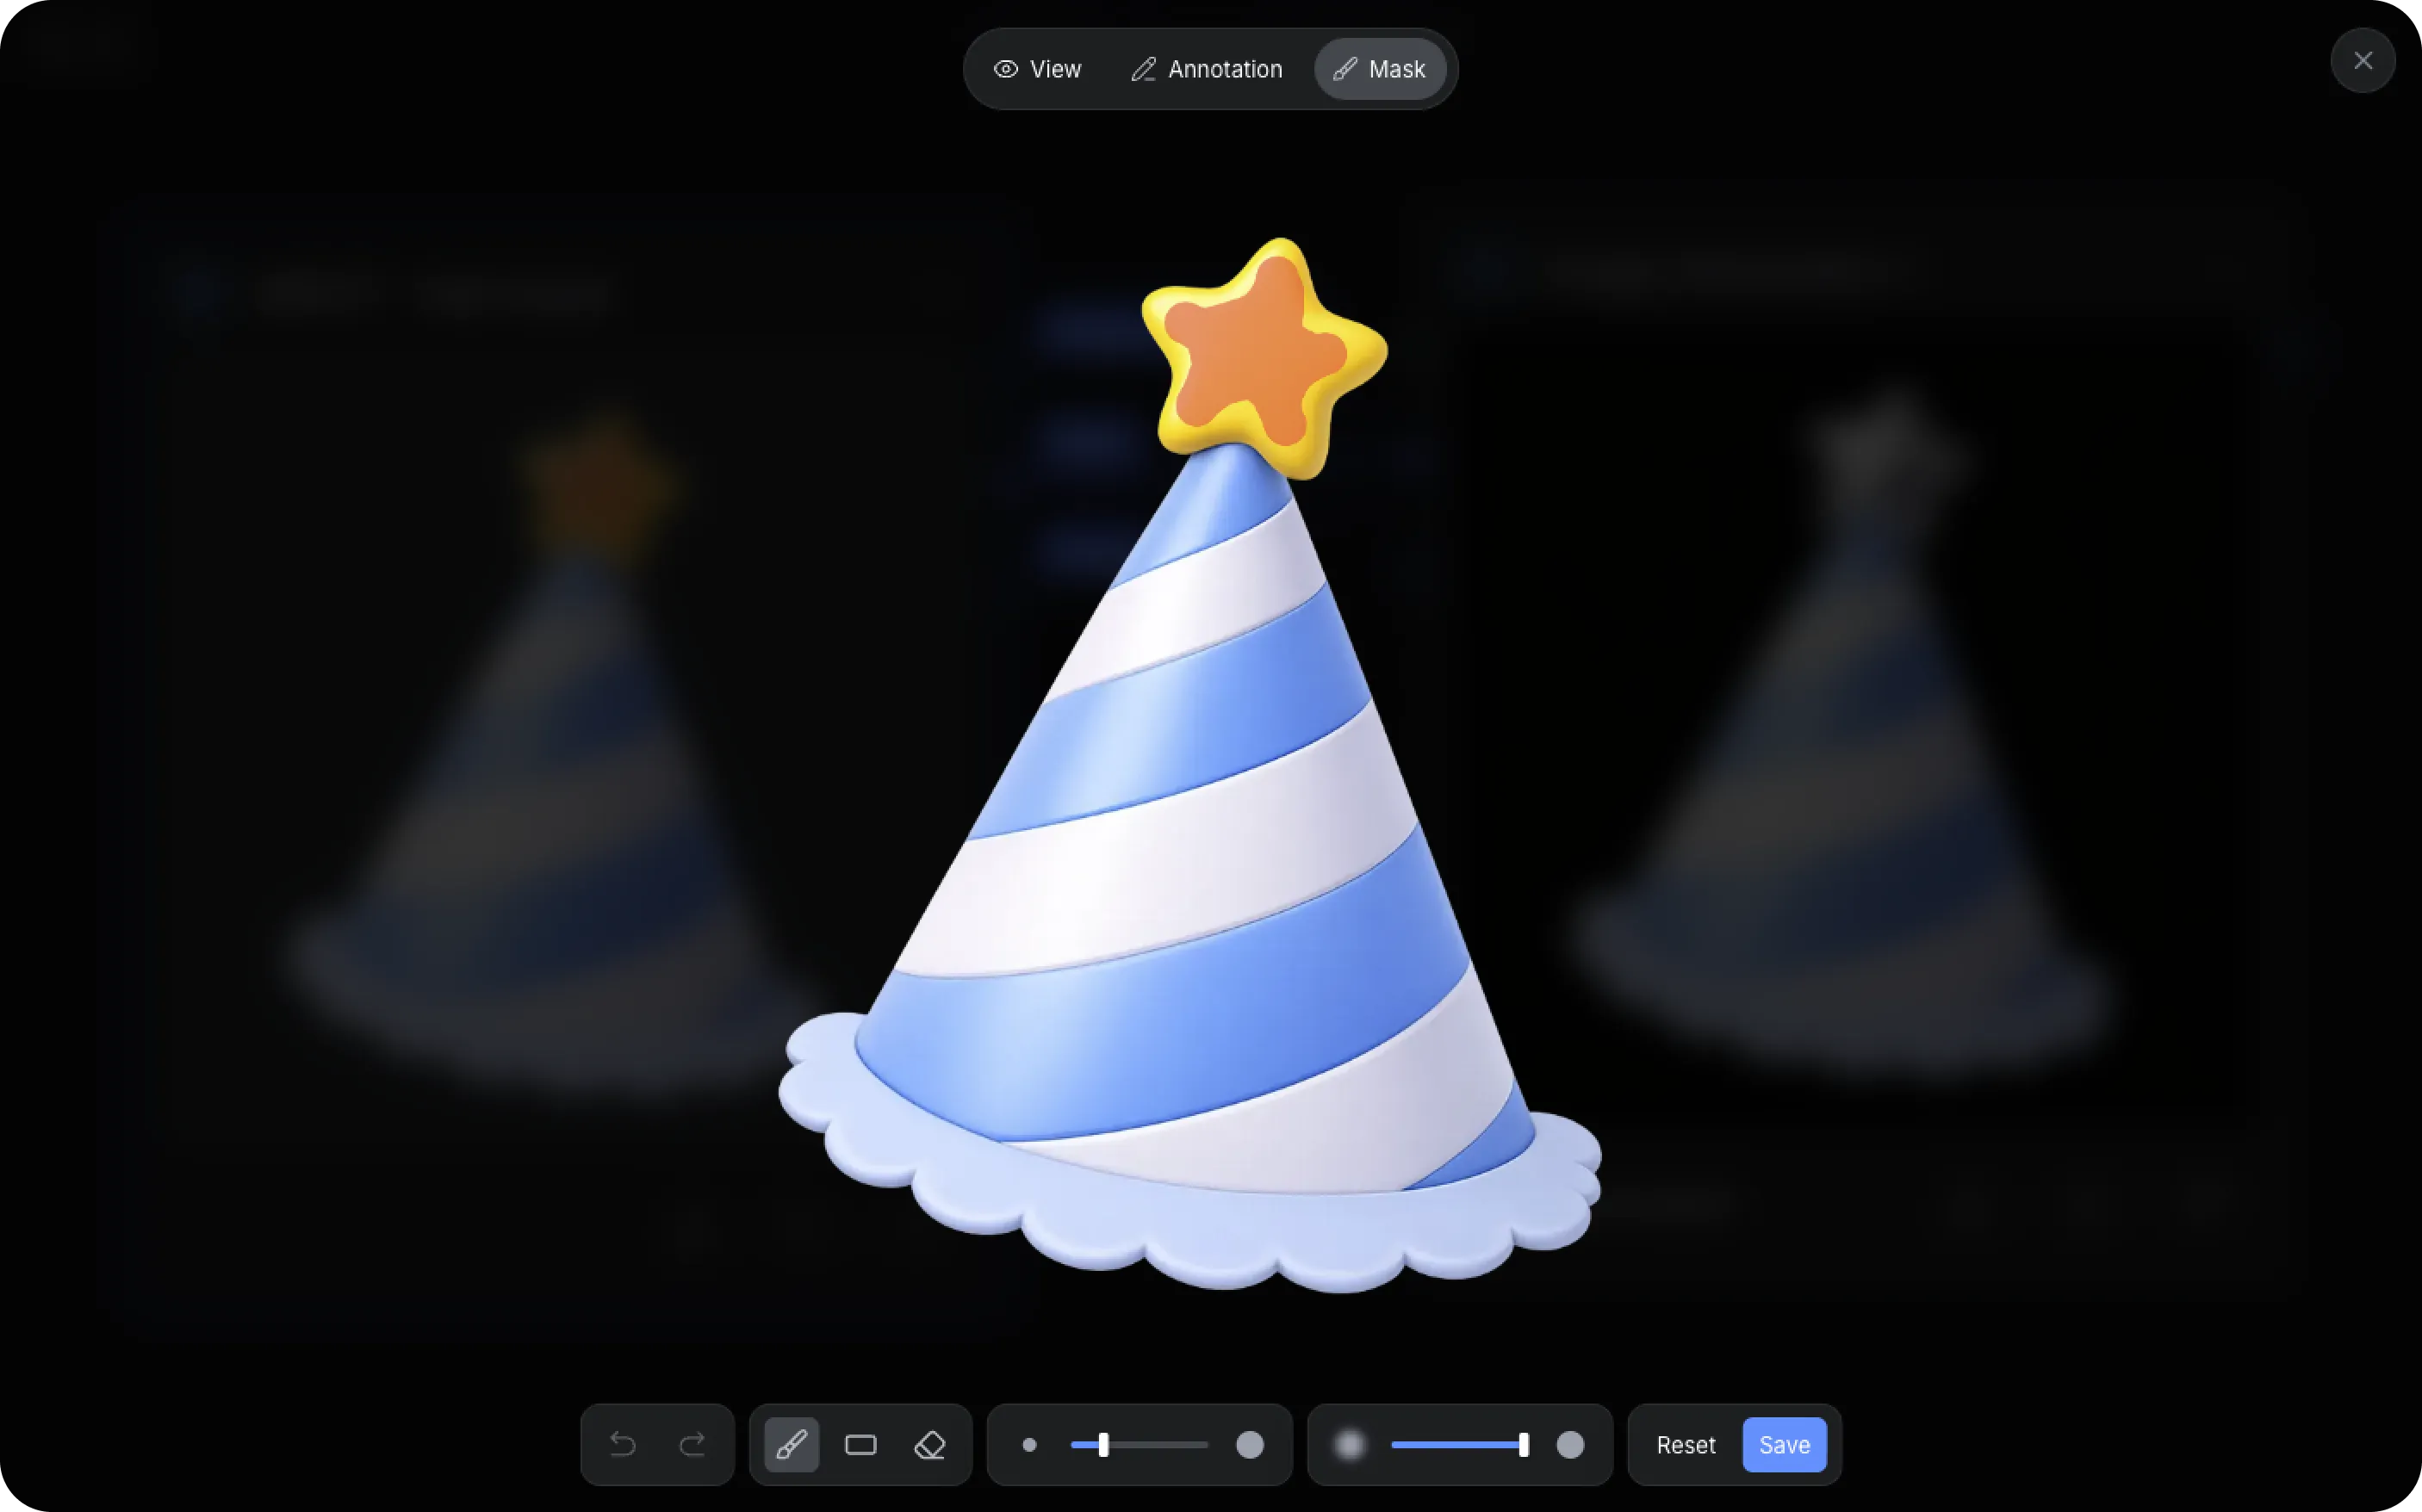
This ensures that only the selected region is edited while preserving the rest of the image.
This is especially useful for:
- Background replacement
- Object editing
- Character adjustments
- Localized image generation
Paint over the area you want to modify, then continue your workflow.