
The Storyboard node turns a written sequence into one image containing multiple connected panels. Use it to plan shots, block character movement, explore camera angles, or visualize how a scene progresses before creating final images or video.
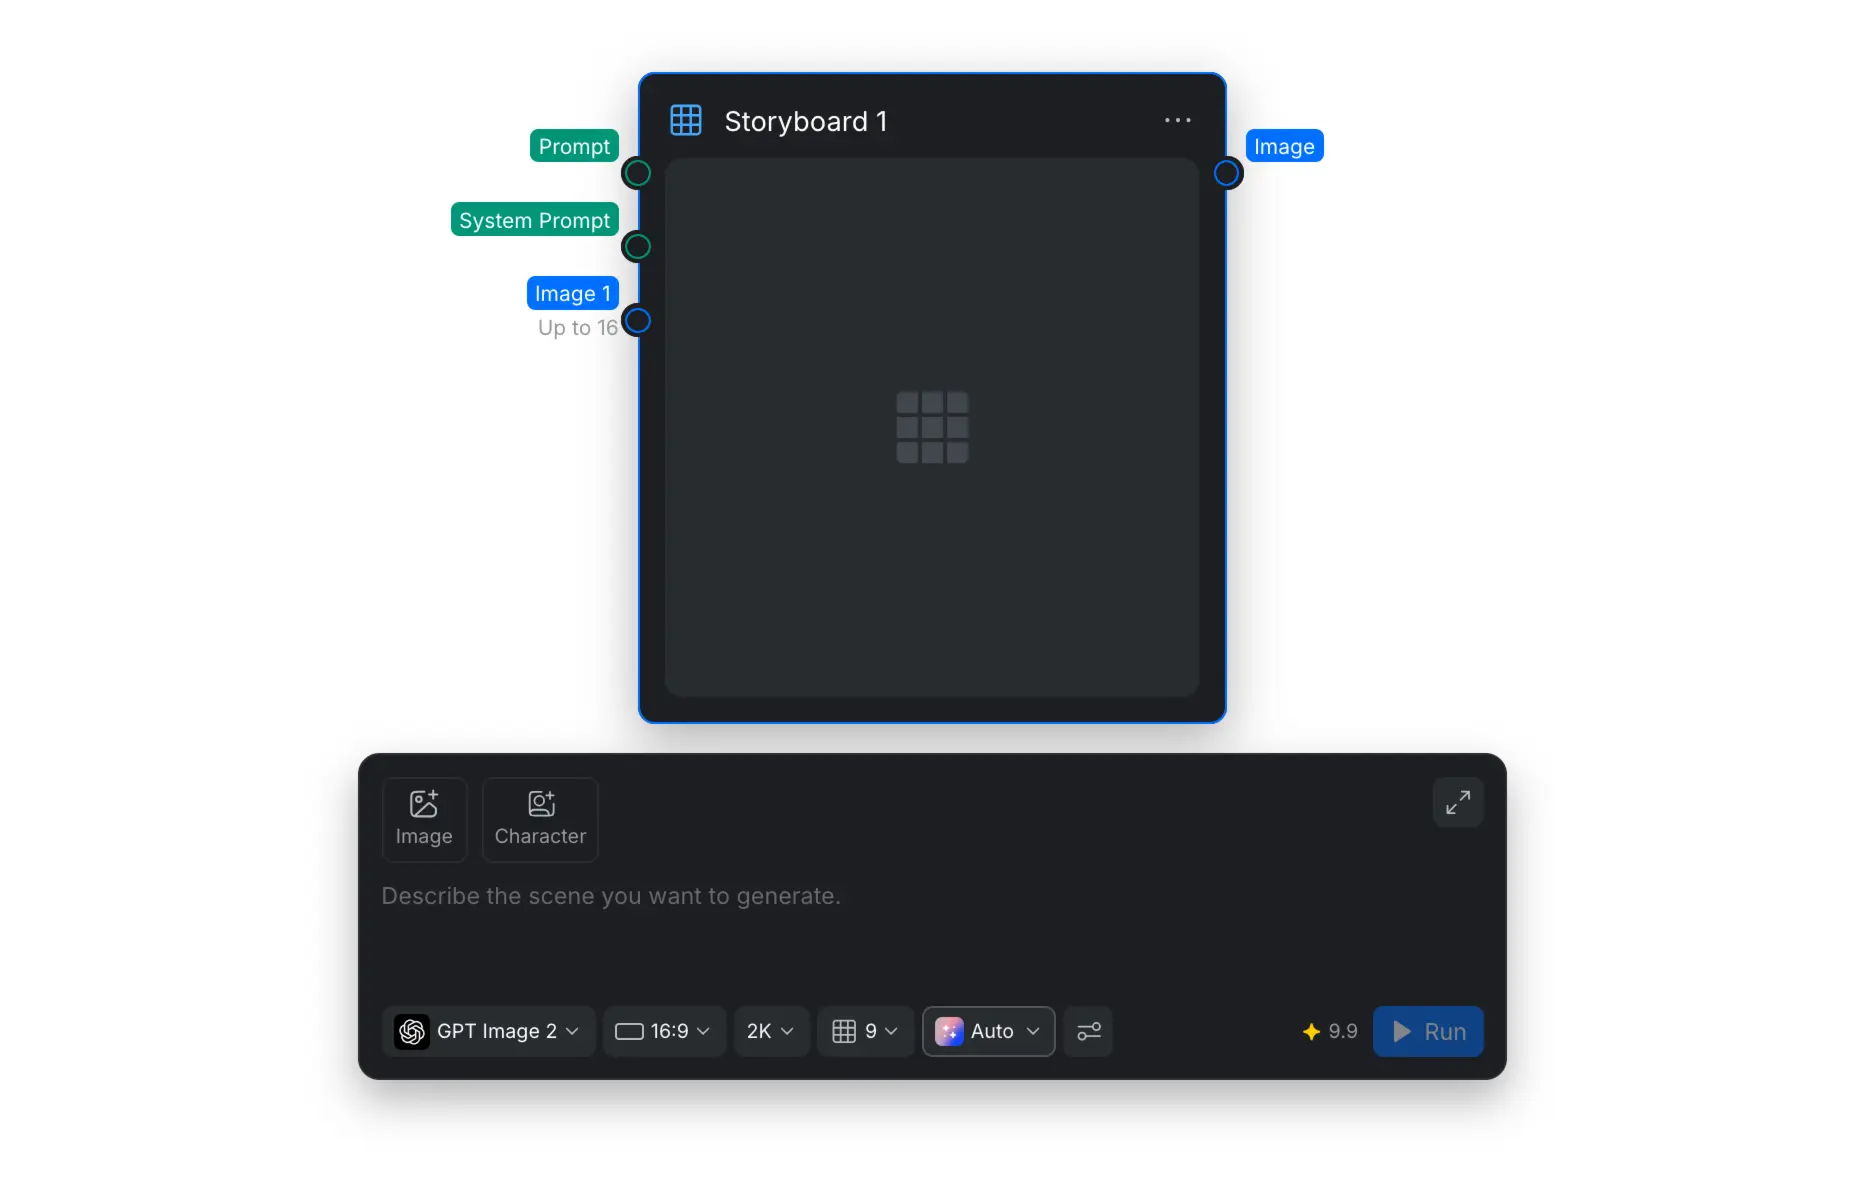
Unlike a standard image-generation task, a storyboard needs continuity. The people, objects, environment, screen direction, and action should remain understandable from one panel to the next. The node provides separate inputs for the story, reusable visual rules, and up to 16 reference images so you can guide those details independently.
1. Understand the Node Inputs
The Storyboard node has three input types and one image output:
| Input or output | What it does |
|---|---|
| Prompt | Describes the story, action, shot order, and important scene details for this generation. |
| System Prompt | Defines reusable instructions for how the storyboard should be interpreted and presented. |
| Image | Accepts up to 16 character, location, prop, costume, or style references. |
| Image output | Returns the completed multi-panel storyboard as a single image that can be previewed, downloaded, or connected to another node. |
2. Configure Storyboard Settings
The controls at the bottom of the Node Panel determine the model, canvas, panel grid, visual style, and generation behavior.
2.1 Choose an Image Model
Select the model from the first dropdown. Model availability and strengths can change, and some models may support different combinations of settings. See Choose an Image Model for the current model list and best-use recommendations, and Model Specifications for each model's supported settings and limits.
2.2 Set the Aspect Ratio
The aspect ratio controls the shape of the complete storyboard canvas, not each panel independently. Available options include:
| Ratio group | Best for |
|---|---|
| 16:9 or 21:9 | Film, widescreen video, and horizontal shot planning |
| 9:16 | Vertical video, Shorts, Reels, and mobile-first stories |
| 1:1 | Compact boards and square presentations |
| 3:2, 4:3, or 5:4 | Traditional boards, presentations, and balanced landscape layouts |
| 2:3, 3:4, or 4:5 | Portrait compositions and social content |
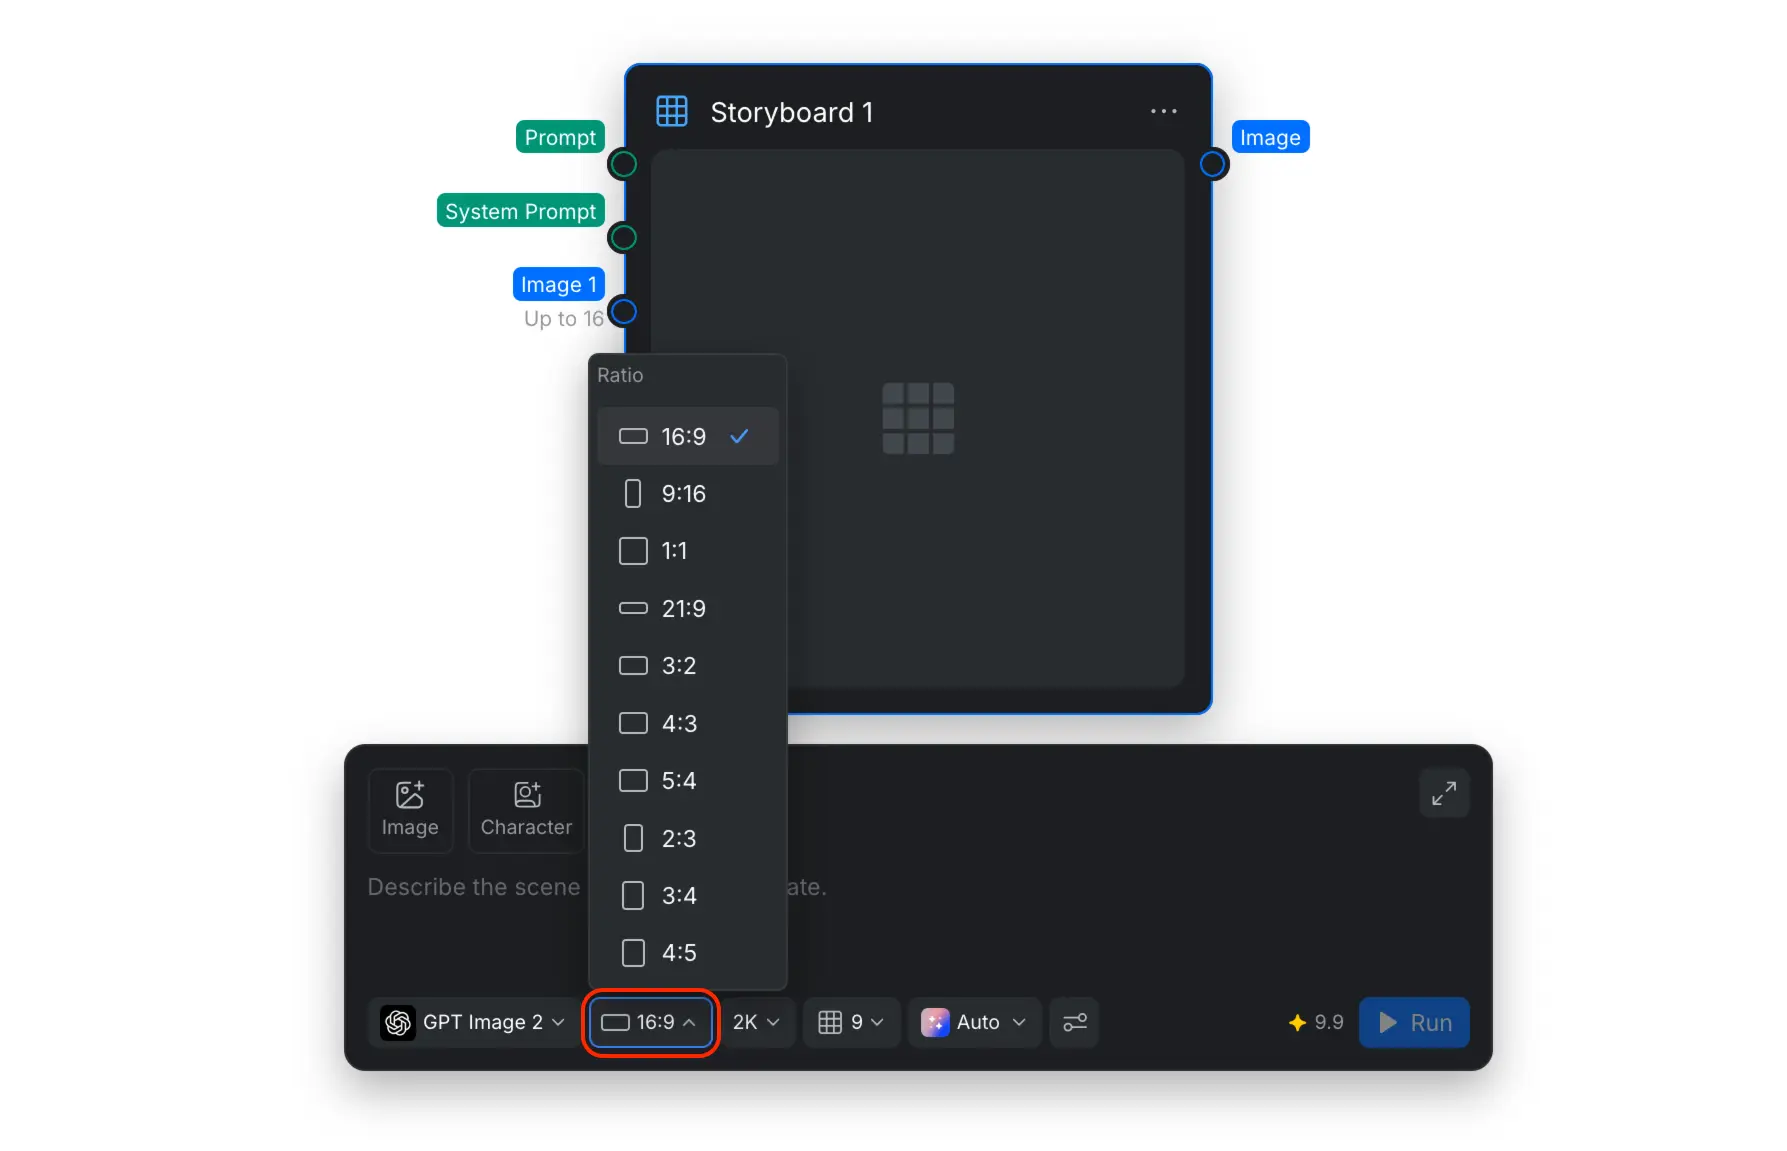
Choose a ratio that matches the intended final output. This makes framing decisions in the storyboard more useful later.
2.3 Set the Resolution
Choose 1K, 2K, or 4K for the complete storyboard image. Higher resolution gives the full canvas more pixels, which can make text, arrows, and individual frames easier to inspect—especially when the storyboard contains many panels.
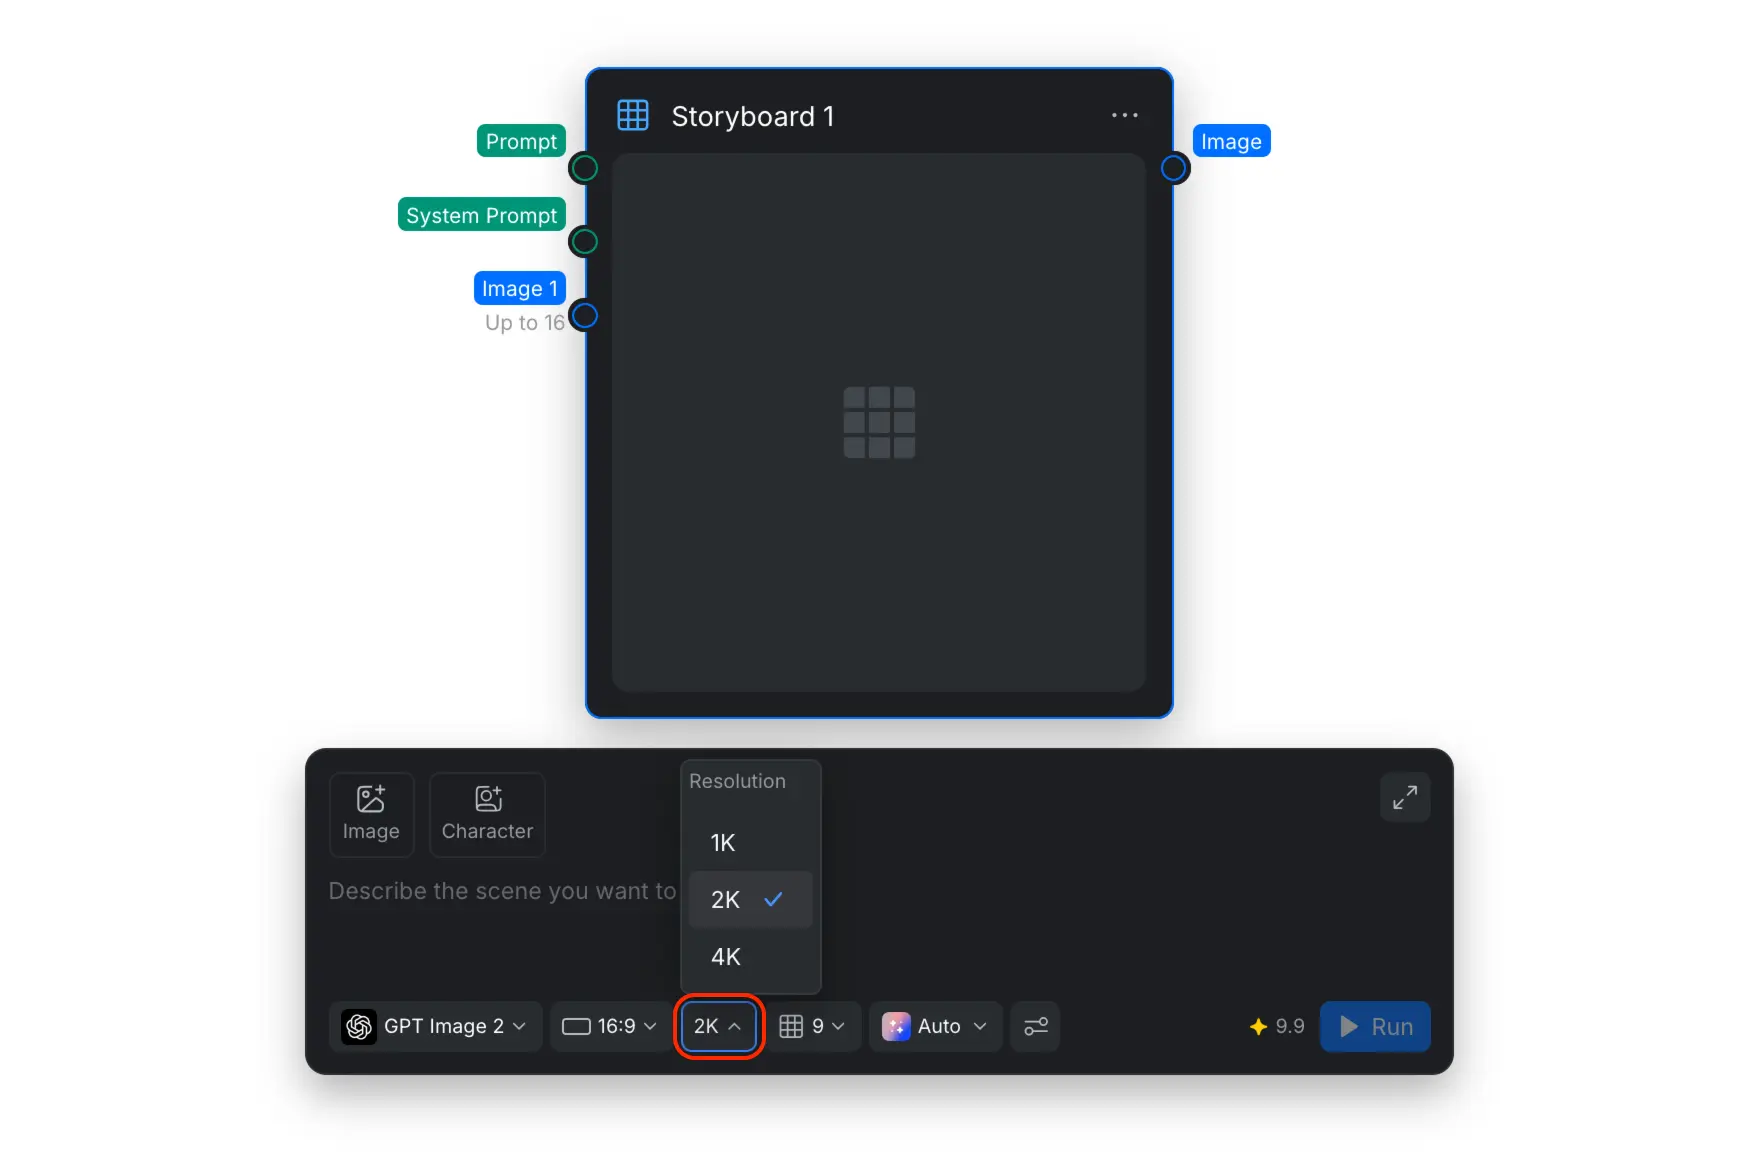
Resolution does not change the number of panels. For a quick draft, start with 1K or 2K. Use 4K when you need a larger board for review, presentation, or closer inspection. For more detail about this shared image setting, see the Choose a Resolution.
2.4 Choose the Panel Count
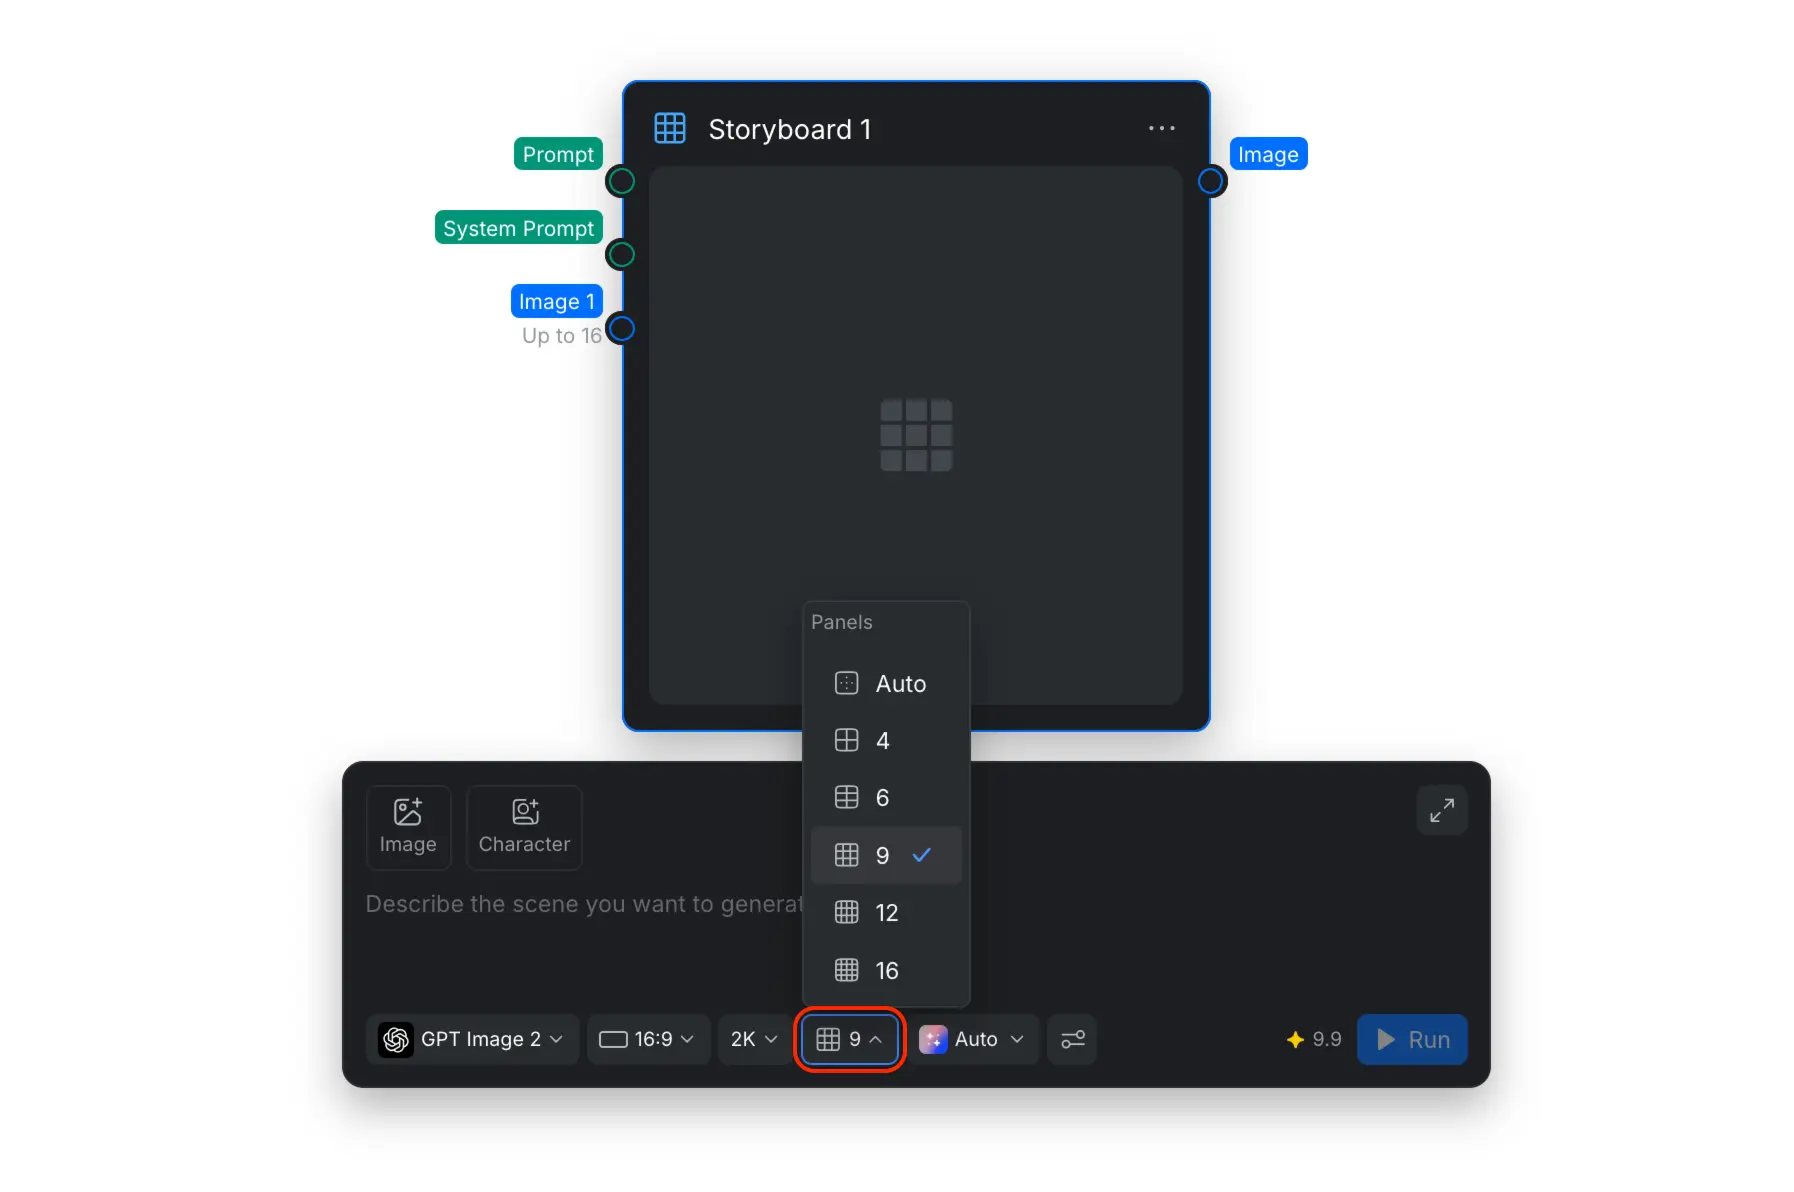
Select Auto, 4, 6, 9, 12, or 16 panels. Each option creates a different grid inside one storyboard image.
| Panel setting | When to use it |
|---|---|
| Auto | Let CawCut choose a panel count based on the prompt. |
| 4 | Short actions, simple concepts, or larger individual frames. |
| 6 | A concise scene with a clear beginning, middle, and end. |
| 9 | A balanced sequence with room for reactions and camera changes. |
| 12 | A longer scene or more detailed action progression. |
| 16 | Dense shot planning where many beats must appear together. |
More panels do not automatically create a better storyboard. If each frame needs facial detail, readable labels, or complex staging, use fewer panels or increase the resolution.
2.5 Choose a Storyboard Style
Open the Style menu and choose Auto, Outline, Clay, Sketch, Cinematic, Realistic, 3D, Anime, Comic, or Cyberpunk.
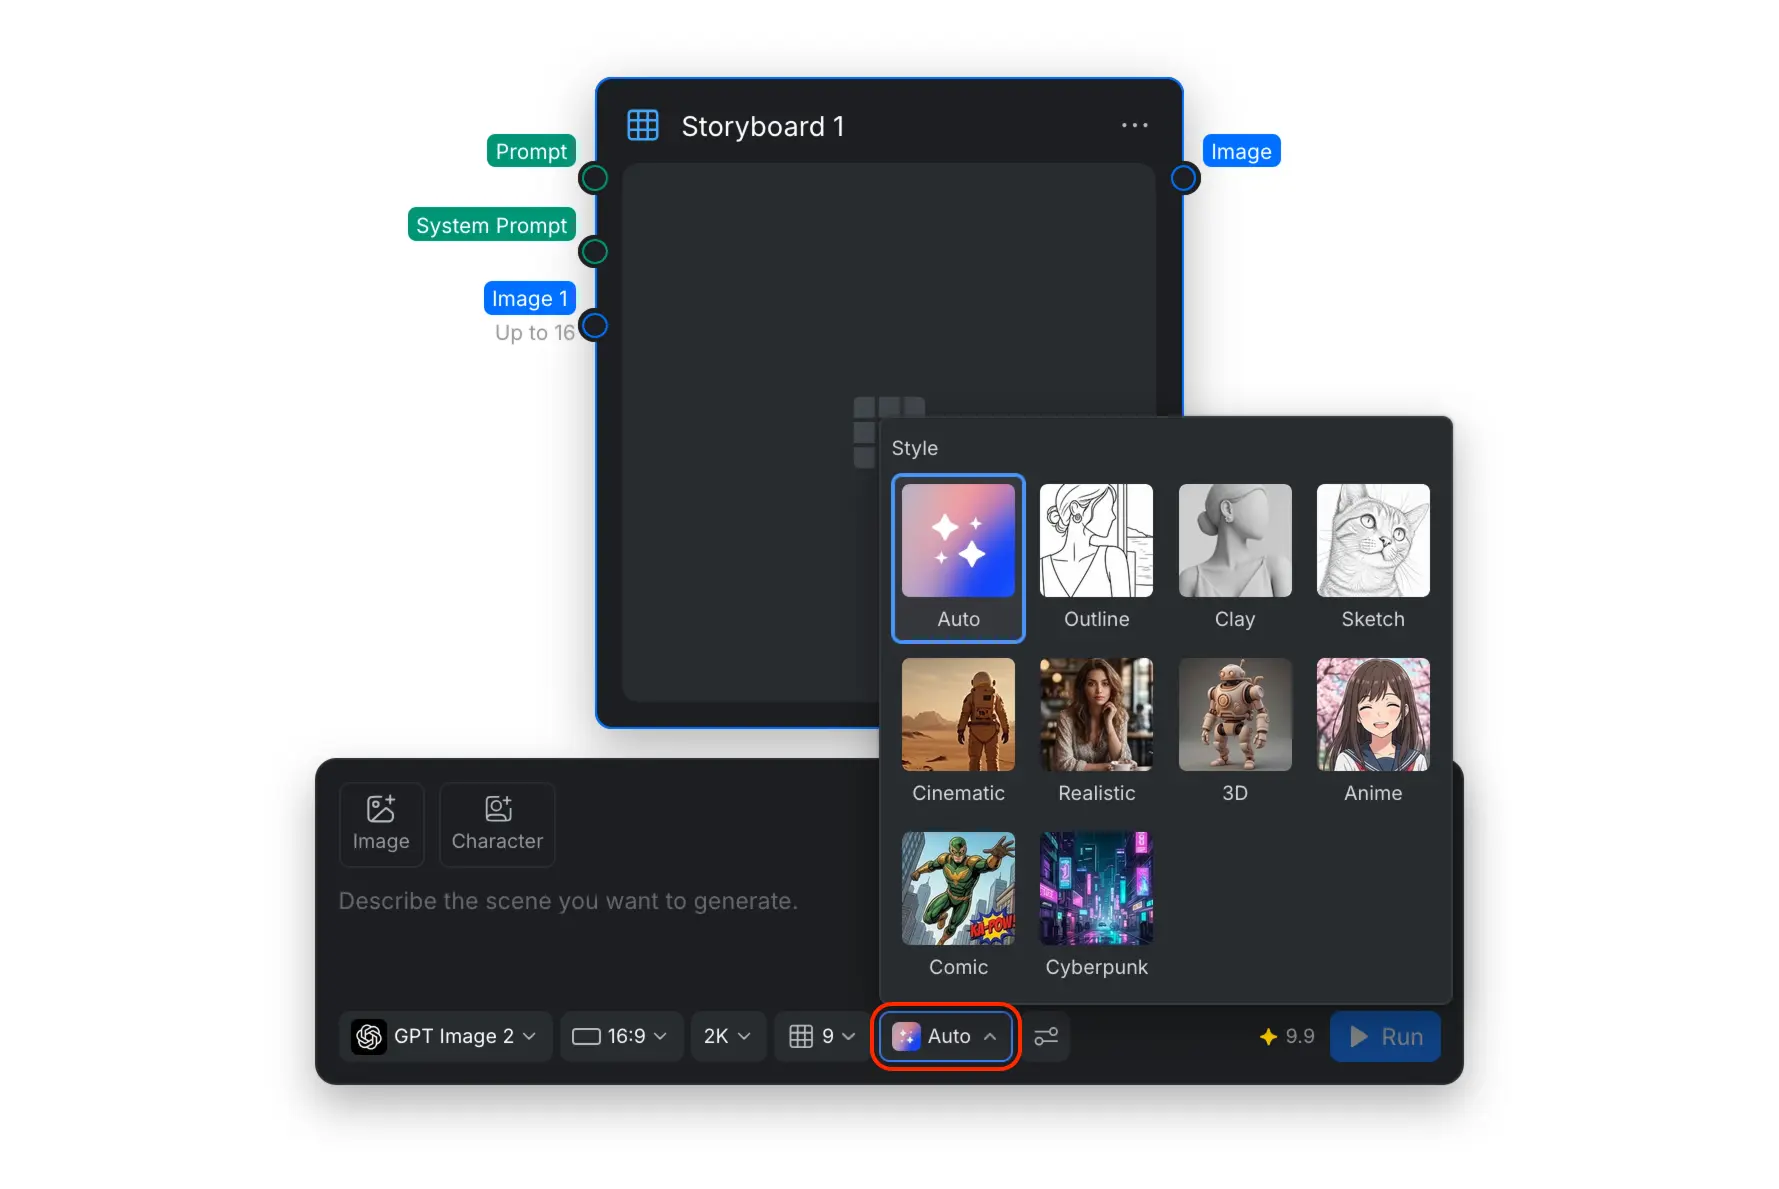
| Style | Best for |
|---|---|
| Auto | Letting CawCut select a treatment that fits the prompt. |
| Outline | Clean composition planning with minimal visual detail. |
| Clay | Studying blocking, depth, pose, and spatial relationships. |
| Sketch | Expressive previsualization with a hand-drawn feeling. |
| Cinematic | Film-like lighting, framing, mood, and dramatic presentation. |
| Realistic | Lifelike character, location, and product visualization. |
| 3D | Animation, game, and CG-style previsualization. |
| Anime | Japanese animation-inspired characters and framing. |
| Comic | Graphic linework, inked detail, and comic-book presentation. |
| Cyberpunk | Neon lighting, futuristic environments, and high-contrast sci-fi mood. |
The same scene can look very different across the nine manual presets:
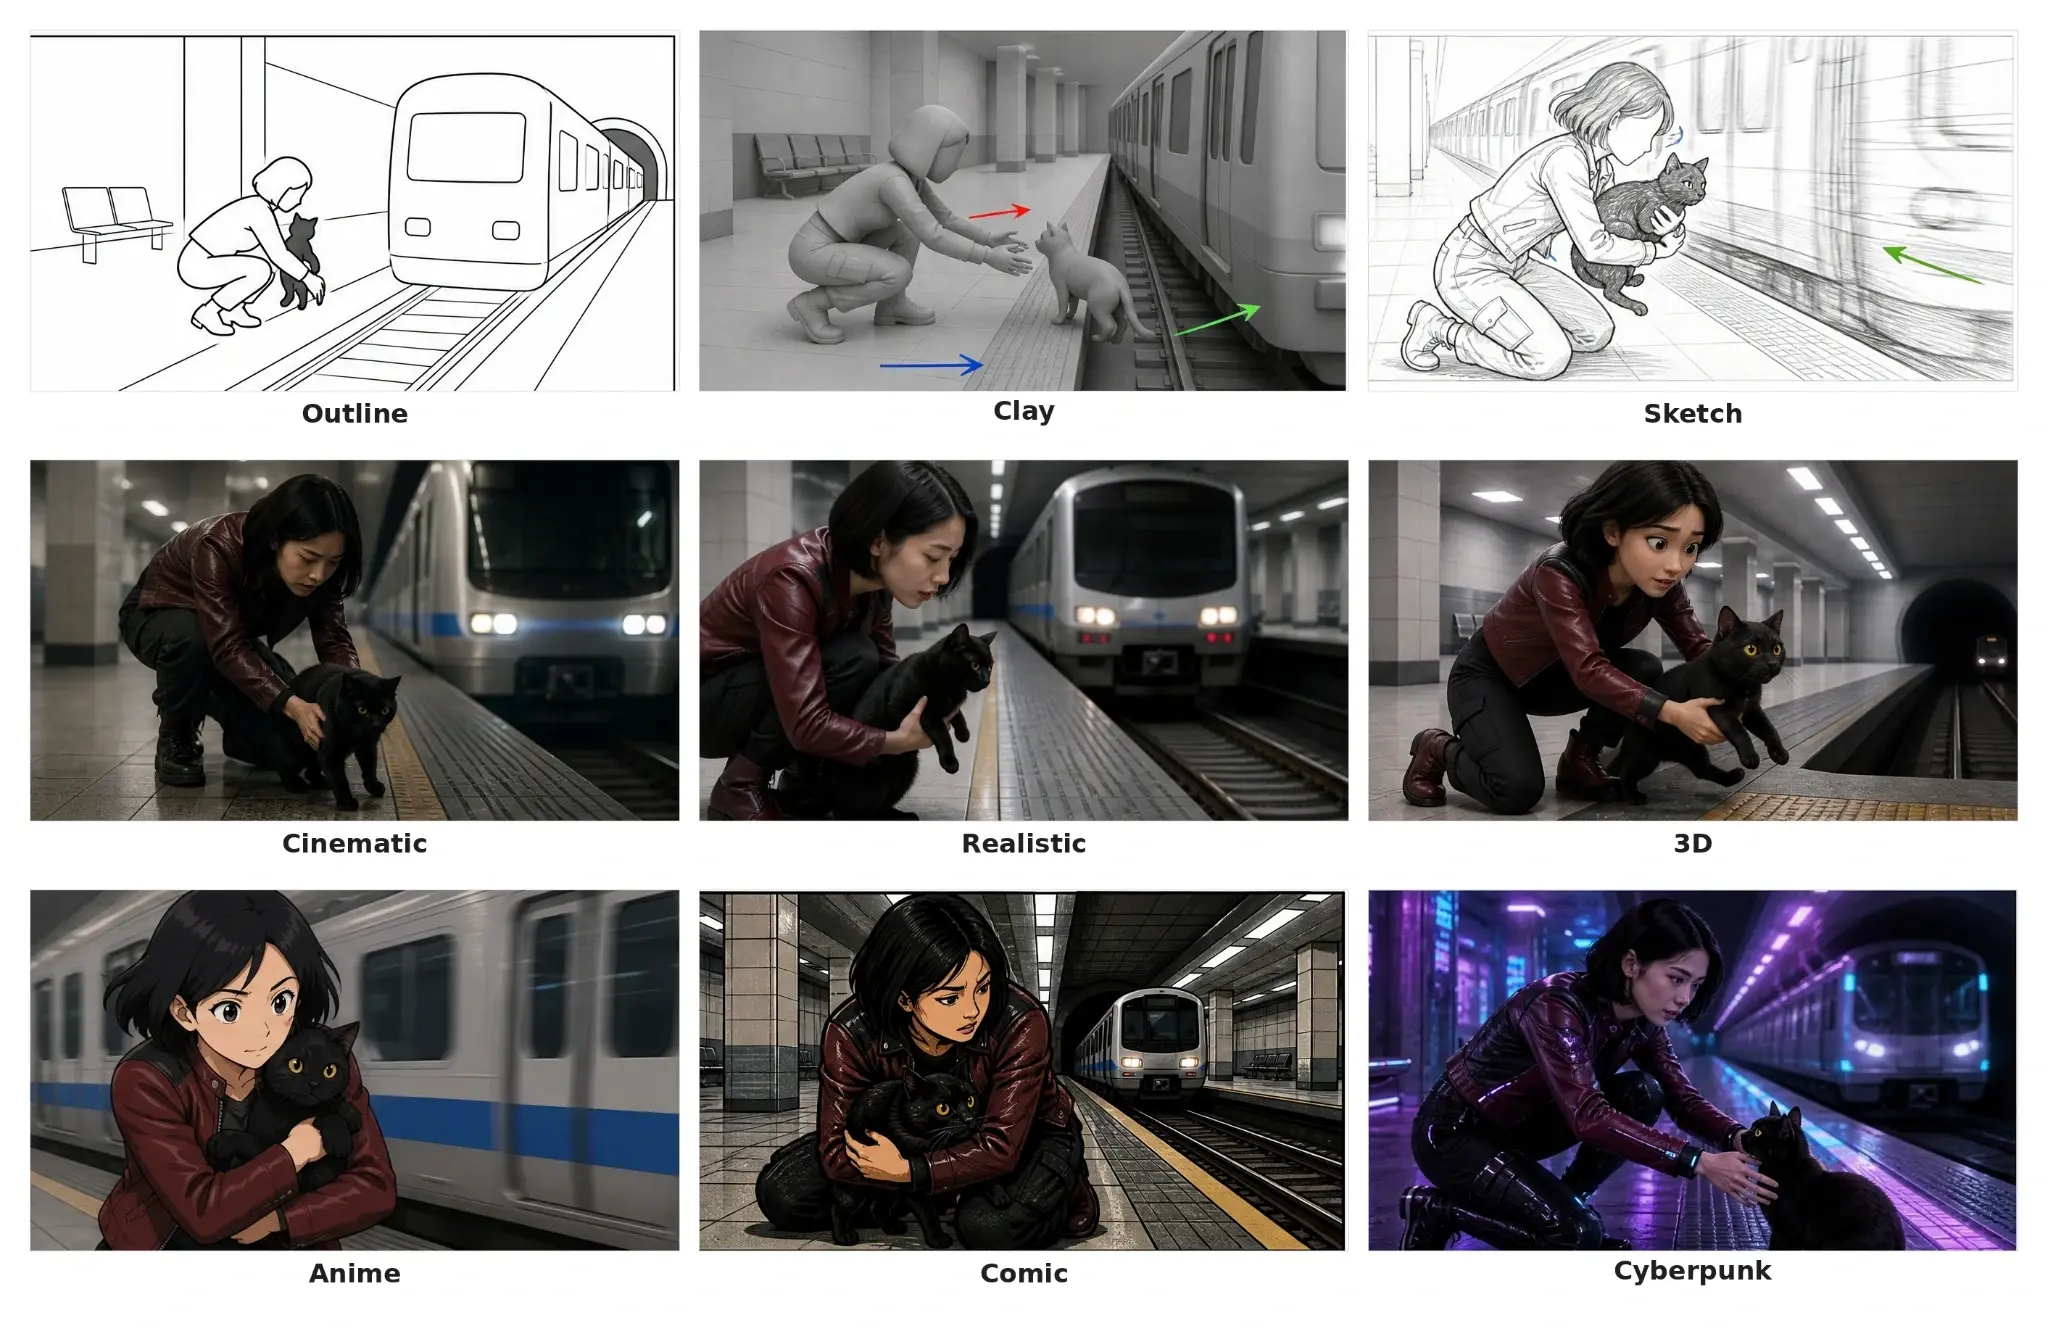
Style changes the visual treatment, but it does not replace a clear story prompt. Continue to describe the action, shot order, and continuity you need.
2.6 Adjust Advanced Settings
Select the settings icon beside the Style menu to open Quality, Prompt Enhance, and Number of images.
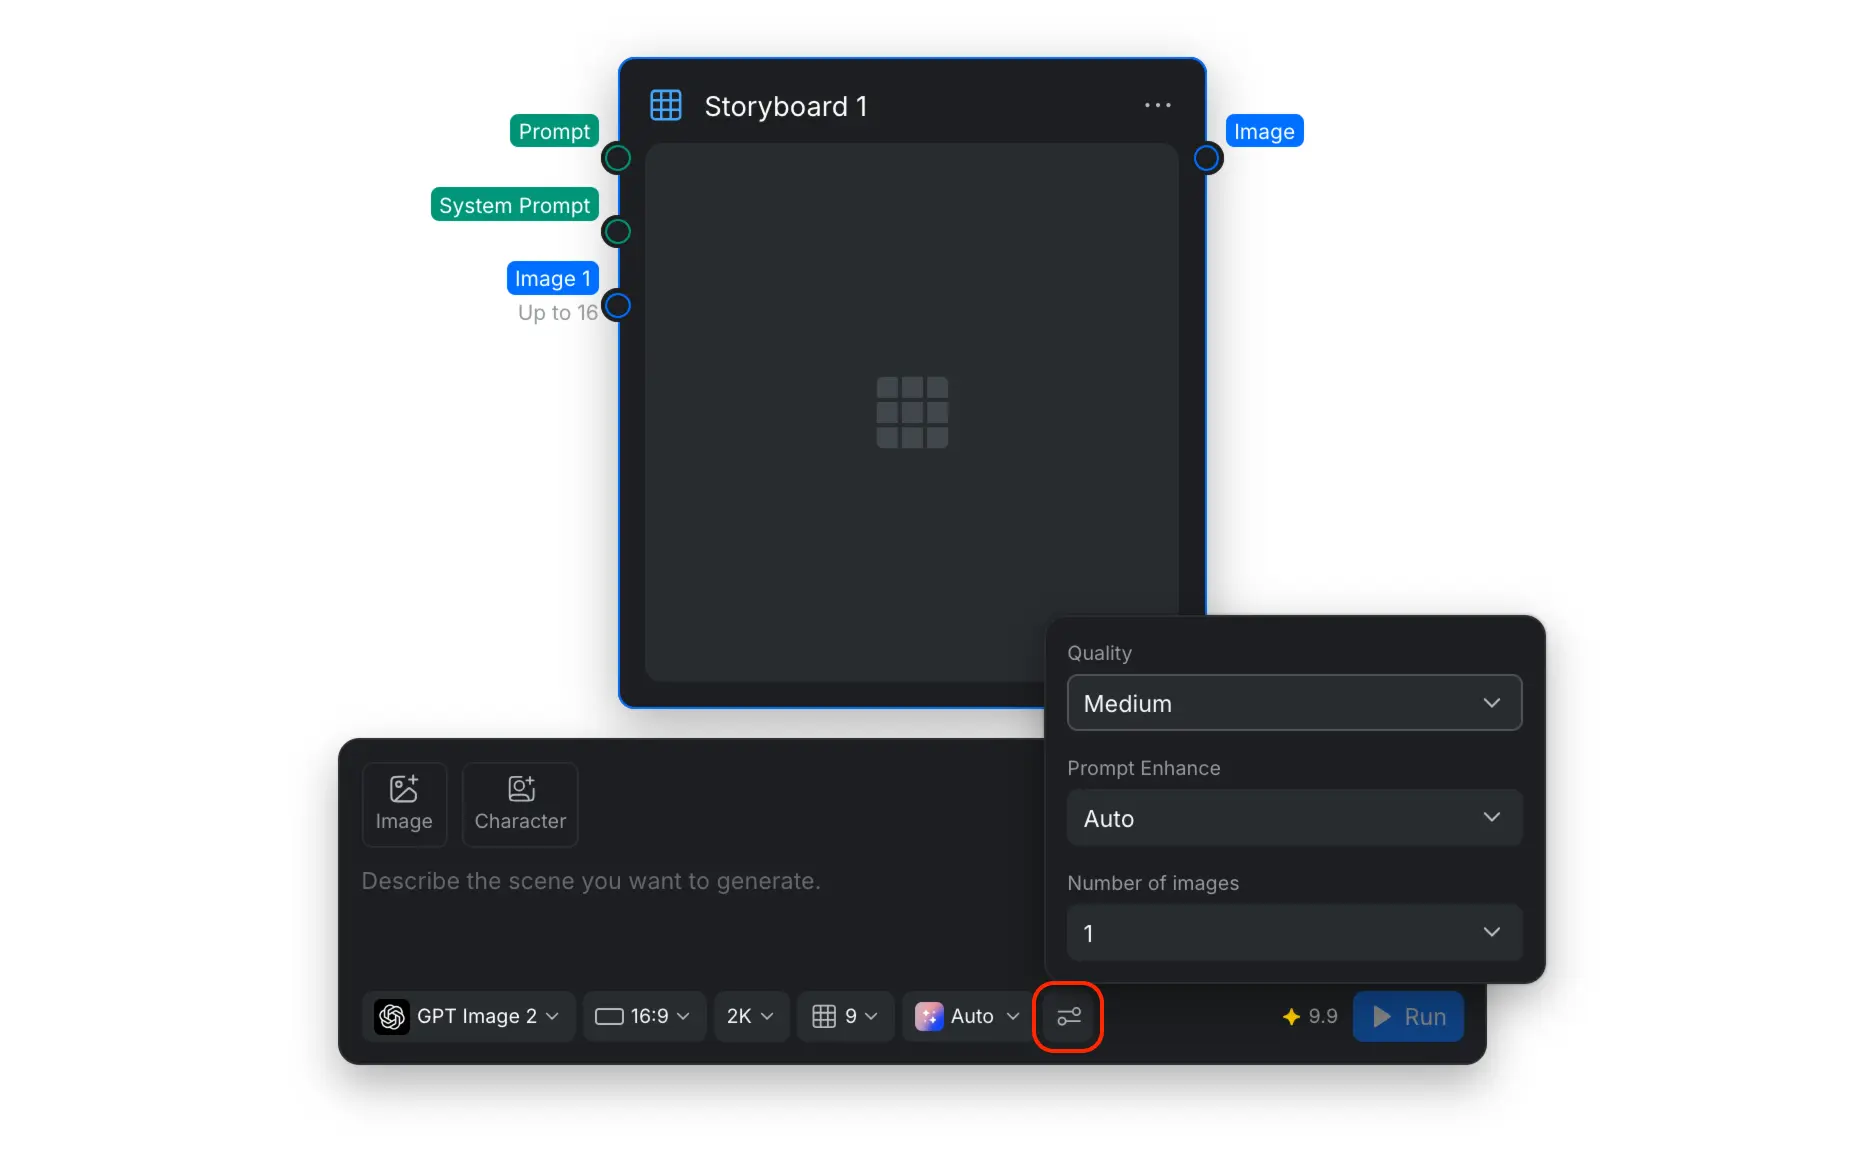
| Setting | What it changes |
|---|---|
| Quality | Controls the generation quality level. Higher settings can take more time or credits depending on the selected model. See Choose a Quality Level. |
| Prompt Enhance | Controls whether CawCut helps expand or refine the prompt before generation. Auto is a useful starting point. |
| Number of images | Generates multiple complete storyboard alternatives in one run so you can compare versions. See the Generate Multiple Versions for more detail. |
3. Generate and Refine the Storyboard
Select Run after configuring the node. The generated board appears in the node preview and is available through the Image output.
When reviewing a result, check the sequence before judging visual polish:
- Confirm that the panels read in the intended order.
- Check that every important story beat appears once and at the right moment.
- Compare character, prop, and location details across panels.
- Check screen direction, movement, and camera changes for continuity.
- Revise only the unclear beat, rule, or reference, then run the node again.
If you want alternatives, increase Number of images. If you need to show more actions within one board, increase Panels. These two approaches solve different problems.
4. Tips for Better Storyboards
- Write in chronological order. A clean sequence is easier for the model to divide into panels.
- Give each beat one main action. Avoid packing several unrelated actions into the same sentence.
- Separate story from rules. Put story events in the Prompt and reusable presentation or continuity instructions in the System Prompt.
- Name repeated elements consistently. Reuse the same names for characters, locations, and props throughout the prompt.
- Describe transitions. State when a person changes position, crosses the frame, enters a new space, or picks up an object.
- Use references strategically. Prioritize identity, clothing, locations, and props that must remain stable.
- Choose function before finish. Outline, Sketch, or Clay can be easier for planning; polished styles are useful when mood and presentation matter.
- Match the final format. Use a landscape ratio for widescreen video and a portrait ratio for vertical content.
5. Keep Characters and Scenes Consistent
A storyboard helps you plan continuity, but stronger reference materials and prompts are often needed when you turn its panels into final images or video.
- Follow the Character Consistency Guide to create and use character, expression, turnaround, clothing, and non-human reference sheets.
- Follow the Scene Consistency Guide to define a location's layout, landmarks, lighting, and spatial relationships across different shots.
Use both guides when your project returns to the same characters and locations across multiple storyboard panels or generated shots.