
Image Generation nodes let you create new visuals from text or transform existing images inside a CawCut workflow. You can select the model and output settings that fit your task, connect reference images when needed, and generate several versions in one run to find the result you want.
1. Image Input Nodes
Use an Image Node or Image Group Node to add source and reference images to a workflow before connecting them to an Image Generation node or another compatible node.
1.1 Image Node
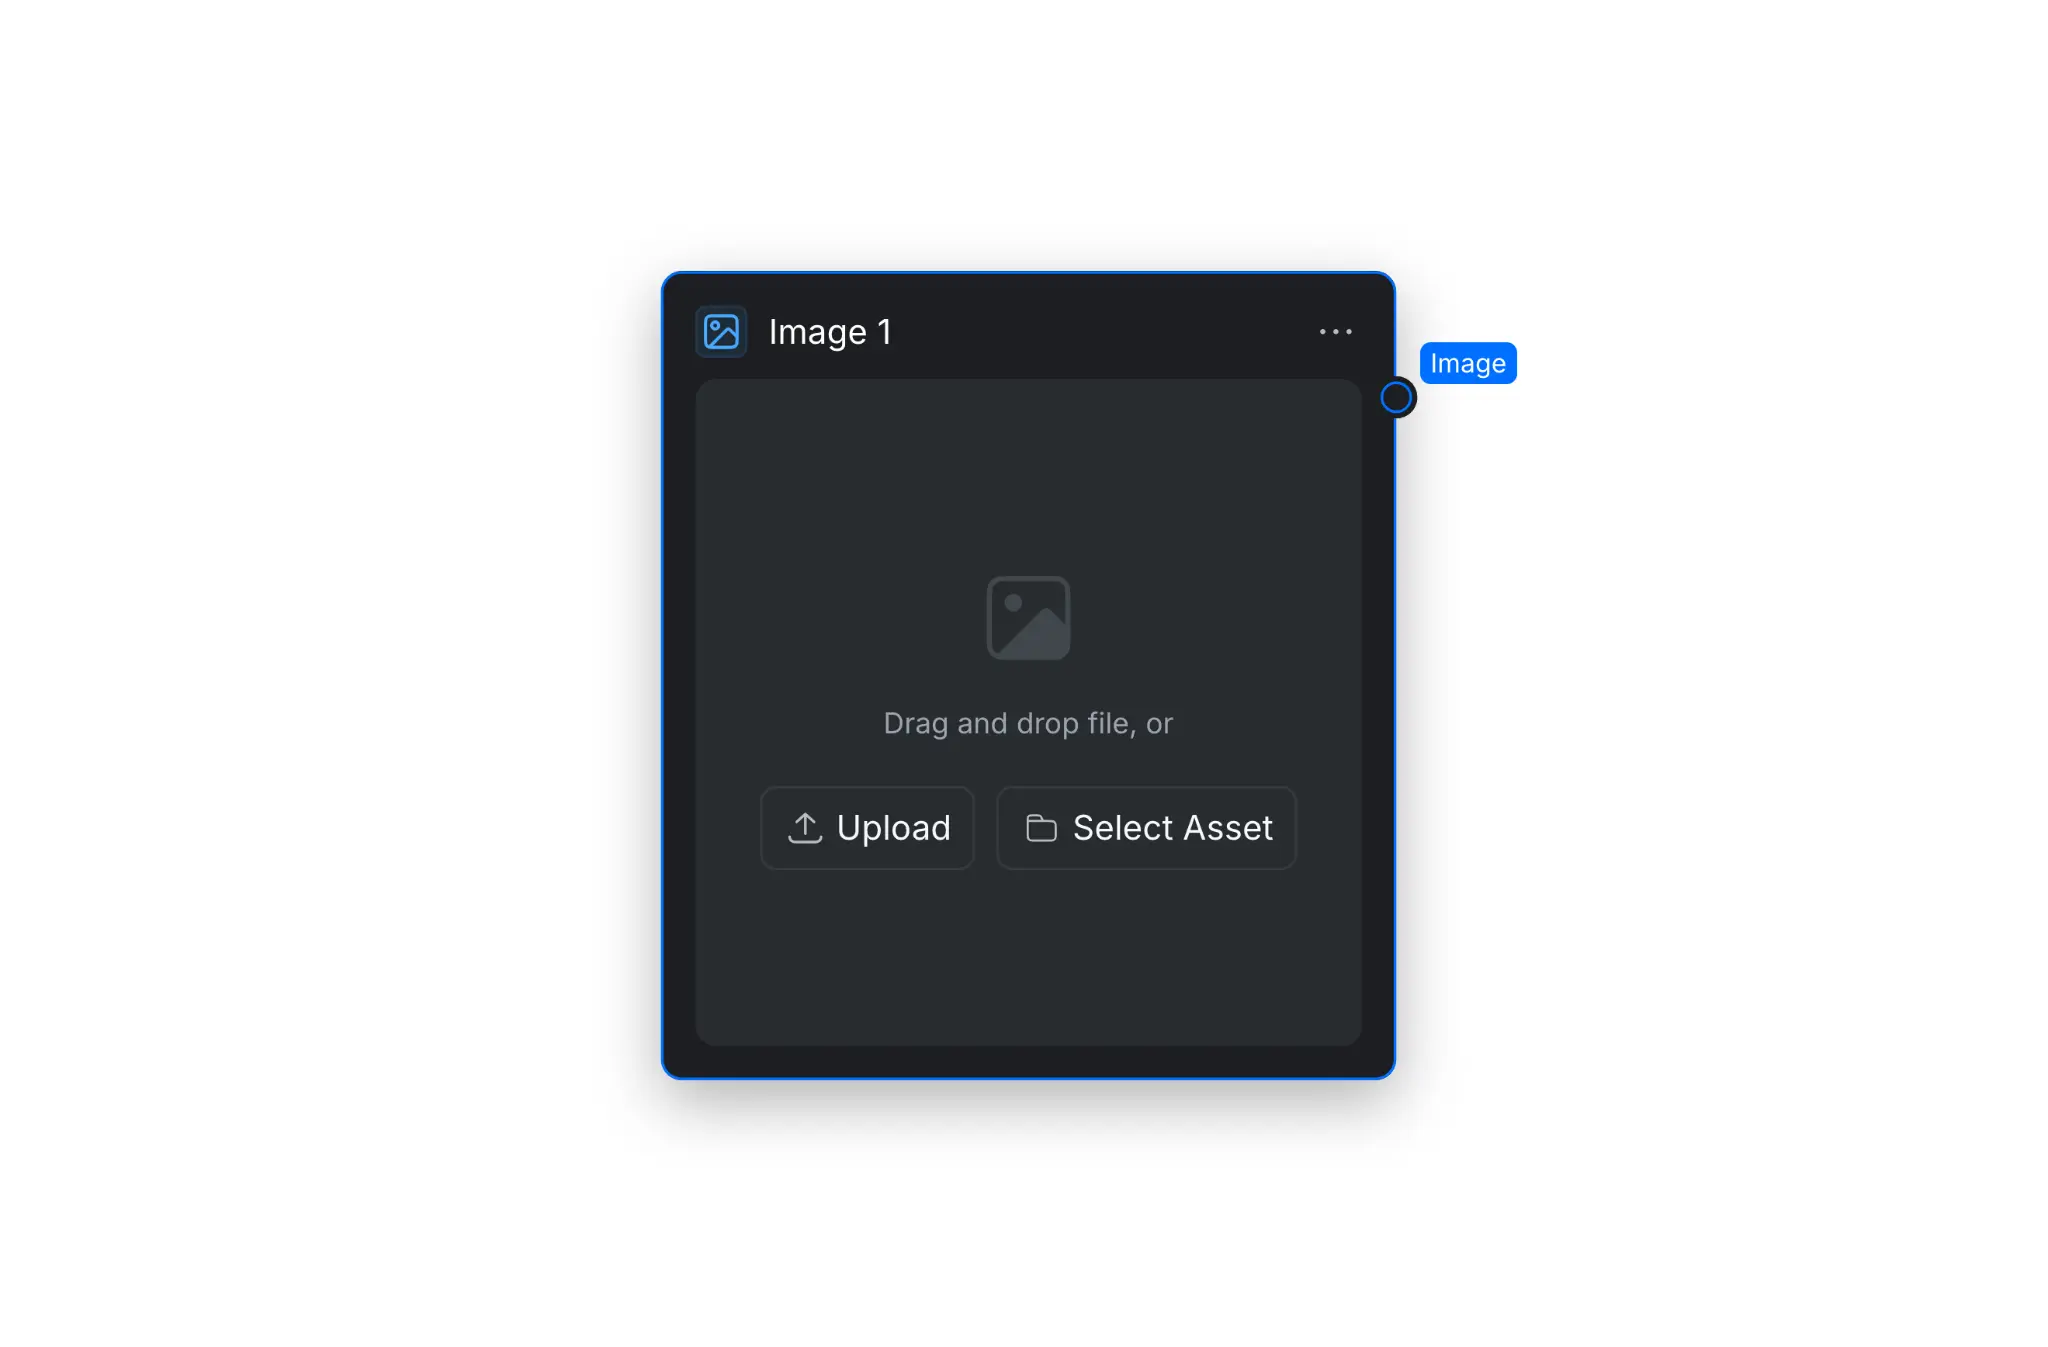
The Image Node adds one image to the workflow. Drag and drop an image into the node, select [Upload] to add one from your device, or select [Select Asset] to use an existing CawCut asset. Connect the Image output to another node to use the uploaded image as an input.
To add annotations or masks that more precisely guide downstream AI models, see Image Editing and Enhancement Nodes.
1.2 Image Group Node
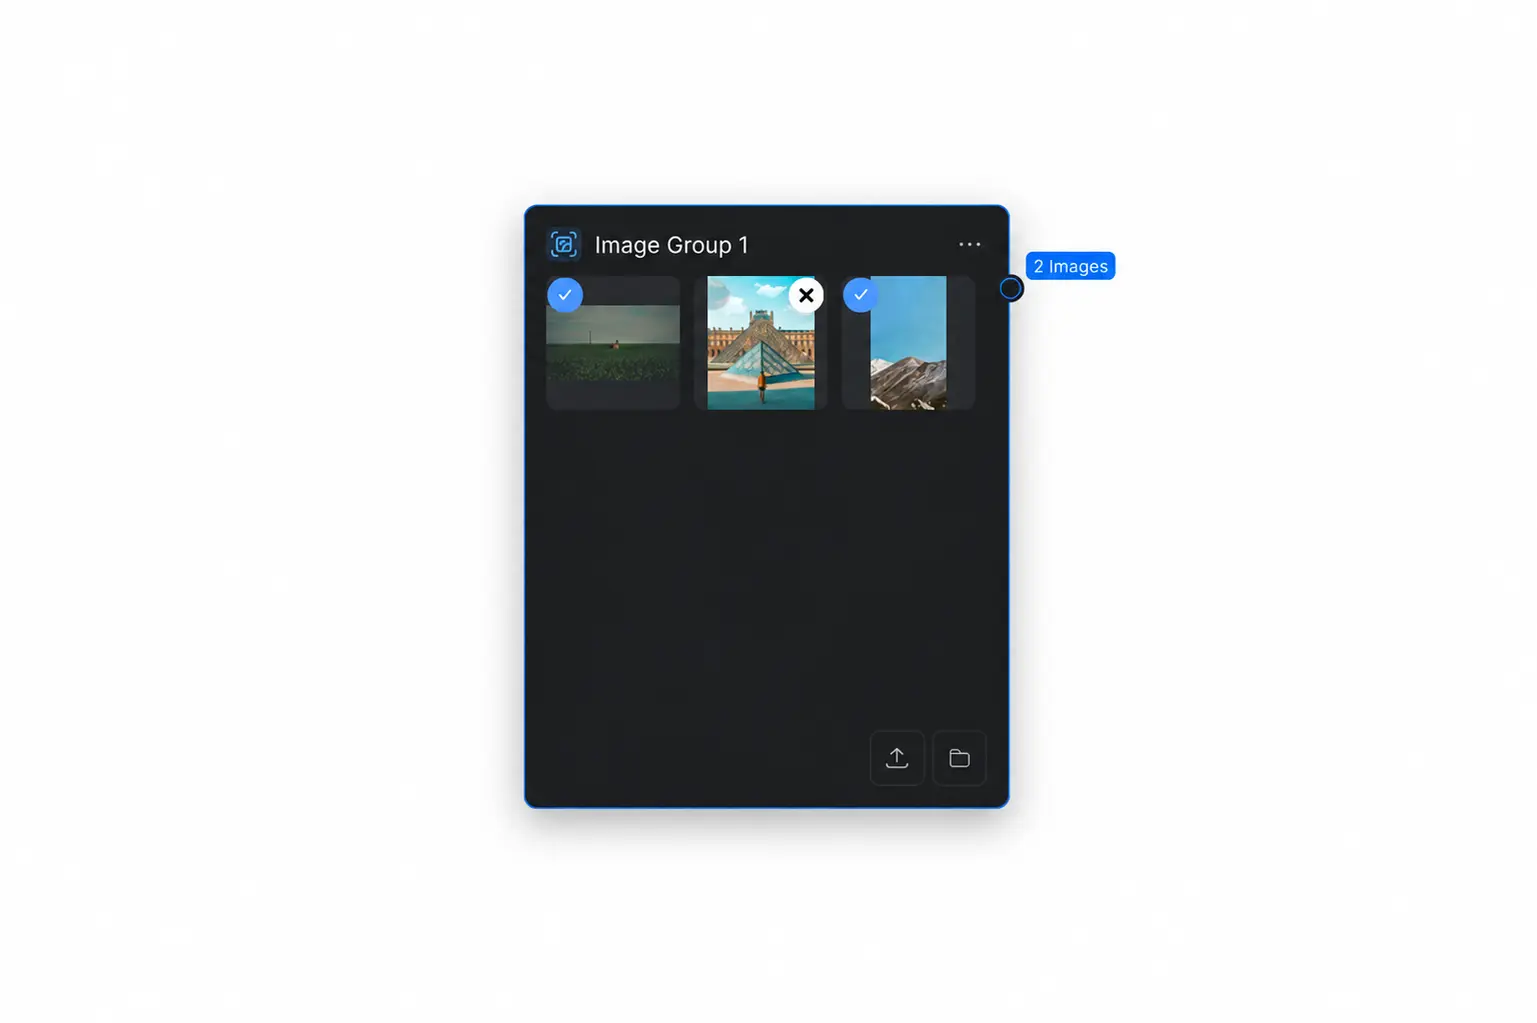
The Image Group Node keeps multiple images together so they can be passed through the workflow as one image group. Open the add node menu, select [Group], then select [Image Group] to add it to the canvas.
Upload images or select existing assets, then use the checkmark on each thumbnail to choose which images are included in the output. The output label shows the number of selected images.
2. Image Generation Node
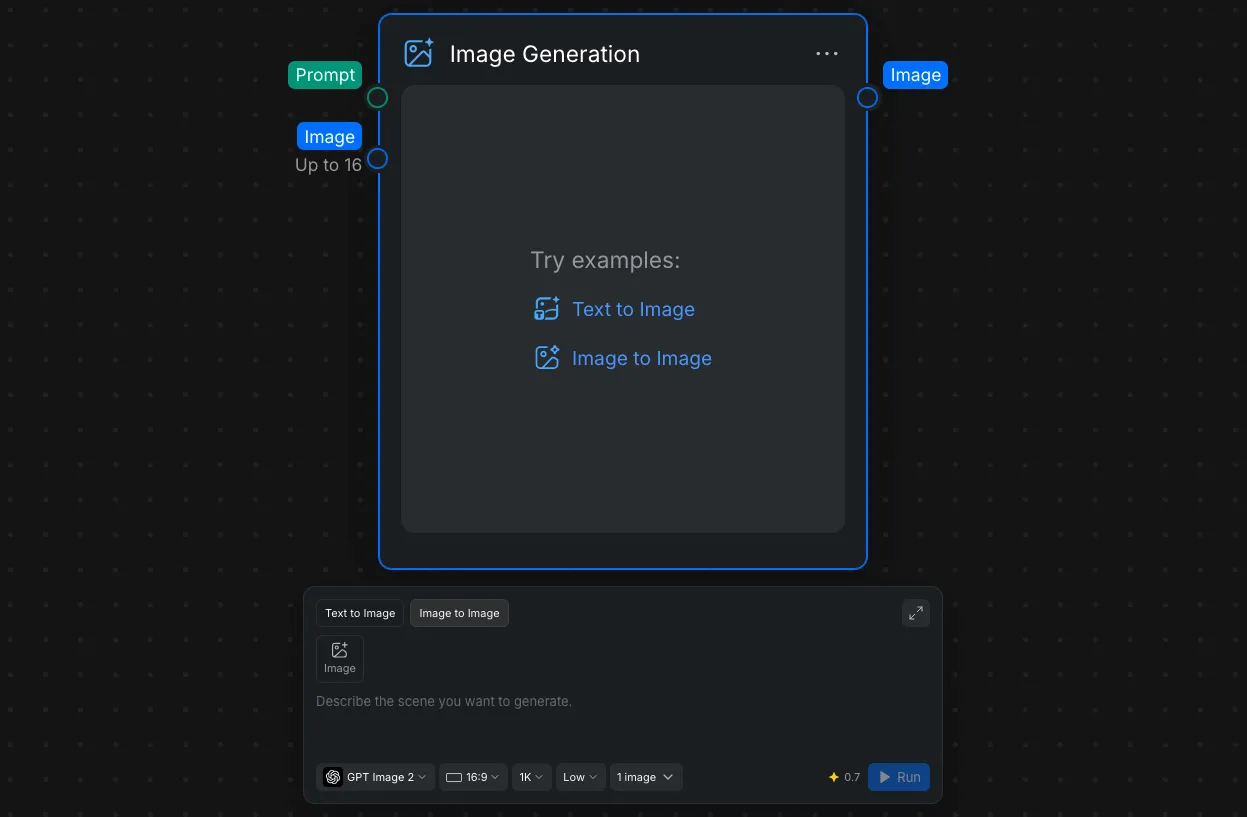
The Image Generation node supports two generation modes in the same Node Panel:
- Text to Image: Describe the image you want with a prompt.
- Image to Image: Add one or more images, then explain how CawCut should transform, combine, or use them.
The node also includes:
- A Prompt input for text supplied by another node.
- Image input ports for reference or source images. The node can display inputs for up to 16 images, although individual model limits may vary.
- An Image output that passes the selected result to connected nodes.
- Controls for the model, aspect ratio, resolution, quality, and number of generated images.
- An estimated credit amount beside Run, which updates according to the selected generation options.
3. Configure Node Settings
Use the controls along the bottom of the Node Panel before selecting Run. These settings determine how CawCut generates the result and can affect its dimensions, level of detail, generation time, and credit use.
3.1 Choose an Image Model
Open the model menu and choose the model that best matches the image you need.
| Model | Best for |
|---|---|
| GPT Image 2 | Complex general-purpose generation and editing, strong prompt following, text, and detailed reference-based work |
| GPT Image 1 | Reliable general image generation and editing across a wide range of styles |
| GPT Image 1 mini | Faster, lower-cost drafts and straightforward image tasks |
| Nano Banana 2 | Fast high-volume creation, conversational editing, multiple references, consistency, and readable text |
| Nano Banana Pro | Complex professional assets, precise creative control, brand consistency, product mockups, and grounded visuals |
| Nano Banana | Fast general-purpose generation and straightforward reference-based edits |
| Flux 2 Pro | Production-quality generation and editing, photorealistic work, and multi-reference compositions |
| Seedream 5.0 Pro | Precise editing, multilingual text, product visuals, marketing assets, and professional production |
| Seedream 5.0 lite | Faster all-purpose generation, image series, and reference-heavy workflows |
| Seedream 4.5 | High-resolution generation, multi-image work, and workflows already designed around Seedream 4.5 |
| Ideogram 4.0 | Typography, posters, controlled layouts, multilingual text, and design-focused images |
| Z Image Turbo | Fast photorealistic drafts, high-volume iteration, and Chinese or English text |
| Recraft V3 | Graphic design, vector-style artwork, icons, brand visuals, mockups, and text-heavy creative work |
| Wan 3.6 | Image-to-image transformations, creative variations, and prompt-guided edits |
3.2 Model Support by Generation Mode
Use this table to quickly compare which current models are available for each image generation mode.
| Models | Text to Image | Image to Image |
|---|---|---|
| GPT Image 2 / GPT Image 1 / GPT Image 1 mini | ✅ | ✅ |
| Nano Banana 2 / Nano Banana Pro / Nano Banana | ✅ | ✅ |
| Seedream 5.0 Pro / Seedream 5.0 lite / Seedream 4.5 | ✅ | ✅ |
| Ideogram 4.0 | ✅ | ✅ |
| Flux 2 Pro / Z Image Turbo / Recraft V3 | ✅ | ❌ |
| Wan 3.6 | ❌ | ✅ |
3.3 Model Specifications
The table shows models whose current data includes at least one documented limit. Prompt length is measured in characters. The Reference images column shows how many image inputs the model can use in Image to Image mode. The Images per run column shows the selectable output range when the current model data defines one.
| Model | Text to Image prompt | Image to Image prompt | Reference images | Images per run |
|---|---|---|---|---|
| GPT Image 2 | 1–50,000 | 3–50,000 | 1–16 | 1–4 |
| GPT Image 1 | 1–4,000 | 3–50,000 | 1–4 | 1–4 |
| Nano Banana 2 | 3–1,000 | 1–2,000 | 1–14 | 1–4 |
| Nano Banana | 1–4,000 | 1–4,000 | 1–4 | 1–4 |
| Seedream 5.0 Pro | 3–20,000 | 3–20,000 | 1–10 | Not supported |
| Seedream 5.0 lite | Not listed | 3–50,000 | 1–4 | 1–4 for Image to Image |
| Seedream 4.5 | 3–10,000 | 3–10,000 | 1–4 | Not supported |
| Recraft V3 | 1–2,000 | ❌ | ❌ | 1–4 for Text to Image |
| Wan 3.6 | ❌ | Up to 50,000 | 1–3 | 1–4 for Image to Image |
The current model data does not list prompt or reference-image limits for every available model. When a value is not listed, use the validation message and available controls shown in the Node Panel.
3.4 Choose an Aspect Ratio
The aspect ratio controls the shape of the generated image. Open the ratio menu and choose the format that matches the final destination.
Common choices include:
- 16:9 for landscape image, presentations, and wide banners.
- 9:16 for vertical image and mobile-first content.
- 1:1 for square social posts and profile graphics.
- 21:9 for extra-wide cinematic images.
- 3:2, 4:3, and 5:4 for common landscape images.
- 2:3, 3:4, and 4:5 for portrait images and posts.
Choosing the final ratio before generation usually gives the model more room to compose the scene correctly than generating first and cropping later.
3.5 Choose a Resolution
Resolution controls the output size in pixels. Depending on the selected model, CawCut may offer 1K, 2K, or 4K.
| Resolution | Best for |
|---|---|
| 1K | Prompt tests, drafts, quick comparisons, and smaller online uses |
| 2K | General final images, larger social content, and moderate cropping |
| 4K | Large displays, detailed final assets, print-oriented work, and close crops |
Higher resolution creates a larger file and may take more time or credits. It does not automatically fix prompt, composition, anatomy, or text problems, so confirm the overall result at a lower resolution before using a larger final setting when possible.
3.6 Choose a Quality Level
Quality controls how much generation effort the selected model applies to the result. Open the quality menu and choose Low, Medium, or High.
| Quality | Best for |
|---|---|
| Low | Fast drafts, early prompt testing, and broad composition ideas |
| Medium | A balance of speed and detail for most everyday generations |
| High | Final results where refined textures, edges, text, or small details matter |
The comparison below uses GPT Image 2, 1K resolution, and the same overall task at Low, Medium, and High quality. The enlarged areas make small surface details easier to inspect.
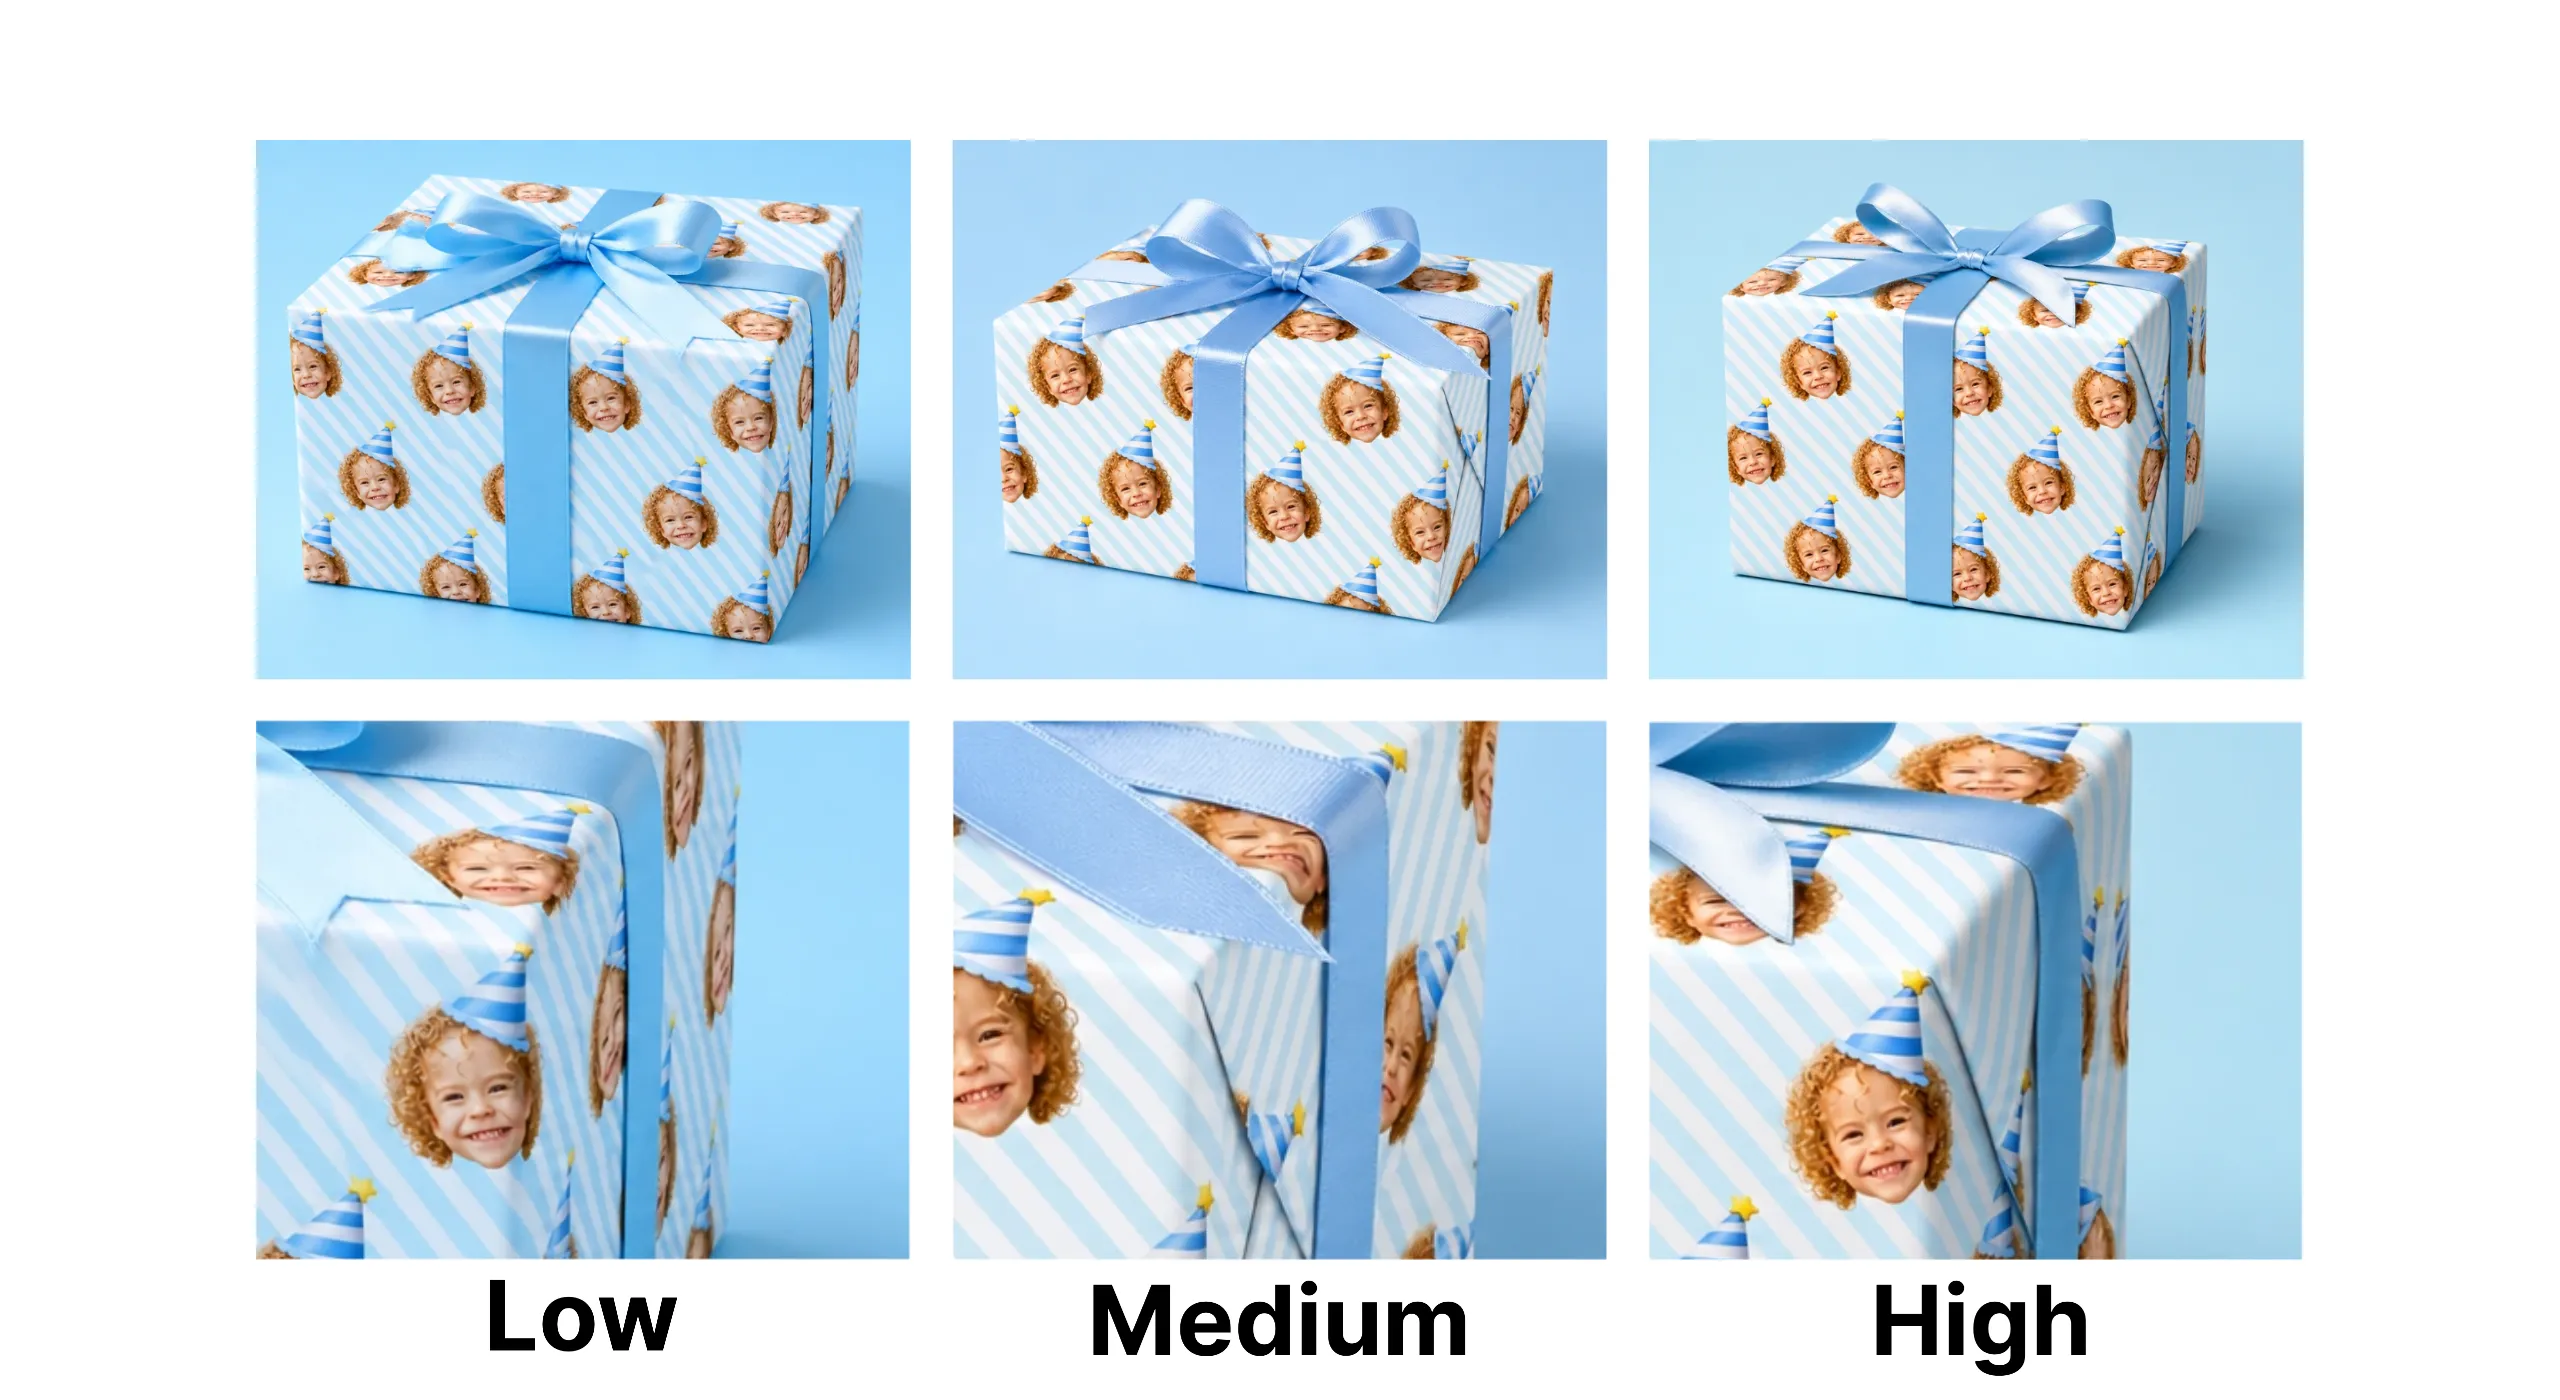
In the comparison above, Low is noisier and misses some details, Medium preserves more detail but still contains some noise, and High removes most of the noise and produces more realistic detail.
4. Generate Multiple Versions
Generating multiple versions in one run gives you several interpretations of the same prompt and inputs. You can compare composition, details, and overall style, then keep the result that best matches what you want.
4.1 Choose the Number of Images
Open the image amount control at the bottom of the Image Generation node and choose how many images you want to create. Then select Run.
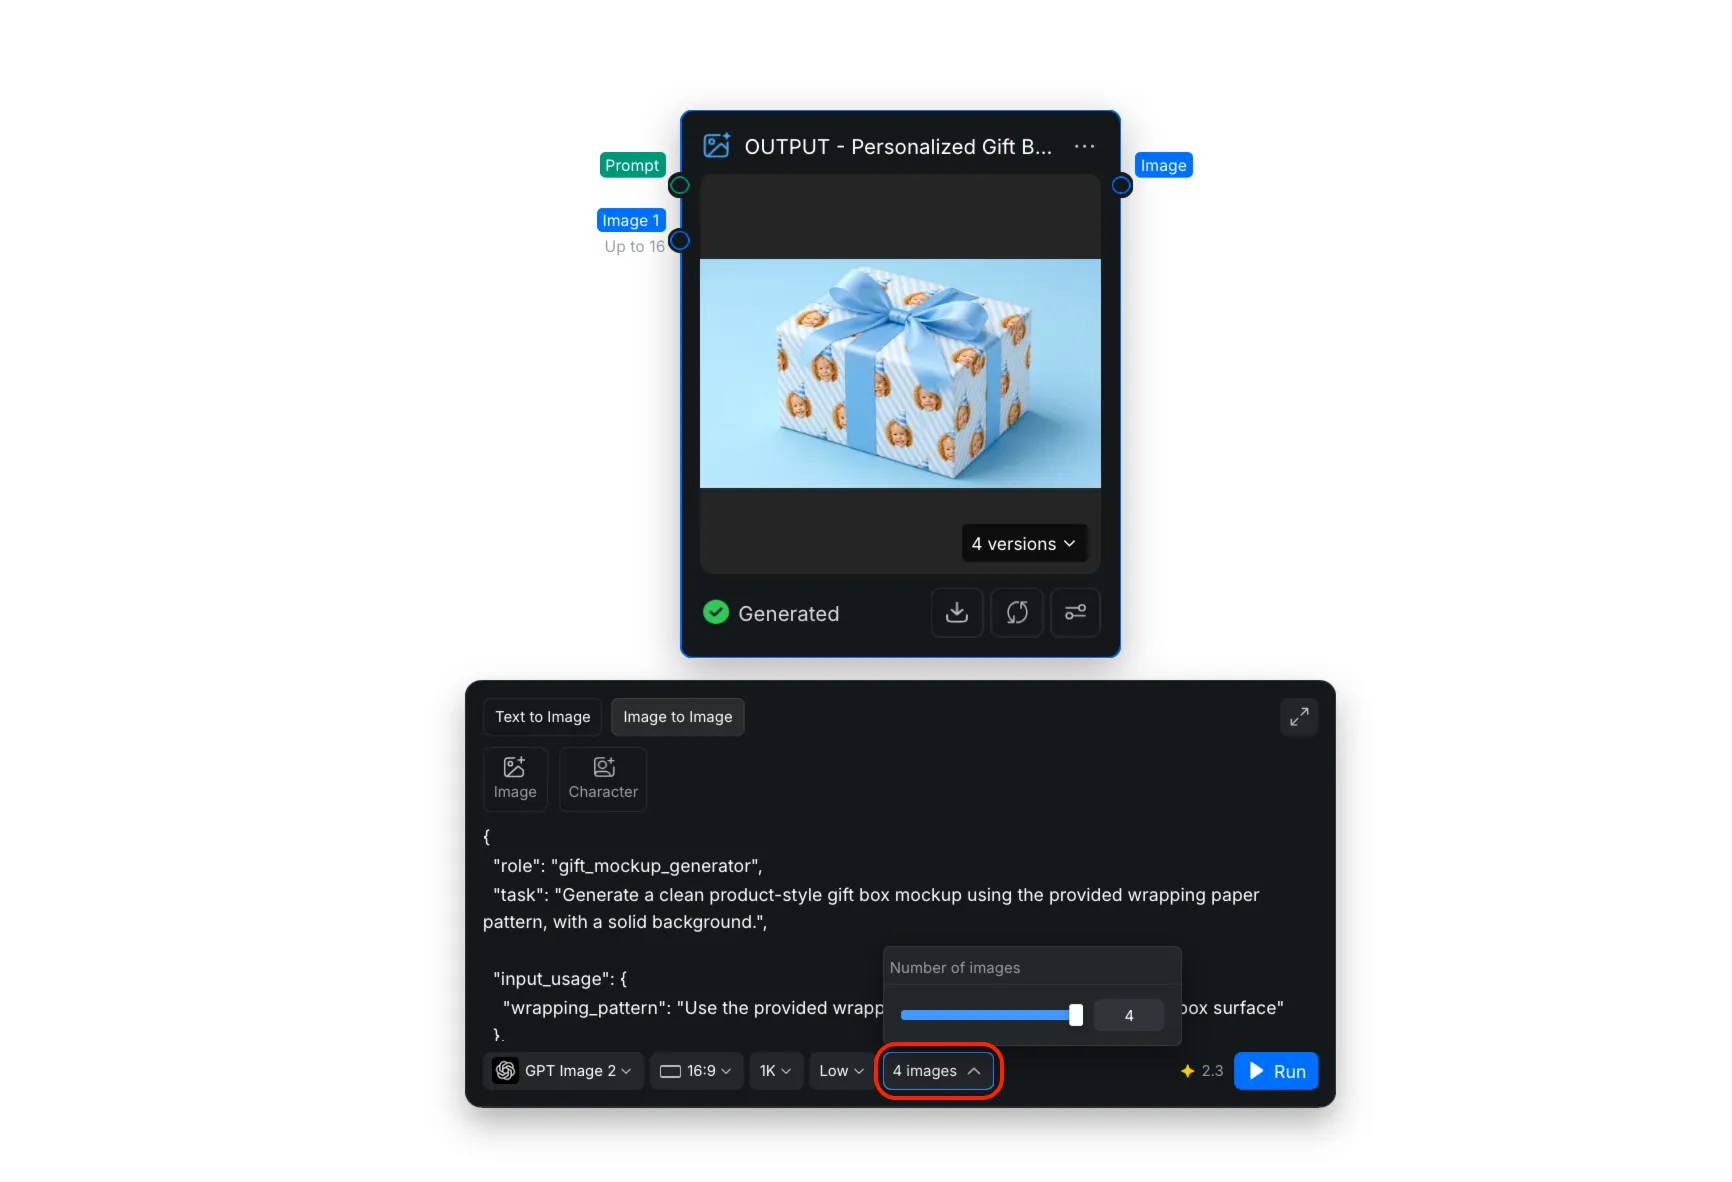
All versions in the run use the same prompt, image inputs, model, aspect ratio, resolution, and quality settings.
4.2 Quickly Select a Version
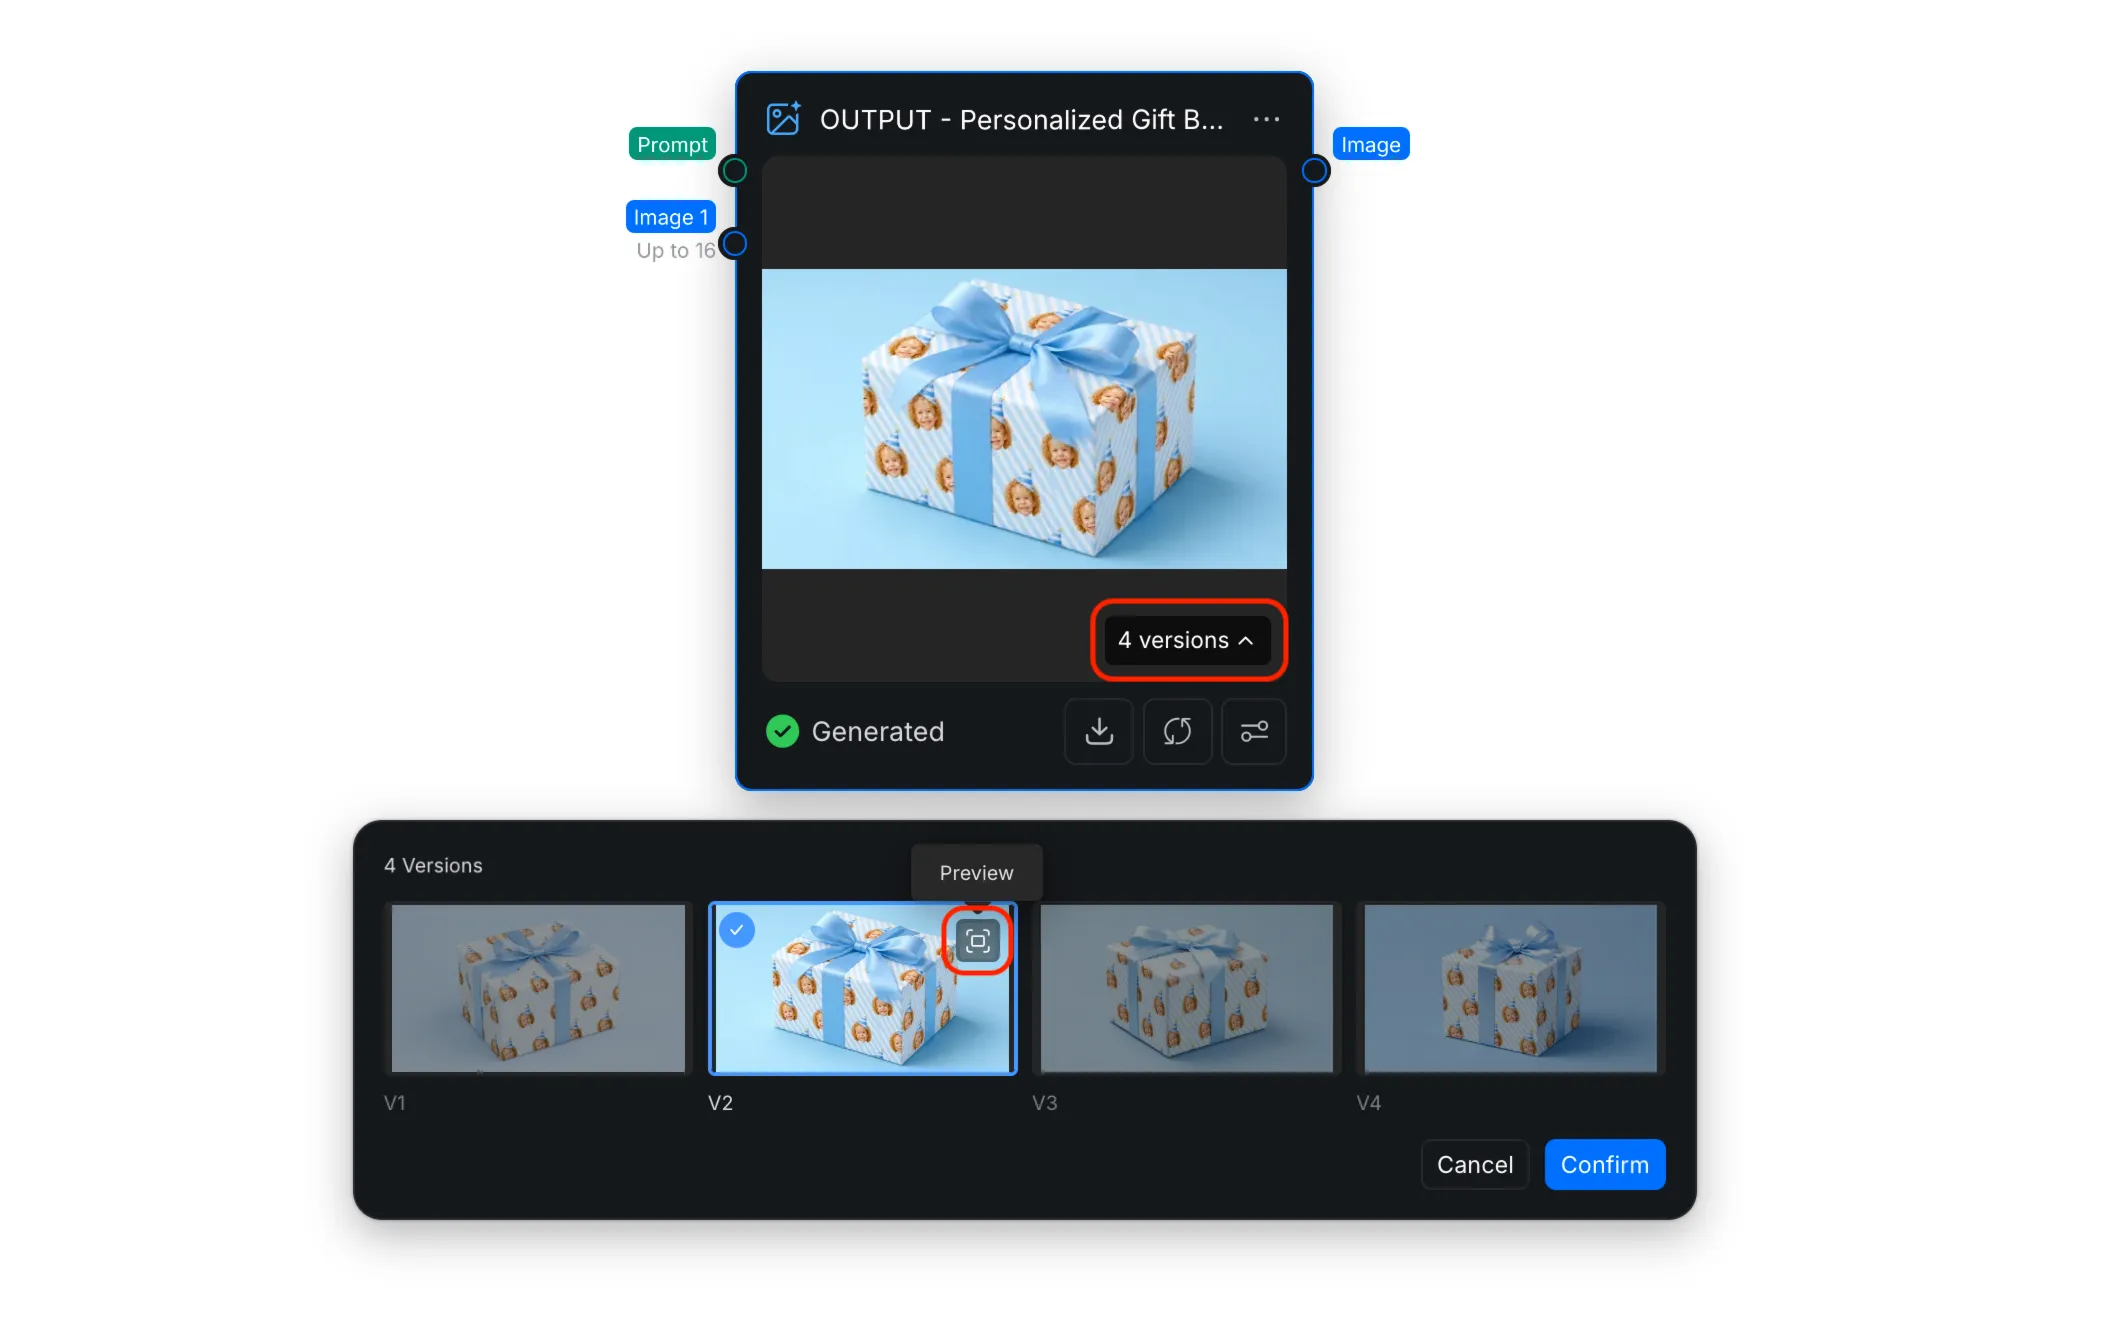
After generation is complete, open the versions menu on the image. Select the version you prefer, then select Confirm. The selected version becomes the node's active image and is passed to any connected nodes.
4.3 Compare Versions in the Full Preview
If you need a closer look, select the [Preview] icon on a version to open it at a larger size. Use the thumbnails on the left to compare the generated results, then select Use this version when you find the best one.