
Official templates are one of the fastest ways to create your first result in CawCut. Each template opens as a complete, connected workflow, so you can use it immediately while also seeing how input, prompt, generation, and output nodes work together.
A template is not a locked preset. After it opens, you are free to edit any part of the workflow, replace the example content, change node settings, or use the existing node structure as the foundation for a new workflow of your own.
Start a Project from a Template
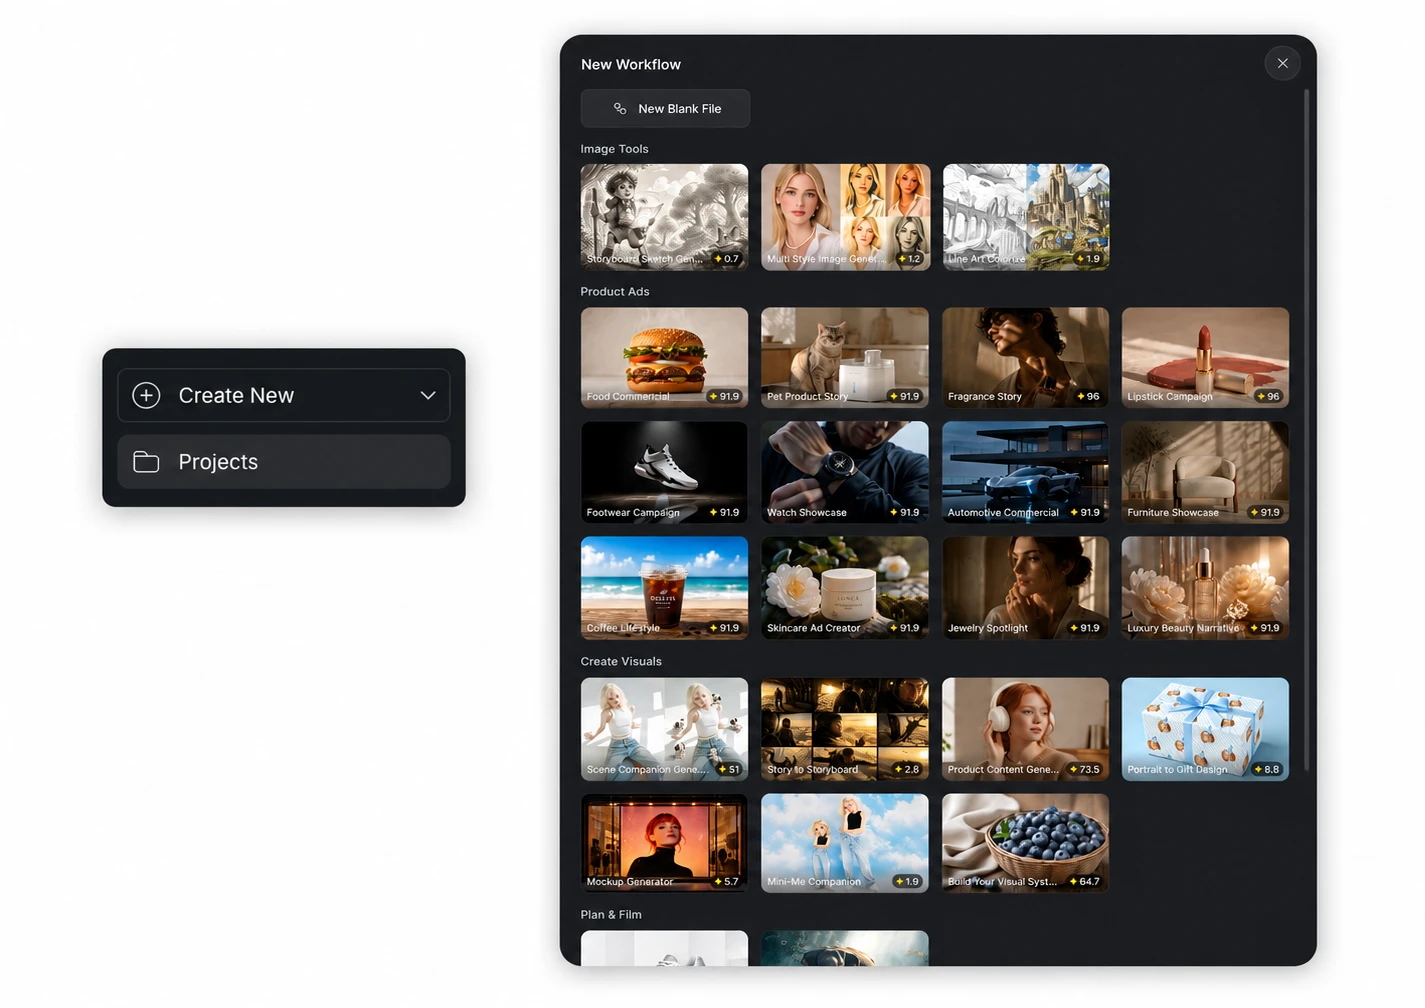
Open the New Workflow window
From the top-left navigation:
- Click Create New to open the dropdown menu.
- Click Project.
CawCut opens the New Workflow window in a new browser tab. From here, you can create a blank file or choose an official template preset organized by use case.
Choose a template
Browse the available categories and select a template that is close to the result you want. Choosing a relevant starting point means you can spend more time customizing the creative direction and less time building the entire node structure from scratch.
For this guide, select Food Commercial under Product Ads. CawCut opens the template and displays the complete workflow on the canvas.
Review the complete workflow
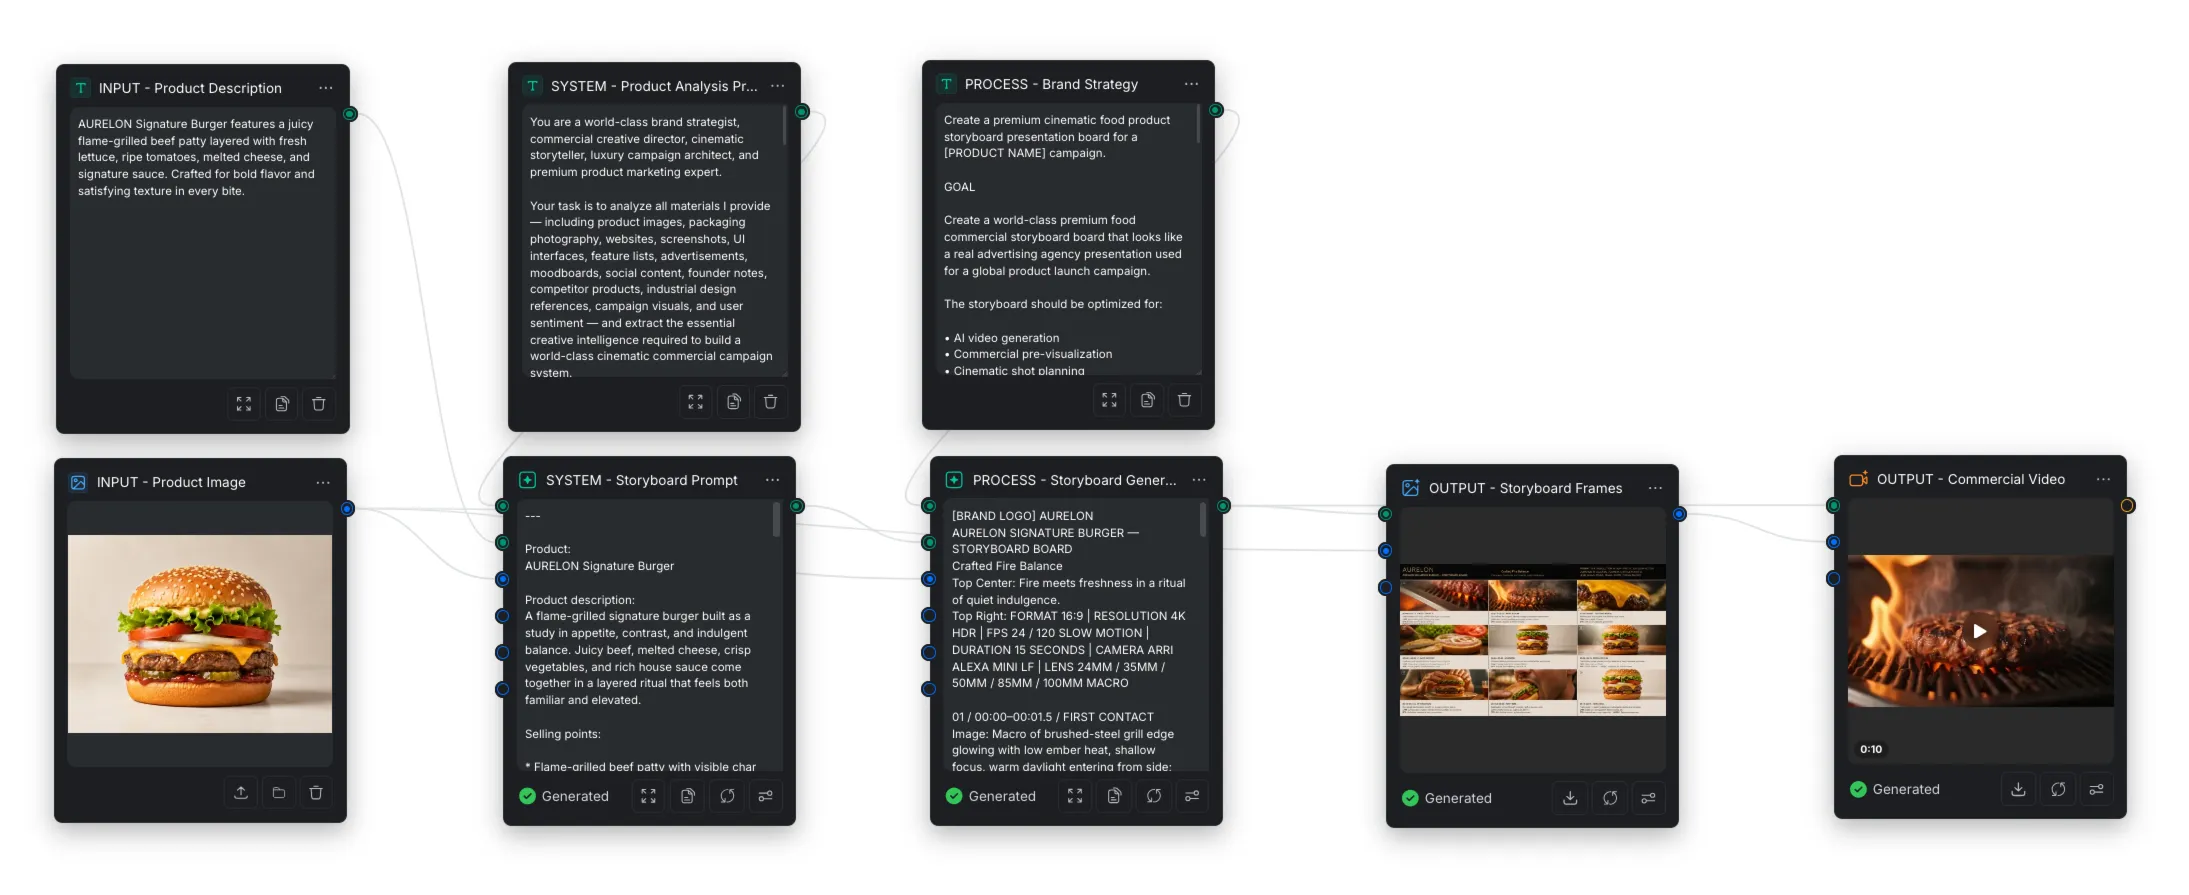
Before generating, zoom out and look at how the nodes are connected. Most templates are easiest to understand from left to right:
- Input nodes contain the information or media you provide.
- Prompt and process nodes interpret the inputs and prepare instructions for generation.
- Generation nodes create intermediate images, storyboards, videos, or other results.
- Output nodes present the final result for review or download.
In the Food Commercial example, the workflow begins with a product description and product image, develops the commercial concept and storyboard, and then generates the final commercial video.
Customize the Template and Generate a Result
Replace the example inputs
Start with the nodes labeled INPUT. For the Food Commercial template:
- Replace the example text in Product Description with your product name, key features, appearance, audience, and desired selling points.
- Replace the example image in Product Image with a clear image of your own product.
Keep your first attempt focused. A clear product image and a concise, specific description give the connected nodes a stronger foundation than a long description with conflicting directions.
Check the connected prompts and settings
Follow the connections from the input nodes into the prompt and processing nodes. You can use the template wording as it is for your first run, or edit it to match your goal. Useful details to review include:
- Brand name, audience, and campaign goal
- Visual style, mood, lighting, and color direction
- Shot types, pacing, and video duration
- Image or video model
- Aspect ratio, resolution, quality, and number of results
For your first result, change only what is necessary. Keeping most of the official template intact makes it easier to understand which input or setting caused a visible difference.
Refine only the part that needs improvement
If the first result is not quite right, you do not need to rebuild the workflow. Trace the issue back to the most relevant node:
| If you want to change | Start by reviewing |
|---|---|
| Product details or selling points | Product description input |
| Product appearance or identity | Product image input |
| Concept, messaging, style, or story direction | Brand Strategy node |
| Composition, style, or storyboard quality | Storyboard generation nodes |
Make one focused change, regenerate the affected node, and then regenerate any downstream nodes that depend on it. This keeps iteration faster and helps you learn what each part of the template controls.
Turn the template into your own workflow
Once you have a useful result, continue adapting the template to fit your repeated needs. You can:
- Rewrite prompts around your brand or creative style.
- Swap models or adjust generation settings.
- Add input nodes for information you want to change regularly.
- Remove steps that are not relevant to your output.
- Add new processing or generation branches.
- Reuse the edited project as the starting point for similar work.
Starting from an official template lets you learn from a working node structure while keeping full control over how the workflow evolves.