
Use this guide when the same person, animal, creature, robot, mascot, train, vehicle, or other recurring design needs to remain recognizable across several AI-generated shots.
The main rule is to separate the character's visual identity from the shot instructions:
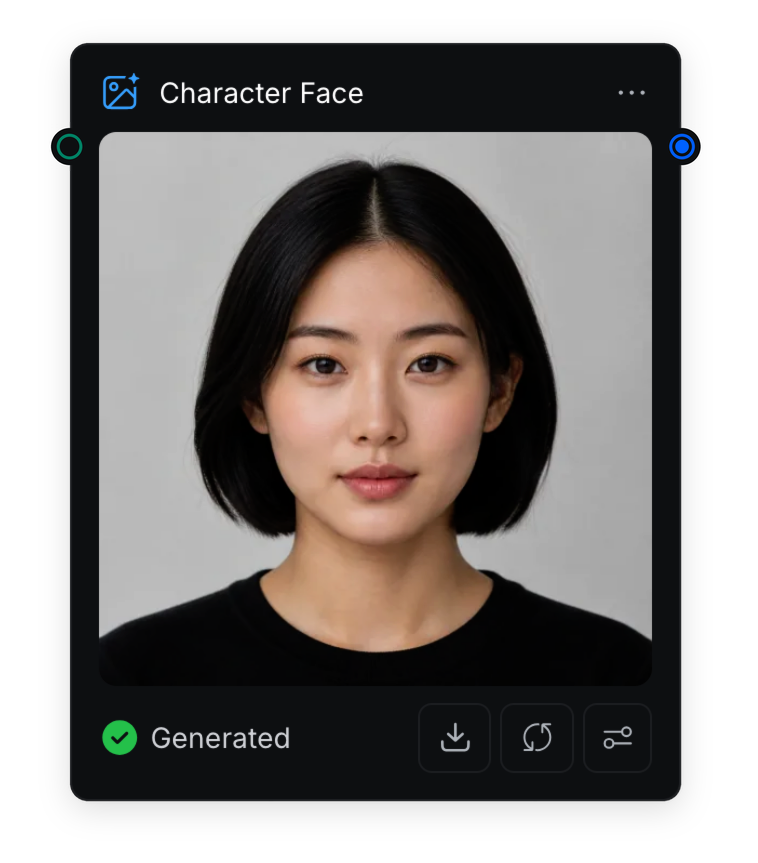
- The face reference defines identity.
- The wardrobe reference defines clothing and accessories.
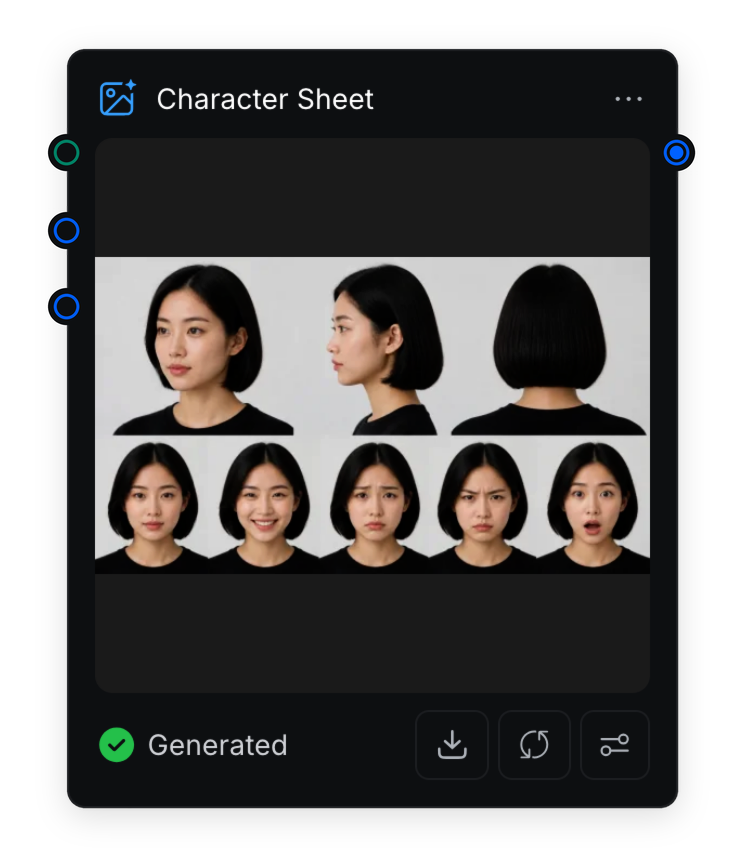
- The head-angle sheet defines the facial profile, head shape, hairstyle, and back-of-head details from different views.
- The expression sheet defines the major recurring emotions without changing identity.
- The vehicle sheet defines a recurring train, car, aircraft, or other machine from multiple sides.
Do not rely on a text description or a small storyboard panel to redefine all of these details for every shot.
1. Use Separate References for Different Details
Use a different approved asset for each type of character information:
| Asset | What it controls |
|---|---|
| Face reference | Facial identity, age, skin details, hairstyle, and defining facial features |
| Wardrobe reference | Clothing, color placement, materials, fit, footwear, and accessories |
| Head-angle sheet | Head shape, facial profile, ears, hairstyle, and back-of-head details from three-quarter, side, and back views |
| Expression sheet | Major recurring facial expressions without changing identity |
| Non-human character sheet | Body structure, markings, fur, scales, mechanical parts, and side-specific details |
| Vehicle reference sheet | Proportions, silhouette, livery, doors, windows, lights, wheels, and side-specific details |
2. Lock the Character Design First
Before generating reference images, write down the details that should remain fixed.
For a human character, define:
- Approximate age and build.
- Face shape, eyes, nose, lips, skin tone, and other defining features.
- Hairstyle, hair length, and hair color.
- Clothing, footwear, materials, and accessories.
- Tattoos, scars, makeup, jewelry, or other recurring details.
- The visual style, such as cinematic realism, stylized 3D, anime, or illustration.
For a non-human character, also define:
- Head-to-body and limb proportions.
- Silhouette and body structure.
- Fur, feathers, scales, shell, skin, or surface materials.
- Ears, horns, wings, tail, paws, claws, joints, or mechanical parts.
- Distinctive markings and their exact placement.
- Size relative to people, objects, or the environment.
Approve this design before generating the rest of the project. Changing the design midway through production makes later shots harder to match.
3. Use a Clear Face Reference
Generate a clear head-and-shoulders or close-up portrait. Use this as the main source of truth for identity.
Use:
- A front or three-quarter face angle.
- Neutral, even lighting.
- A simple background.
- A neutral or lightly expressive face.
- Unobstructed facial features and hairstyle.
Avoid hats, sunglasses, heavy shadows, or other elements that hide important details.
4. Add Head-Angle and Expression Sheets
Create a head-angle sheet when the character's face or hairstyle will be shown from different directions. The sheet only needs head-and-shoulders views from three angles:
- Three-quarter view.
- Side or profile view.
- Back view.
Use a neutral expression for these angle references. Keep the same head shape, facial proportions, ears, hairline, parting, hair length, volume, and neckline in every view. The back view should clearly show the shape and structure of the hairstyle without adding clothing or body-design details.
Add a small expression set for the major emotions that will recur in the project, such as neutral, happy, sad, angry, and surprised. Use the same front or three-quarter head angle for the expression row so the expressions are easy to compare. Avoid adding many subtle variations that may cause the model to reinterpret the face.
5. Keep Wardrobe in a Separate Reference
Create a separate reference that focuses on clothing without introducing another face. A neck-down figure, mannequin, or cropped body works well.
Include:
- Front and back views of the outfit.
- Exact colors and color placement.
- Fabric texture and reflectivity.
- Seams, buttons, pockets, zippers, and accessories.
- The intended fit and silhouette.
- Footwear when it appears in the project.
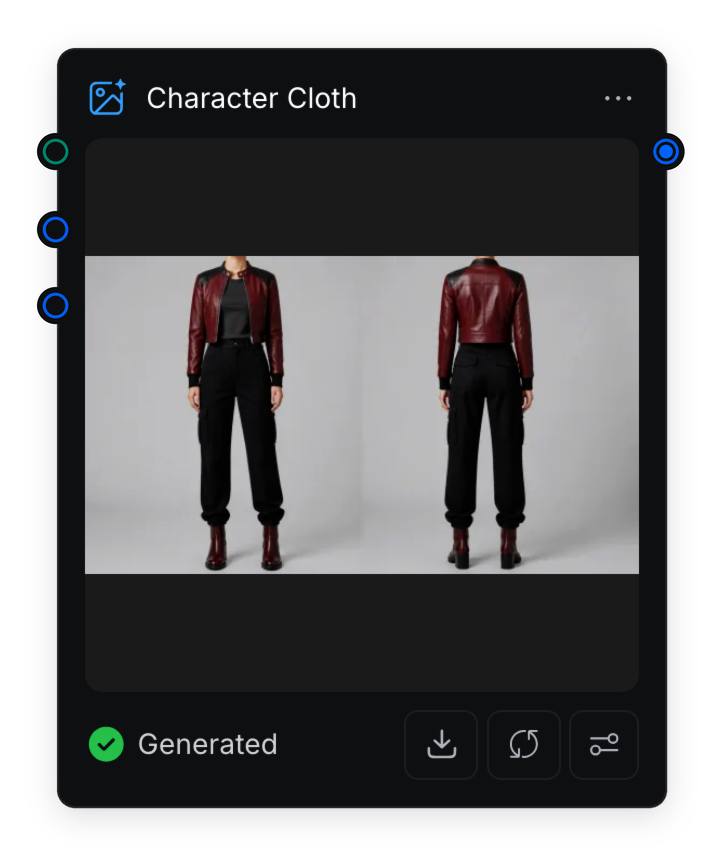
The face image defines who the character is. The wardrobe image defines what the character wears.
6. Show Non-Human Characters From Multiple Sides
Animals, creatures, robots, mascots, and other non-human characters can change significantly when viewed from another angle. A single front-facing image is usually not enough.
Create a sheet that includes:
- Front, left-side, right-side, back, and three-quarter views.
- A consistent full-body silhouette.
- Exact head-to-body and limb proportions.
- Fur, feather, scale, shell, skin, or surface patterns.
- Ear, horn, wing, tail, paw, claw, or mechanical-part shapes.
- Distinctive markings and their exact placement on both sides.
- A size comparison when the character appears beside people or objects.
- A small expression or pose sheet when repeated acting is required.
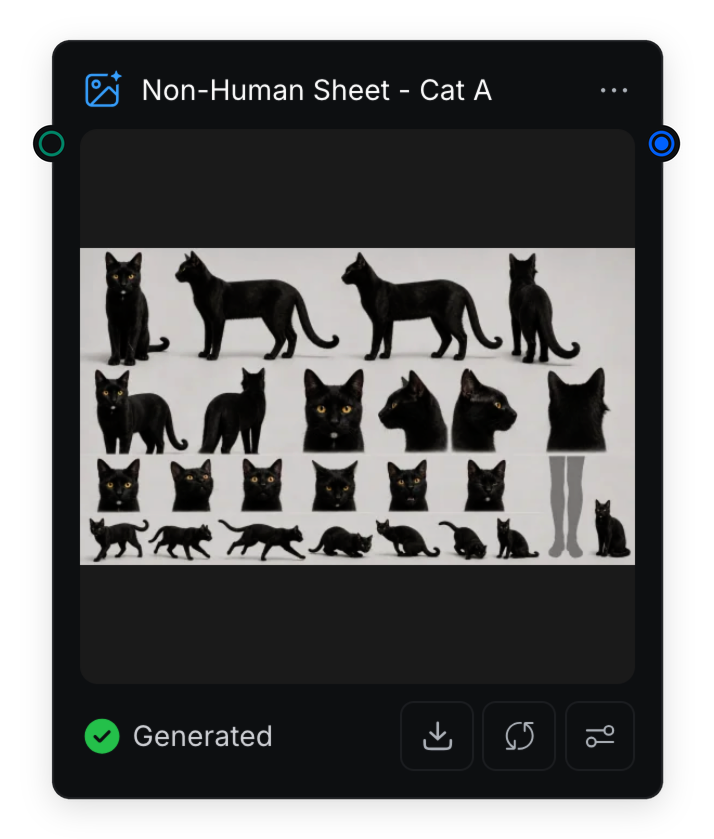
Include both left and right views when the character has asymmetrical markings, damaged parts, accessories, or patterns that appear on only one side.
7. Treat Recurring Vehicles Like Non-Human Characters
When a train, car, aircraft, or other vehicle appears across several shots, create a multi-angle sheet just as you would for a non-human character. This keeps its design stable when it approaches the camera, turns, or appears from the opposite side.
Include:
- Front, left-side, right-side, rear, and three-quarter views.
- Fixed body proportions and silhouette.
- Consistent doors, windows, lights, wheels, roof, and underbody details.
- Exact livery, colors, materials, and markings.
- Separate left and right views when the design is asymmetrical.
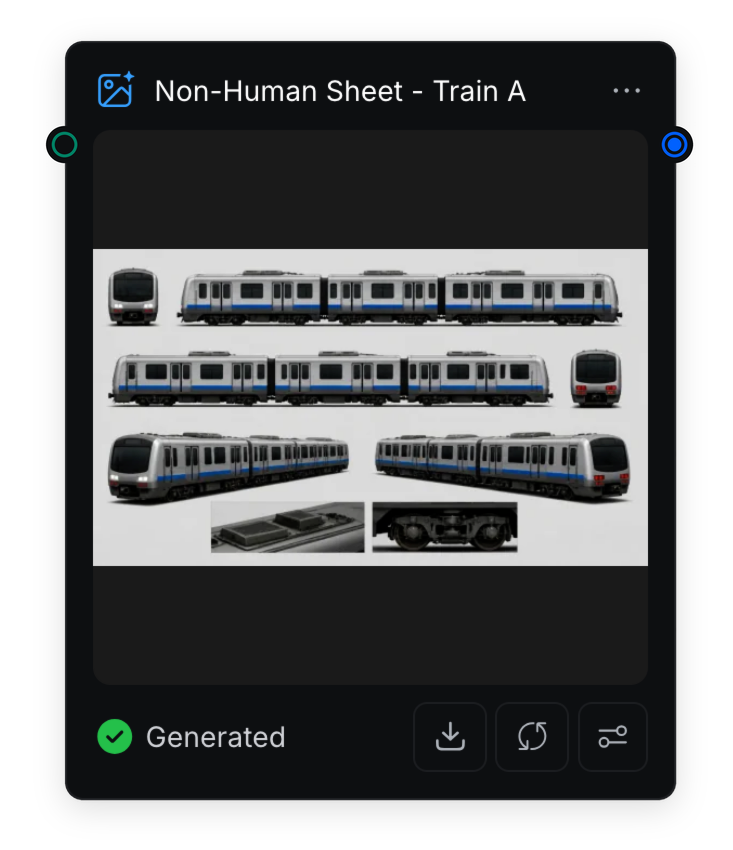
Use the vehicle sheet as the appearance source for the vehicle. In the storyboard, reduce it to a simple recognizable silhouette that preserves only its proportions, orientation, and travel direction.
8. Give Each Reference One Clear Role
Connect only the focused references needed by the generation node. See Connect Nodes and Run a Workflow if you need help connecting several image inputs.
Tell the node what each reference controls.
When a storyboard is also connected, state that it controls only composition, pose, blocking, and movement. Do not add a finished shot image as another appearance reference, because its combined pose, lighting, and background can conflict with the focused character sheets. For more details, see Keep Scenes Consistent With Storyboards.